Chained Routing
Chained routing is a strategy to organize and manage incoming interactions logically and sequentially.
In this process, calls or other customer inquiries are first directed to a primary queue or group of agents. If the initial queue is unable to address the inquiry, the system then "chains" the interaction to a secondary queue or group of agents with different skills or expertise.
With Studio, the implementation of chained routing and overflow strategies is easy: simply add and configure the Assignment and dial (A&D) component as needed. If a call isn’t answered, you can direct it to different agents or ring groups by adding another A&D component. For example, if your tier-1 support team is unable to answer a call, you can direct it to your tier-2 support team.
Please follow these instructions to create two or more layers of call assignment:
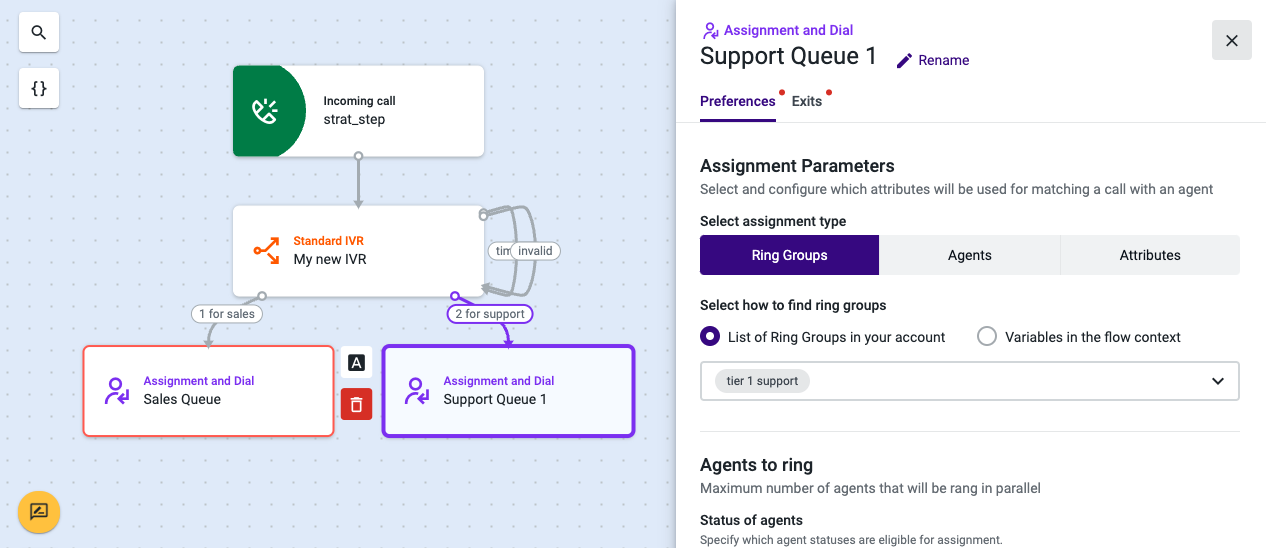
- Add the Assignment and dial (A&D) component to your flow and name it “Support Queue 1”.
- Open the A&D component, and select the Preferences tab.
- Choose Ring Groups as the assignment type and select the appropriate ring group from the drop-down. In our example, we’ve chosen our “Tier 1 Support” ring group.
- Fill out the remaining fields of the Preferences tab.
- Select the Exits tab.
- Add a new A&D component under the “No answer”, “Maximum waiting time reached”, and “No match found” sections. Every time the “Tier 1 Support” ring group is unable to answer a call, it will be directed to this new component.
- Name the component “Support Queue 2”.
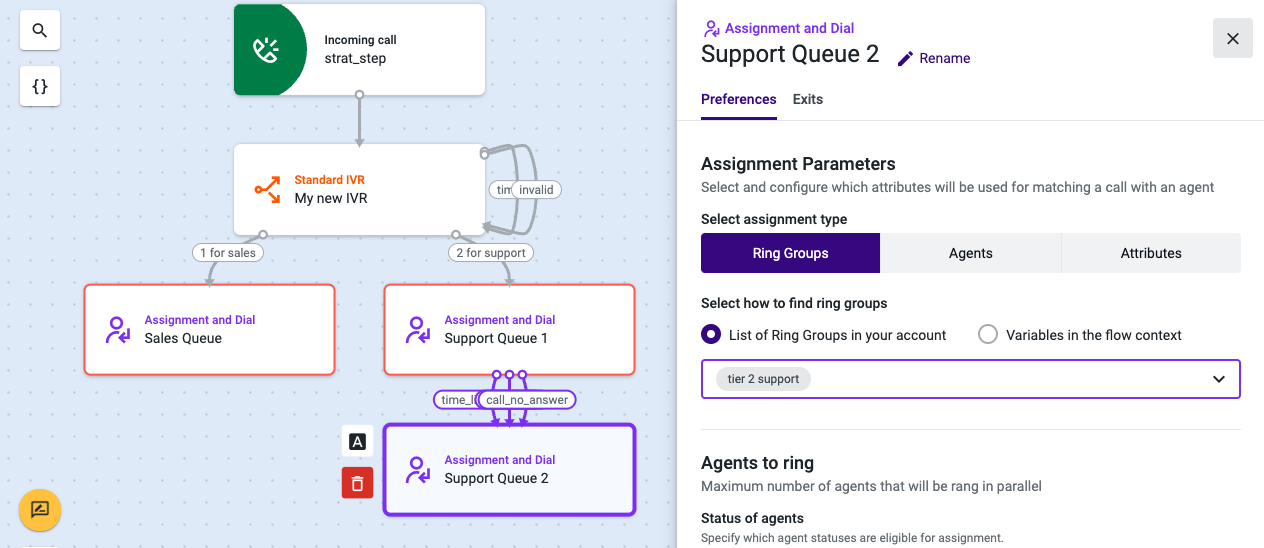
- Open “Support Queue 2”, and select the Preferences tab.
- Choose Ring Groups as the assignment type and select your corresponding “Tier 2 Support” ring group.
- Fill out the remaining fields of the Preferences tab.
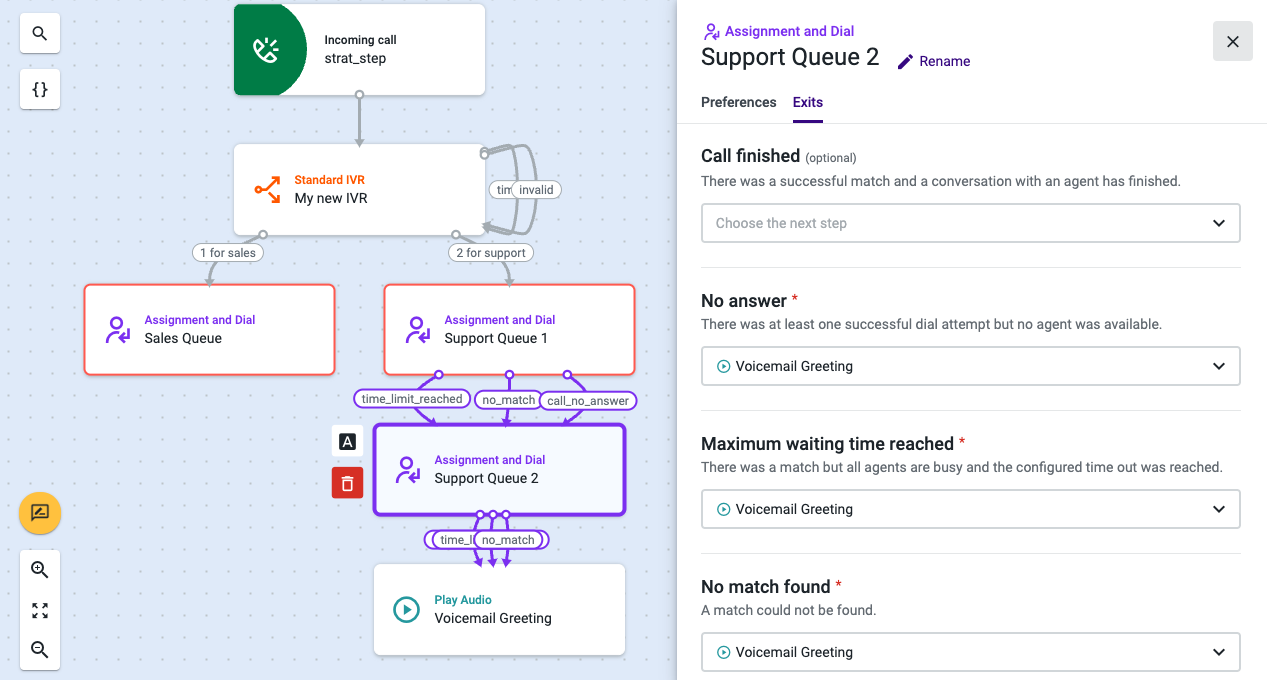
- Select the Exits tab.
- Add the appropriate components in case your “Tier 2 Support” is unable to answer the call. In our example, we will route the call to the Play Audio component in all three sections.
- Open the Play audio component and type or paste your message. Example: “All of our agents are currently assisting other callers. Please call again later or leave a message after the beep.”

- Select the Exits tab and add the Voicemail component.
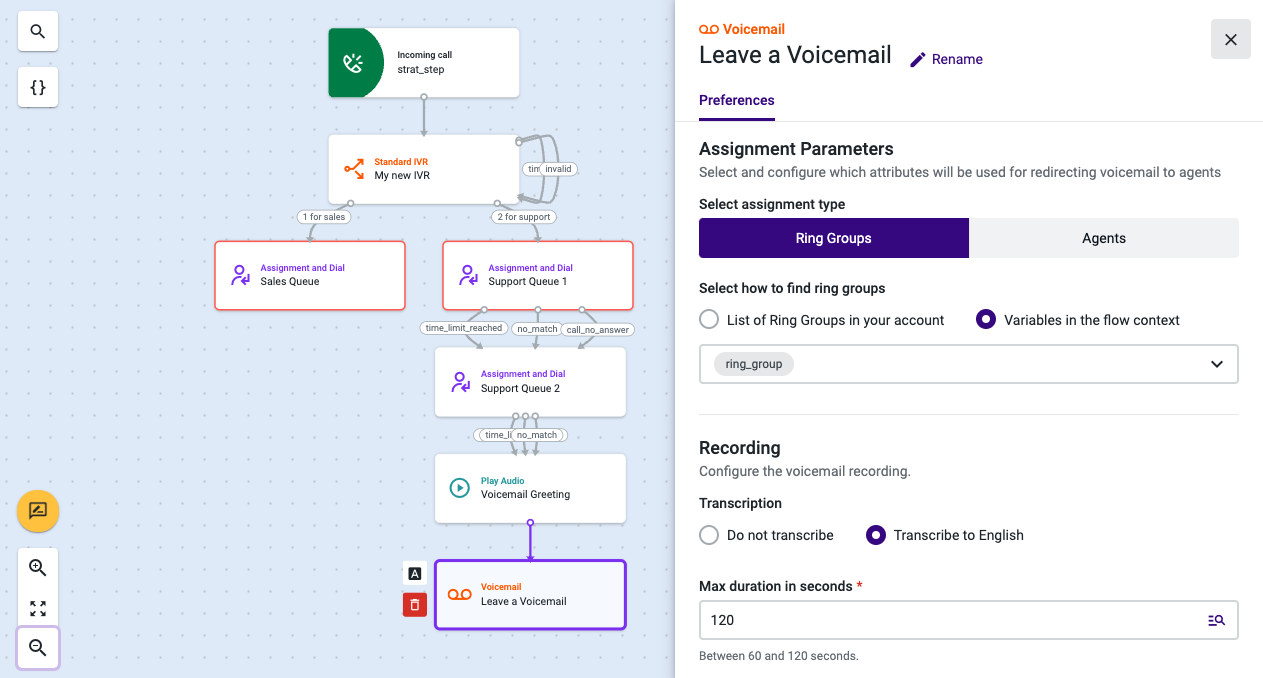
- Complete the configuration of the Voicemail component and any other incomplete component you may have.
- Save your flow.
From now on, if your “Tier 1 Support” ring group does not answer a call, it will be routed to the “Tier 2 Support” ring group. And if they are unable to answer the call as well, it will be directed to Voicemail.
Updated 8 months ago