Sending Voice Notifications to Contacts via API Request
A Studio flow can be triggered from an external system via an API request.
Through this API request, an automatic outbound call can be initiated when a pre-specified condition is met. This way, you can easily dial clients to notify them of a specific event.
Create a Studio API flow according to the steps below.
Configuring an API Flow
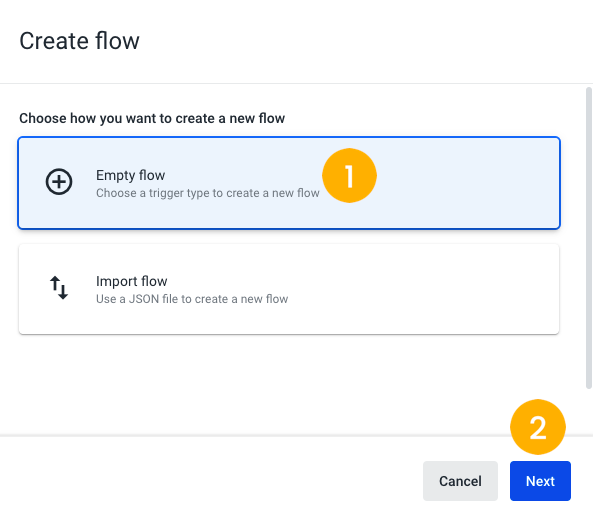
- Click Create flow on the Flow Manager page and on the new window that is displayed, select Empty flow[1], followed by Next[2].
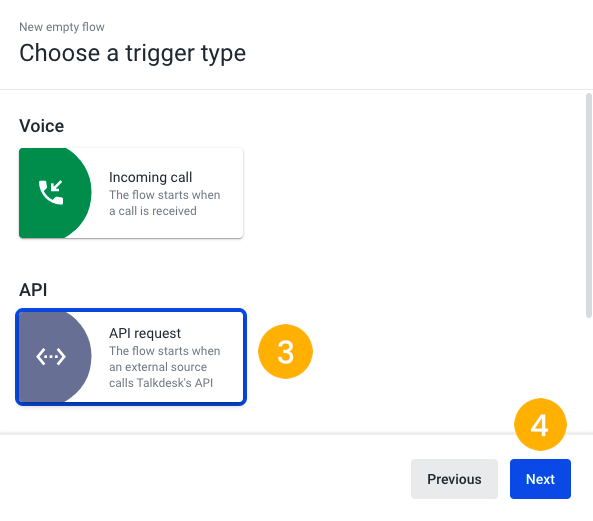
- Choose API request[3] and then Next[4].
- On the next screen, provide a name and, optionally, a description for the flow.
The flow editor page will be displayed, and you will see the API request component as the flow initiator. Within it, you will need to configure the input arguments, i.e., the data to be sent in the body of the POST API request that will trigger the Studio flow. Each argument can be mapped to a variable that can then be used in the flow.
In our example, a food delivery courier triggers an automated outbound call by clicking on a button of the delivery service’s application, when they’re at the door and ready to deliver the order to the customer. We have configured the arguments and variables in the following manner:
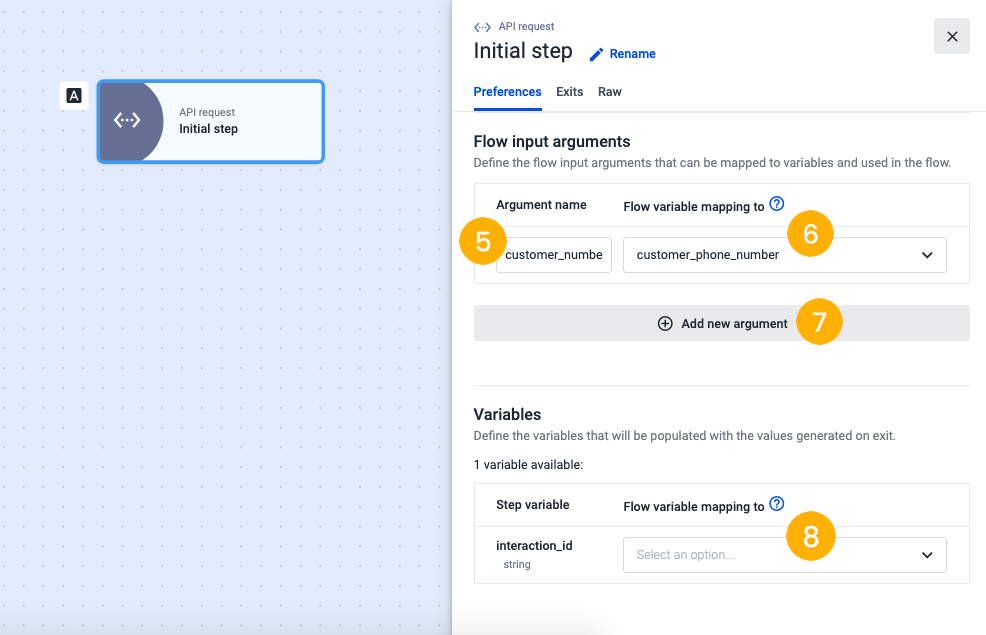
- Fill in the first text box with the "Argument name" - "customer_number" [5].
- Create the corresponding flow variable that will map the customer phone number information - "customer_phone_number" [6].
- Repeat the process and click Add new argument[7] to fill in the remaining arguments and variables with the following information:
| Arguments | Variables |
|---|---|
| order_number | order_number |
| origin_store | origin_store |
- If necessary, create a variable to populate the interaction_id field, under the “Variables” section.
- Go to the Exits tab and add the "Make outbound call" component. This is the component that enables the outbound call to be executed and the customer to be dialed.
Note
There is a set usage limit of one “Make outbound call” component per call path.
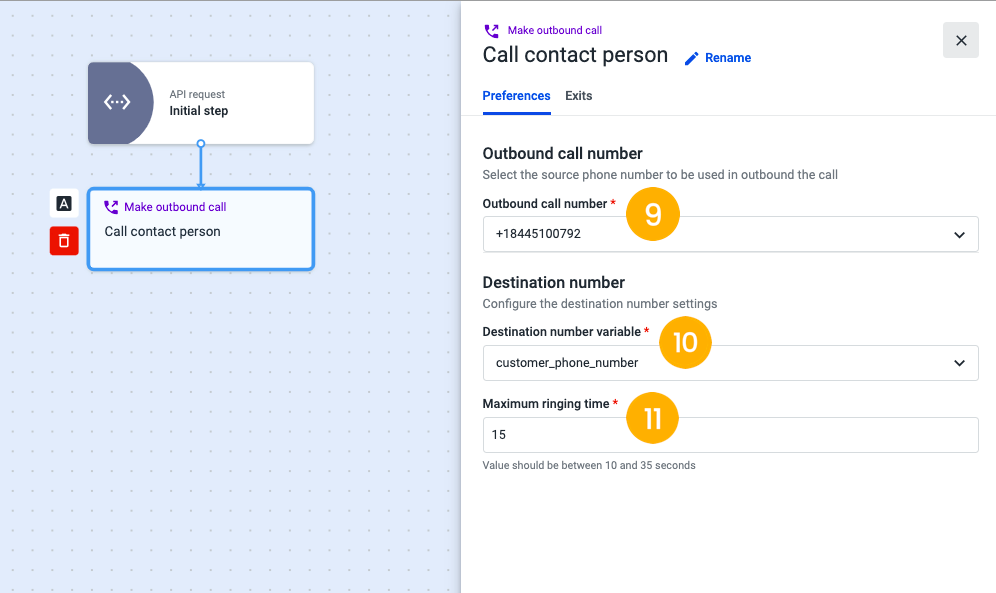
- In “Outbound call number”, select a source phone number from the list, from which the trigger will be executed [9]. The available phone numbers correspond to those previously added to your Talkdesk account under Admin > Numbers.
- Select the destination number variable [10], which, in our example, corresponds to the variable we have configured in the API Request component - customer_phone_number. This variable will retrieve the phone number information within the body of the API request.
- Define the maximum time that the call will ring on your contact person’s phone, from 10 (minimum) to 35 seconds (maximum) [11], with 15 seconds being the default time range.
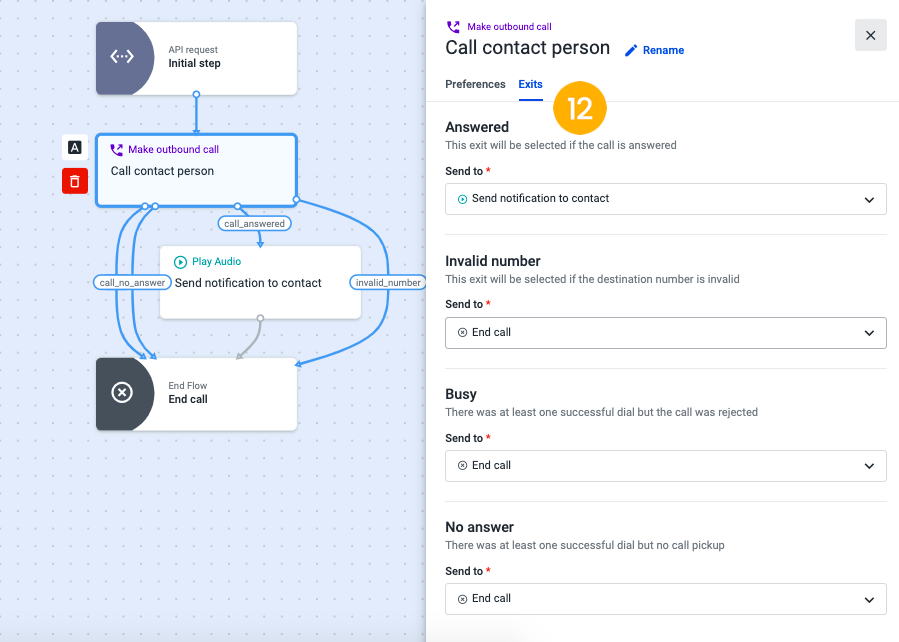
- On the “Exits” tab, define the following mandatory exits [12]:
-
“Answered”: the component will use this exit if the customer answers the call. This voice notification is played to the customer at this point, so we recommend using a voice component for this exit. In our example, the call will be directed to a “Play Audio” component, which we’ve named “Send notification to contact”.
-
“Invalid number”: select a component that will be executed in case the destination number is invalid. In our example, we’ve decided to use the “End flow” component, which will terminate the call if the call made through our API request cannot reach the destination phone number.
-
“Busy”: this exit will be used by the system if the customer’s phone line is busy or if the customer rejects the call. In our example, the call will be directed to the “End flow” component and will be hung up, but you can decide to use a different configuration.
-
“No Answer”: this exit will be used to direct the call to a component of your choice in case the number was dialed, but the contact person did not pick up. We’ve decided to add the “End flow” component if, after the maximum ringing time defined before, in step 11, the call was not picked up.
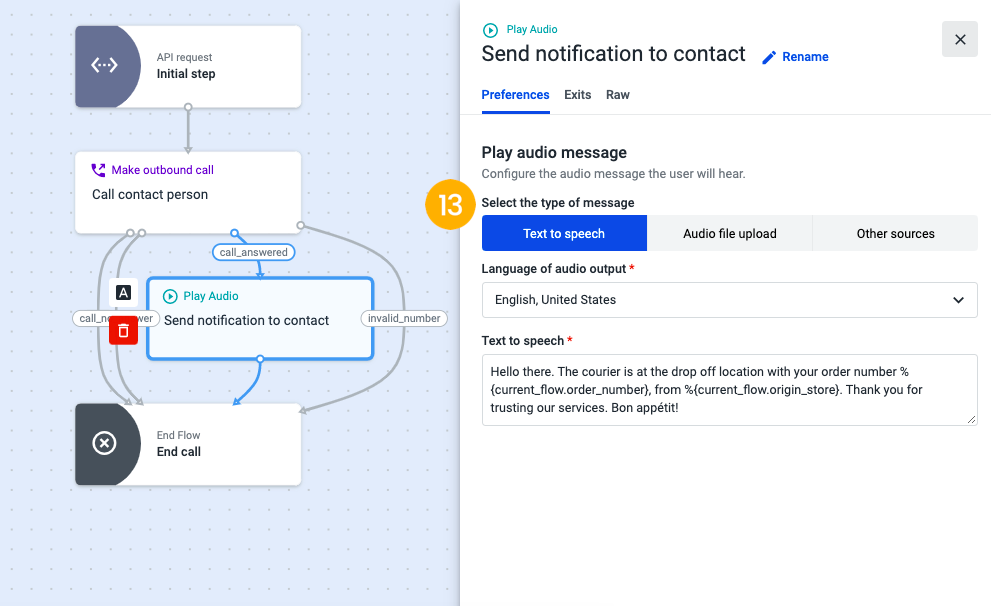
-
Add the Play Audio component and then choose the method by which the audio message will be played to the customer when the call is answered [13] and configure the remaining options accordingly. We have chosen the Text-to-speech source and configured the following message, as an example:
Hello there. The courier is at the drop-off location with your order number %{current_flow.order_number}, from %{current_flow.origin_store}. Thank you for trusting our services. Bon appétit! -
On the Exits tab, select the End flow component, so that the call is hung up as soon as the notification is played to the customer.
-
Save and publish your flow.
Configuring the API request
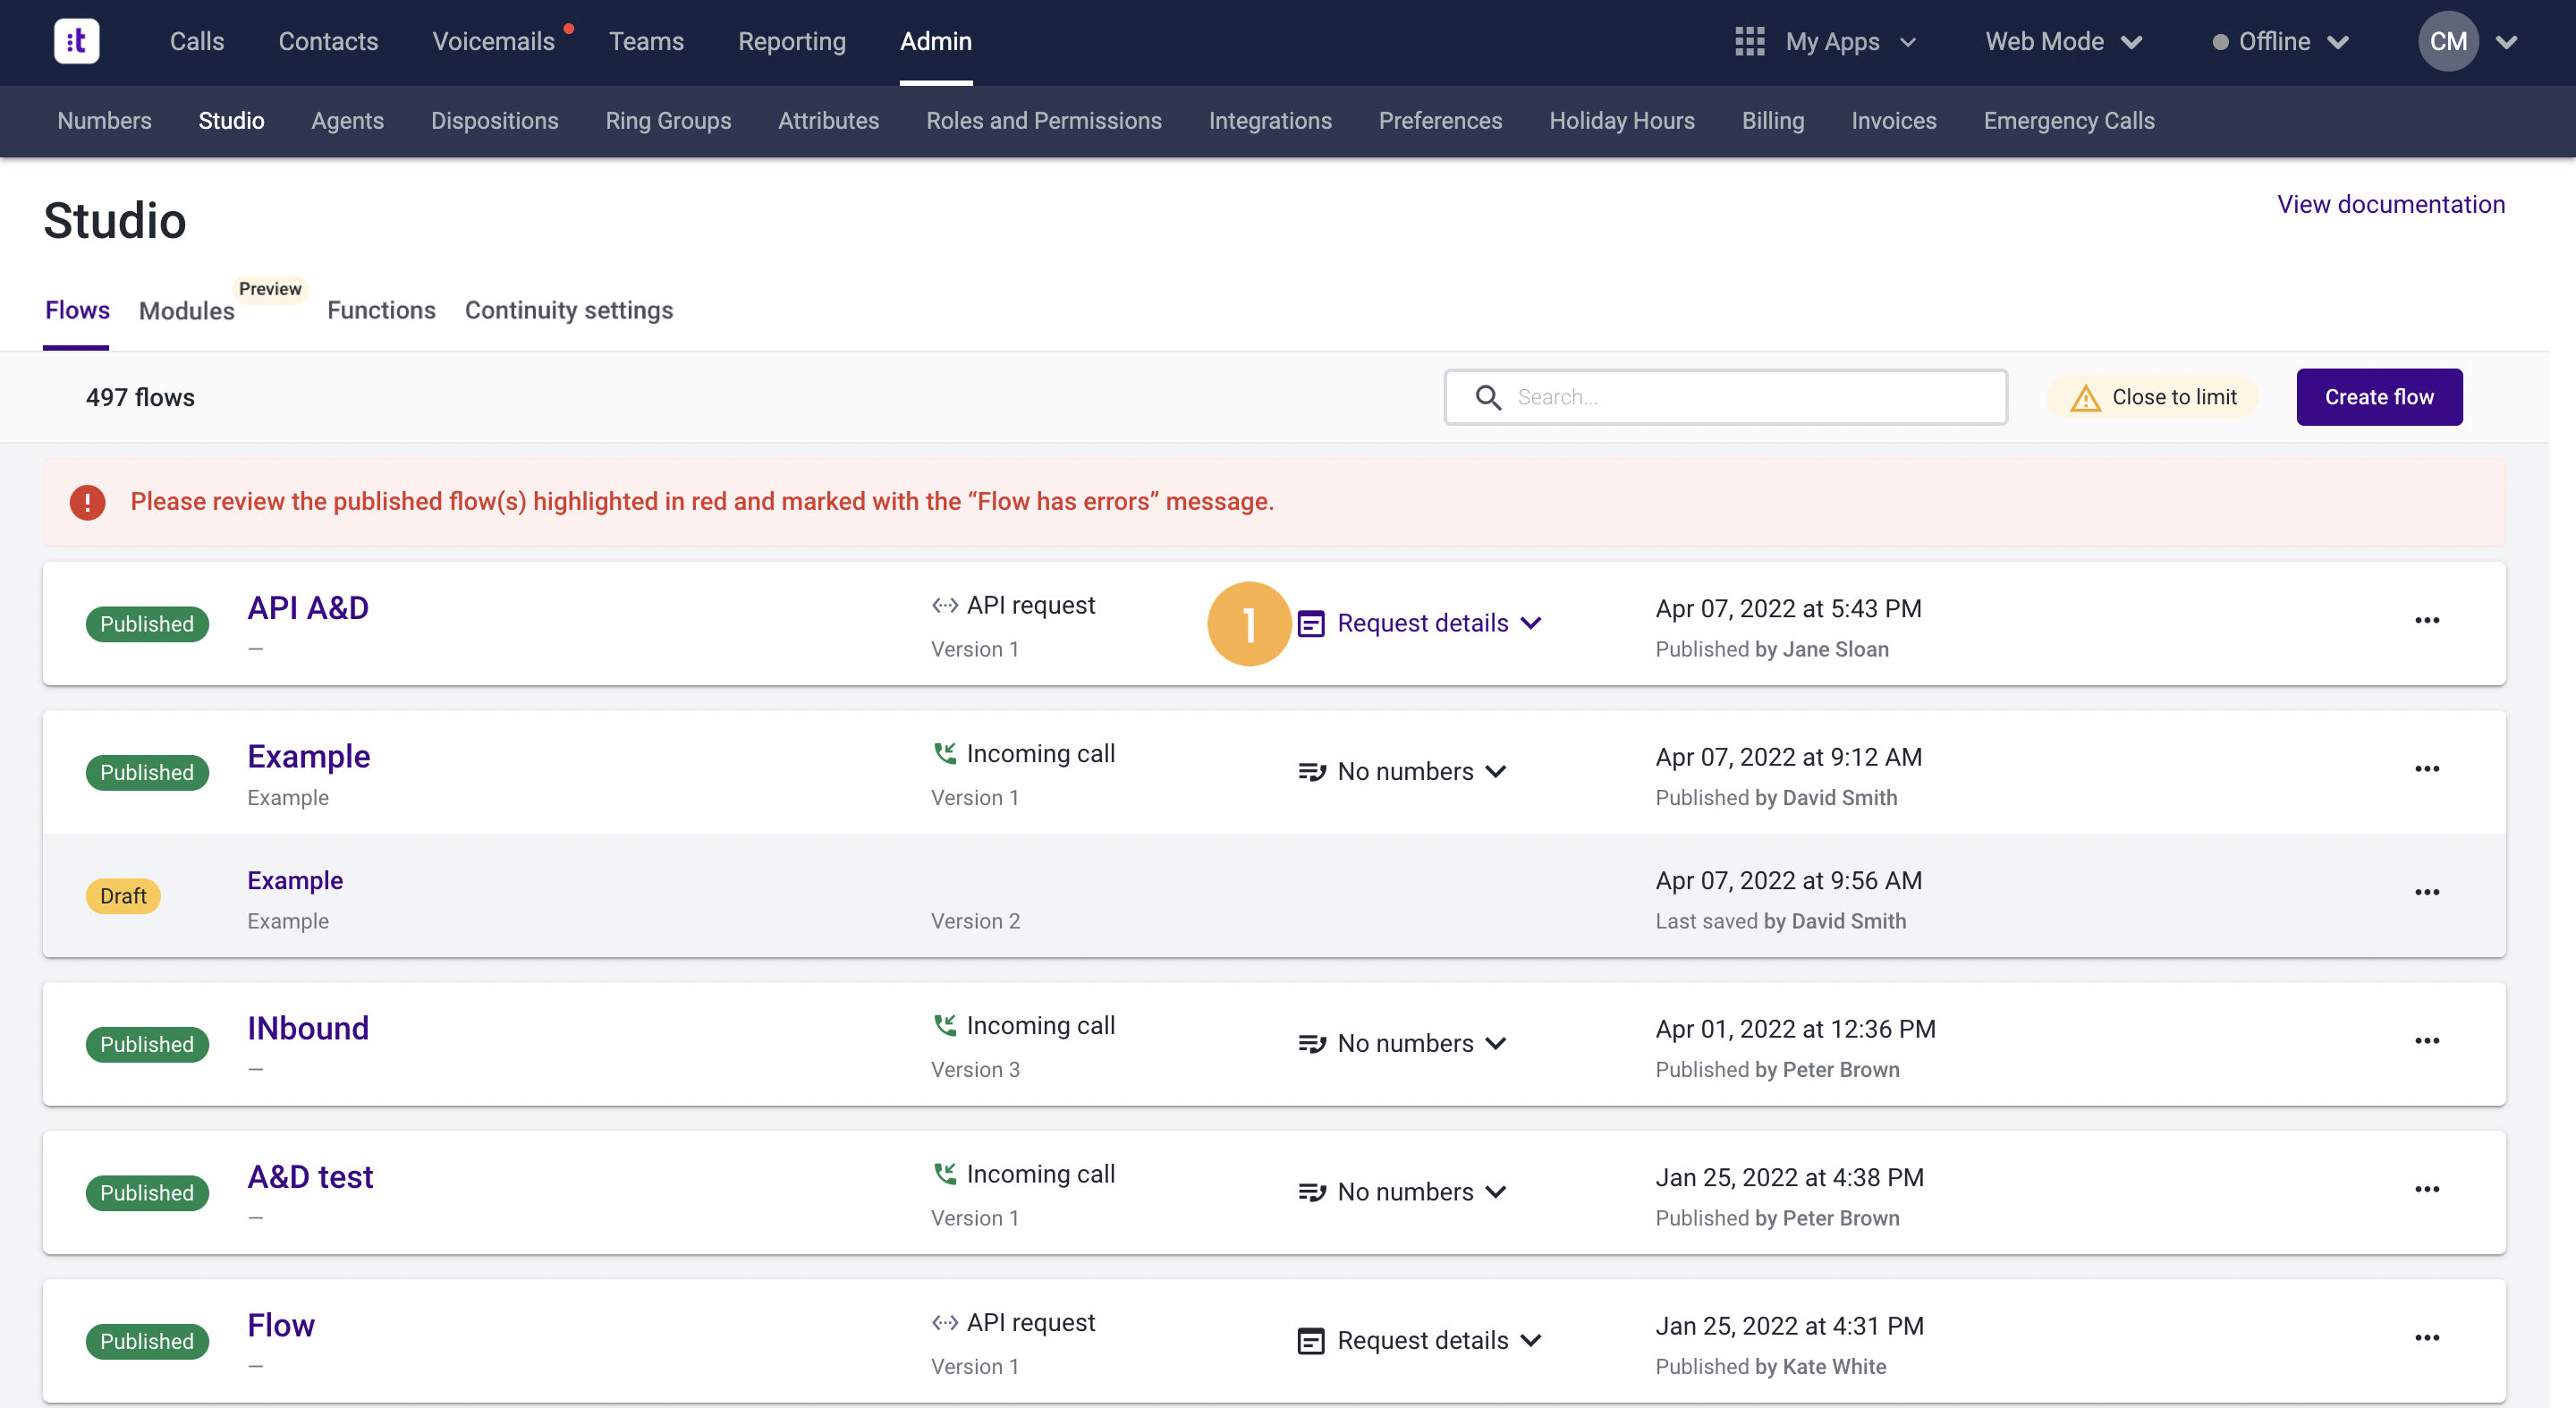
- When you have finished configuring your flow, return to the Flow Manager page and click on the Request details[1] button of the flow you’ve just created.
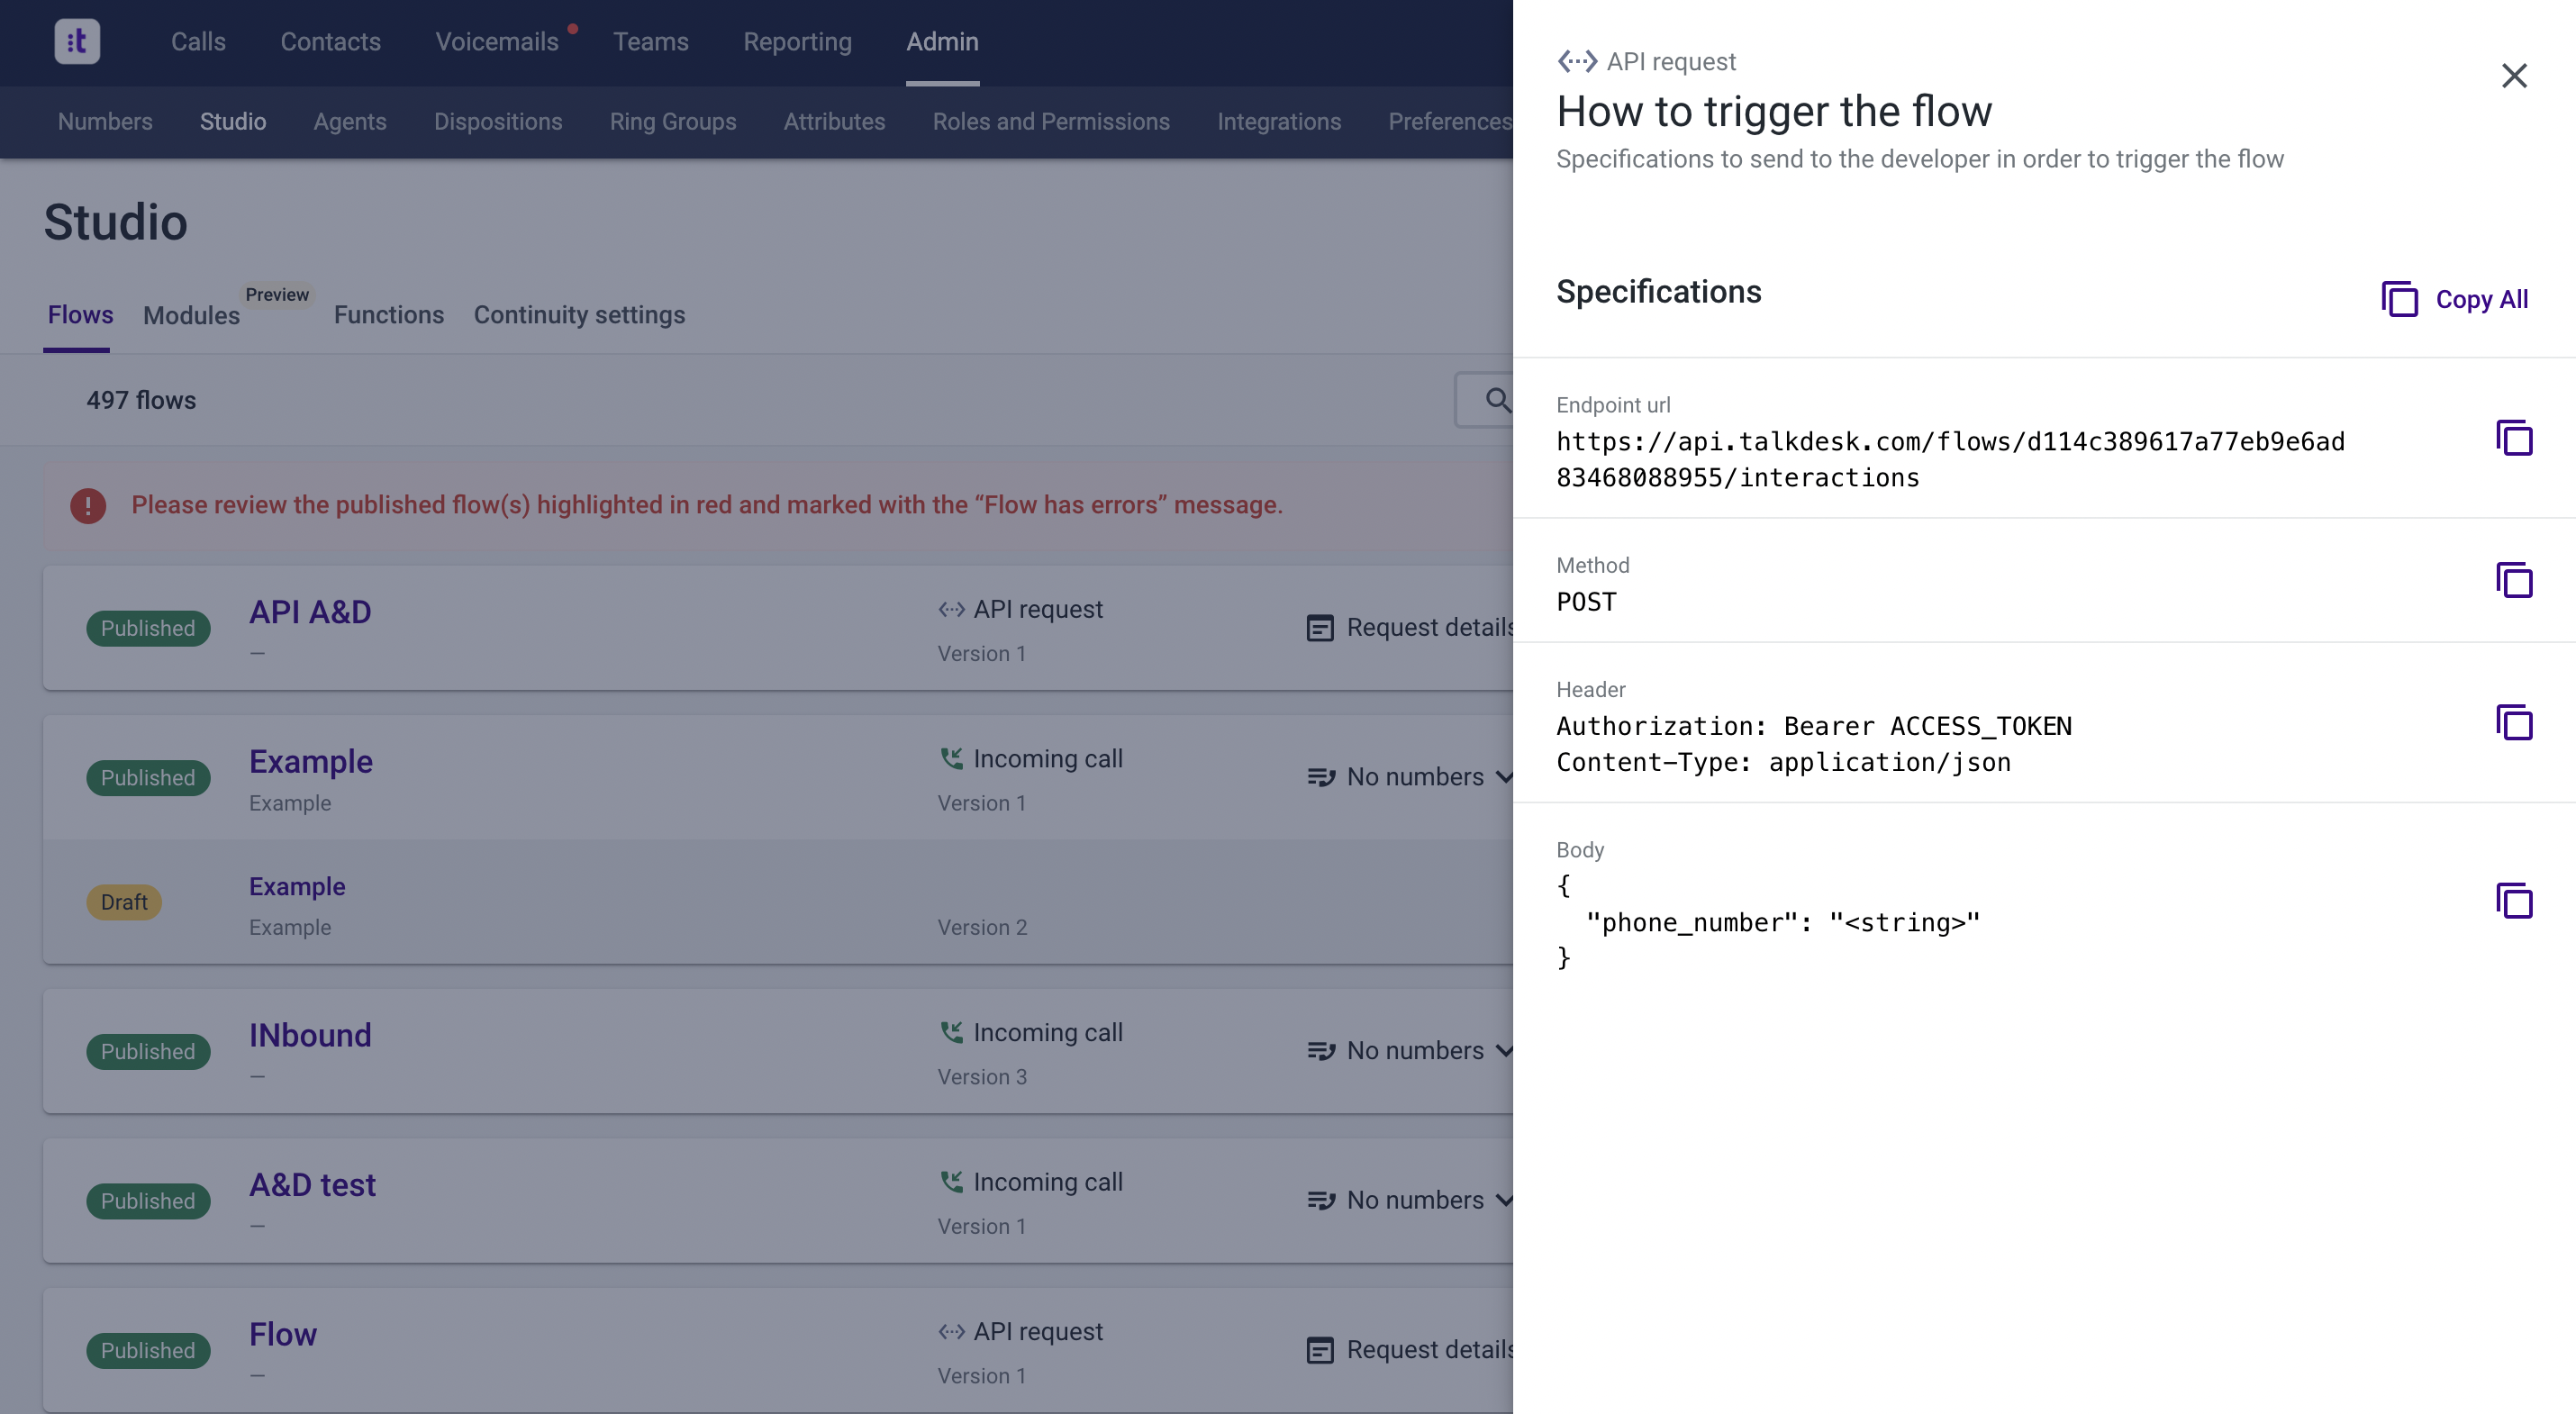
-
A side panel containing relevant information for you to build the API request on your API development tool will be displayed.
-
Additionally, check the instructions provided on this page in order to obtain all the necessary details about how to build the API request.
Notes
- String input arguments are the sole data types that are currently supported. On your specific API request, the values will need to be replaced by the actual values to be sent in the request body.
- Through Talkdesk Builder™ it is possible to create an OAuth Client to get access to the Flows API. The scope for the Flow API, which starts an interaction that executes the published version of a given Studio flow, is flows-interactions:start. For more information about scopes, please refer to this article.
Components supported in API Flows
The API flows can be configured using the following components:
| Voice Components | Non-voice Components |
|---|---|
| Forward to External | Calendar-based Rules |
| Input IVR | Time-based Rules |
| Play Audio | End Flow |
| Standard IVR | Execute Action |
| Voice IVR | Run Function |
| Voice Transcription | Salesforce Data Dip |
| Callback | Conditional Statement |
| Make Outbound Call | Traffic Splitter |
Note
Each of the voice components can only be placed on a point of the flow where a call exists, due to the fact that there must be a transition between a “Make outbound call” component’s “Answered” exit and one of those voice components.
Additional Specifications
- Flows API limit: there is a limit of two API requests per second (rps), per account.
- “Make outbound call” component reporting and automations: apart from the “Studio Flow Execution Report”, there will be no reporting and no automations on automatic agentless outbound calls regarding these flows.
Updated 3 months ago