Assigning a Call to the Same Agent
Studio provides the ability to route an interaction to an agent based on data retrieved from an external system. If a third party system is integrated with Talkdesk, our customers can easily assign an incoming call to an agent who has previously dealt with the same contact person.
One of the simplest ways to do this is by matching the phone number the contact person is using with the phone number associated with a case in Salesforce (or other CRM). The contact person will then be connected to the agent who owns the case. If there isn’t a match, the call can be directed to a general support line, for example.
Please follow these instructions to route a call to the owner of a case in Salesforce based on the phone number of a contact person:
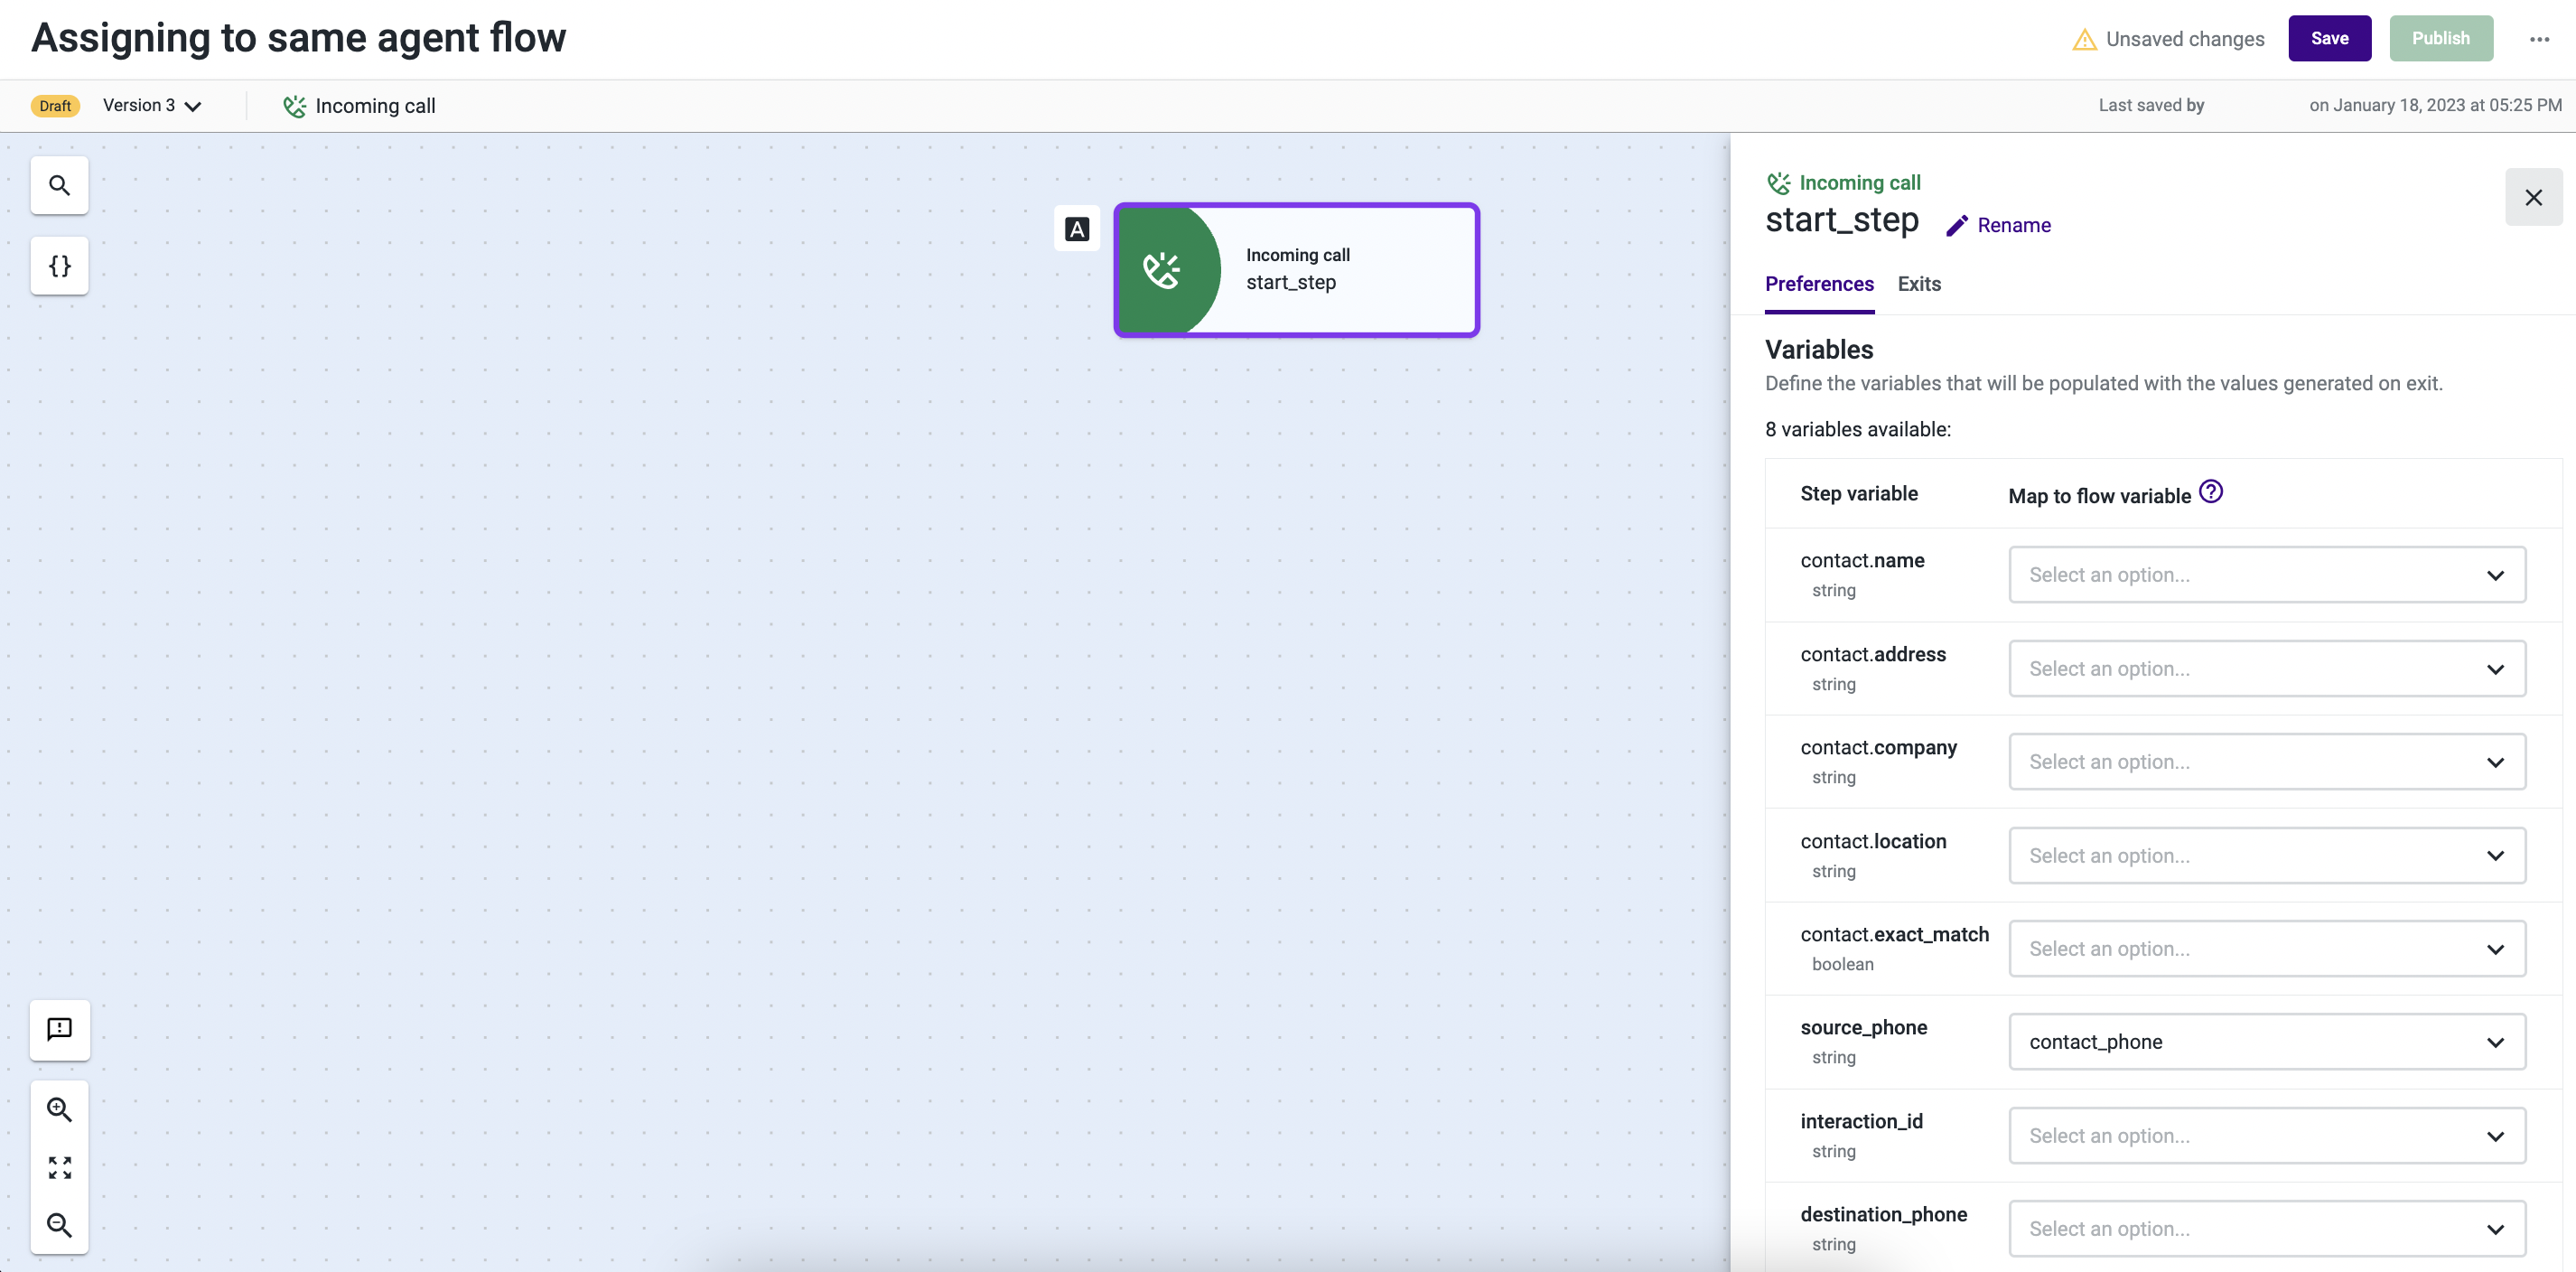
- Open the Incoming Call component and select the Preferences tab.
- Click on the drop-down next to "source_phone" and then on Create variable.
- Give a name to the variable. It will store the phone number that called your contact center. We’ve named it “contact_phone”.
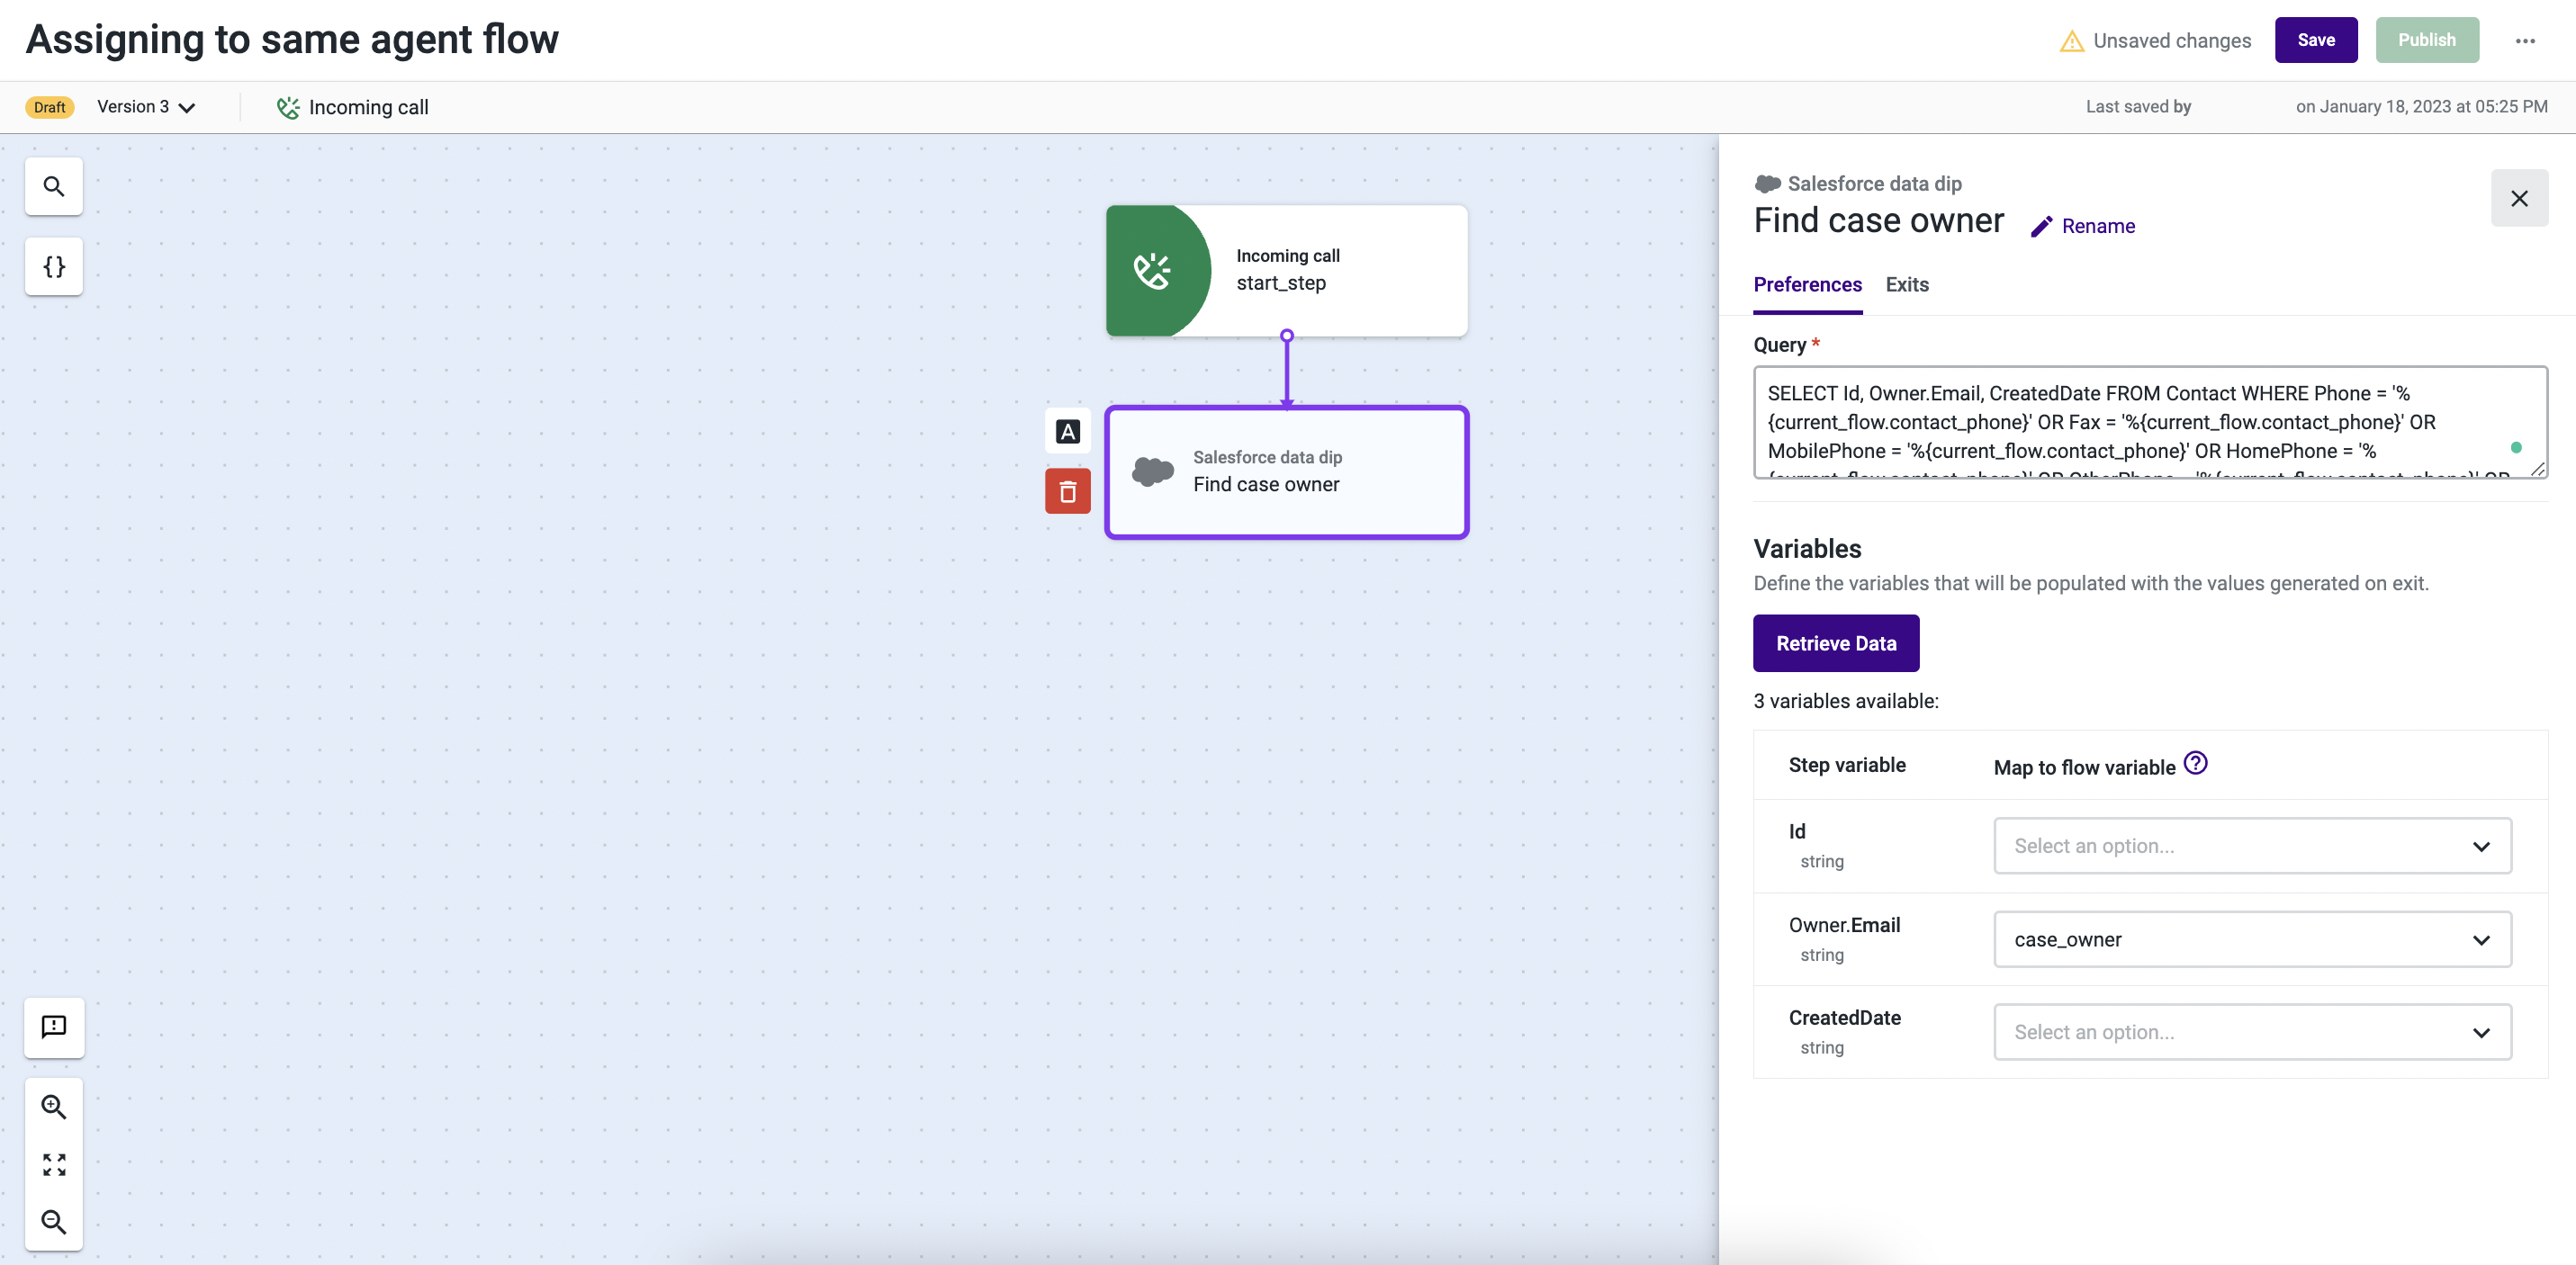
- Select the Exits tab and add the Salesforce data dip component.
Note: To integrate with external systems other than Salesforce, please use theExecute Action Studio component
- Open the Salesforce data dip component and paste the following query:
SELECT Id, Owner.Email, CreatedDate FROM Contact WHERE Phone = '%{current_flow.contact_phone}' OR Fax = '%{current_flow.contact_phone}' OR MobilePhone = '%{current_flow.contact_phone}' OR HomePhone = '%{current_flow.contact_phone}' OR OtherPhone = '%{current_flow.contact_phone}' OR AssistantPhone = '%{current_flow.contact_phone}' ORDER BY CreatedDate DESC LIMIT 1
NoteIf you have given a different name to your variable (step 3), replace all instances of “contactphone” with the name of your variable.
- Click on Retrieve Data.
- Click on the Owner.Email drop-down and add a new variable with the name “case_owner”. This variable will store data if there is a match between the phone number used to call the contact center and the phone number associated with a case in Salesforce.
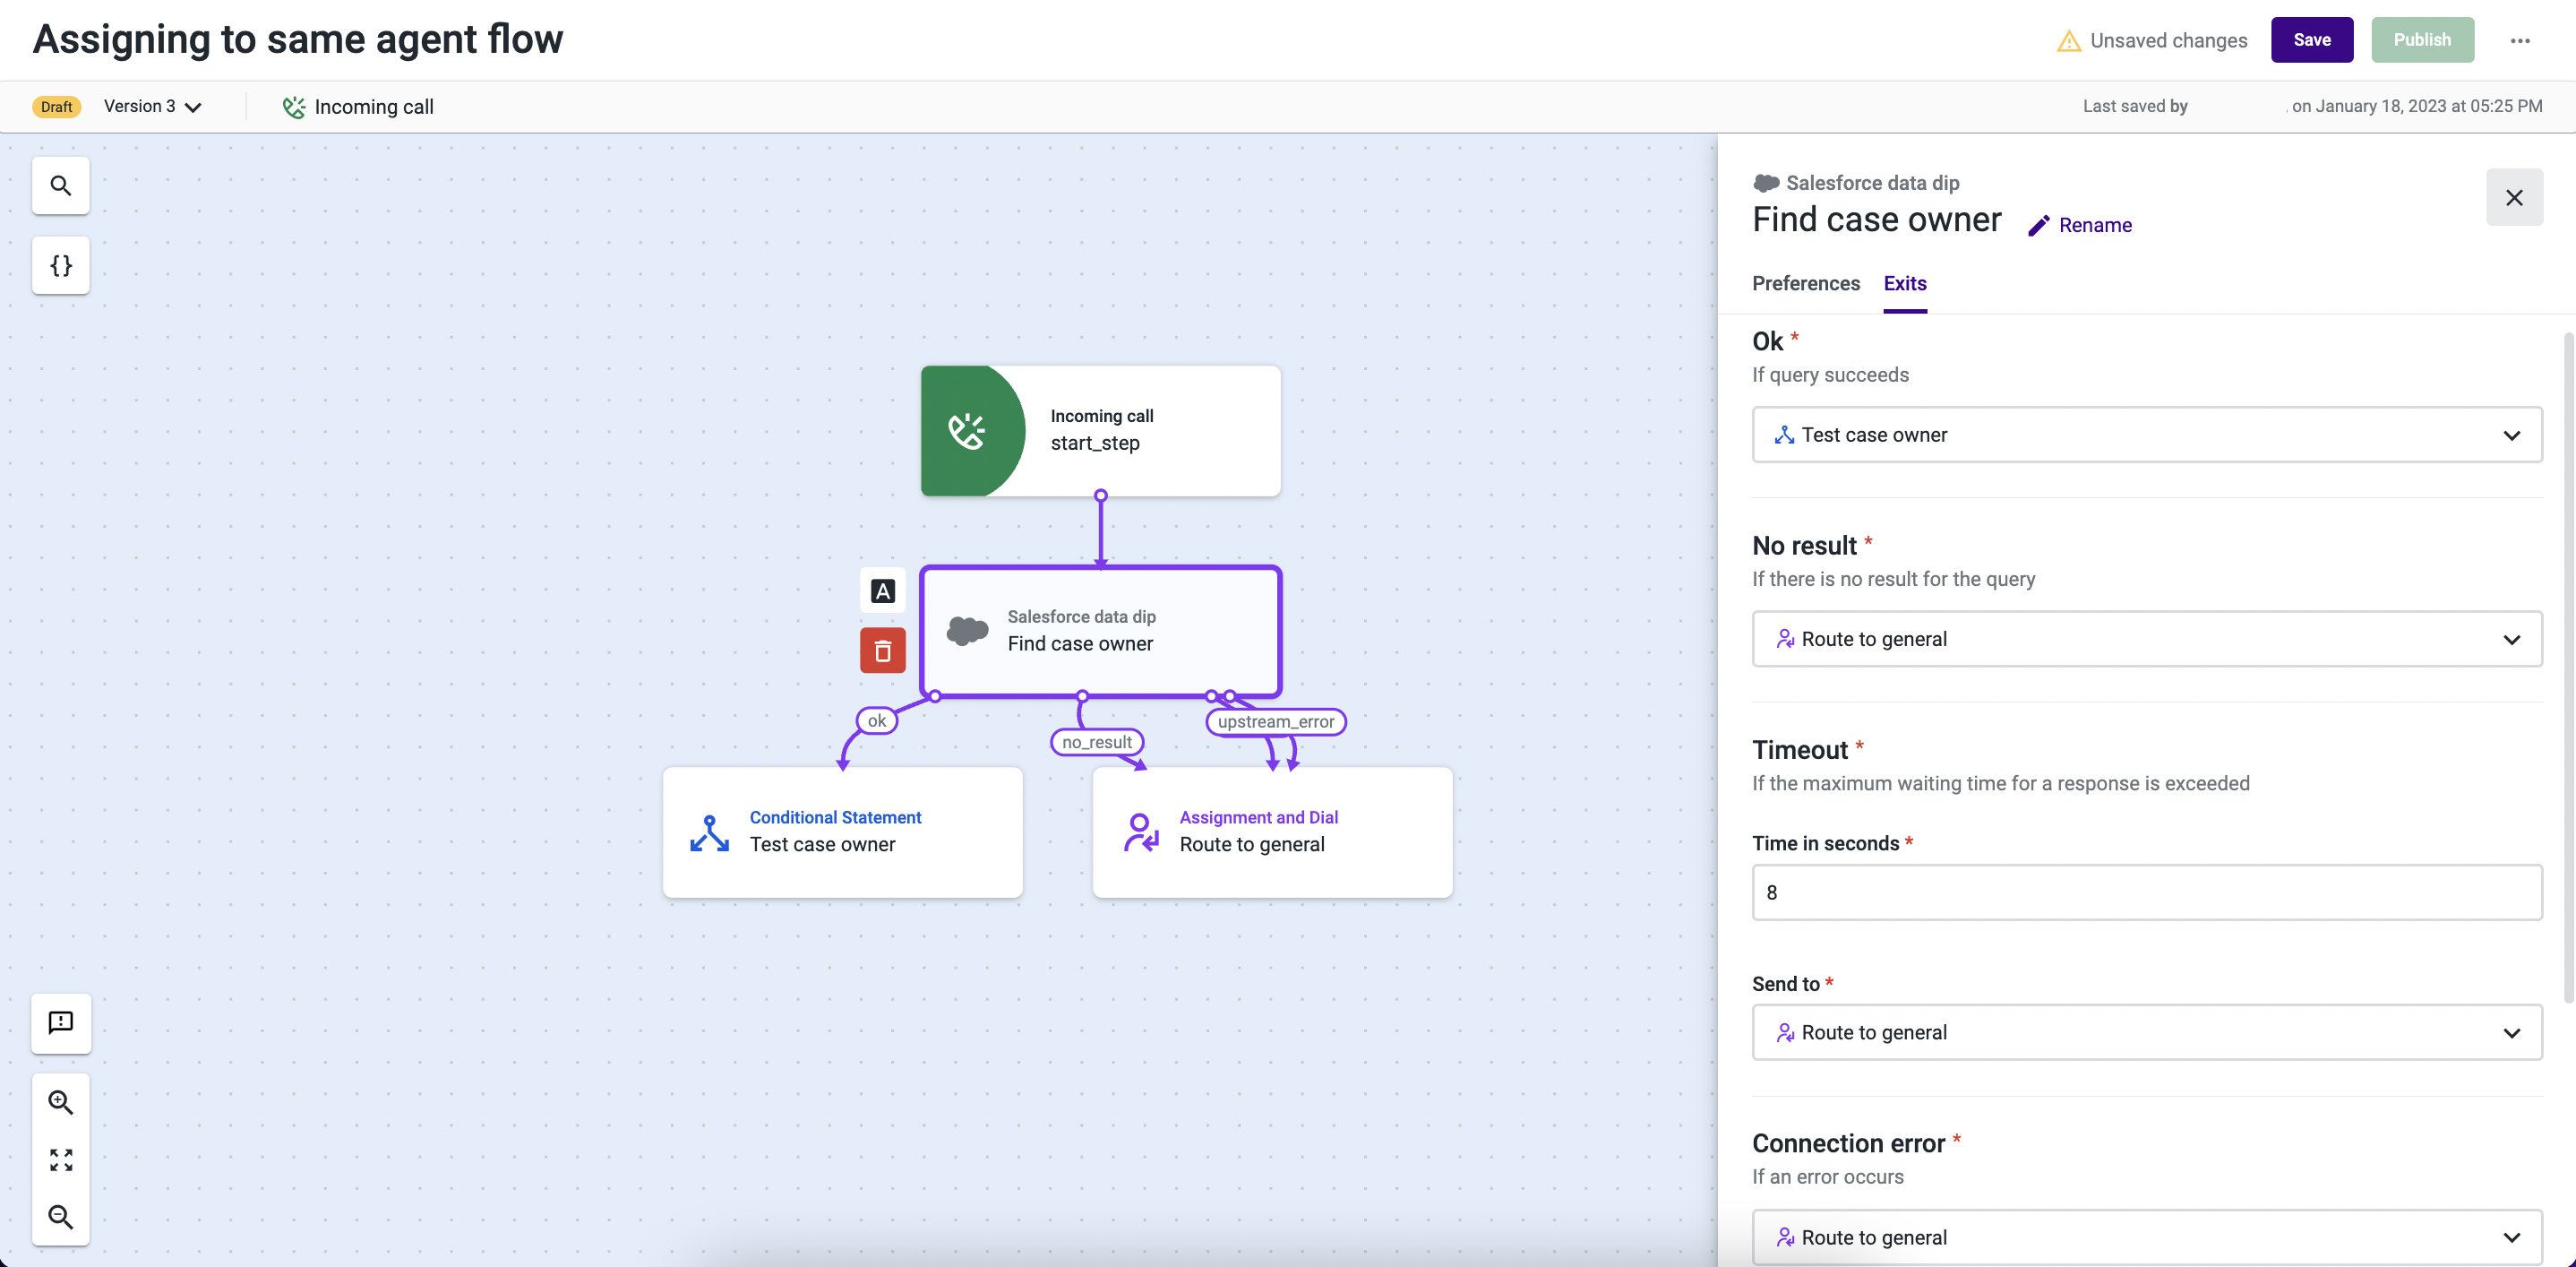
- Open the Exits tab and add the Conditional statement component under the “Ok” section.
- Under “No Result” add the Assignment and dial (A&D) component and name it “Route to General”.
- Select “Route to General” from the “Connection error” and the "Timeout" drop-downs.
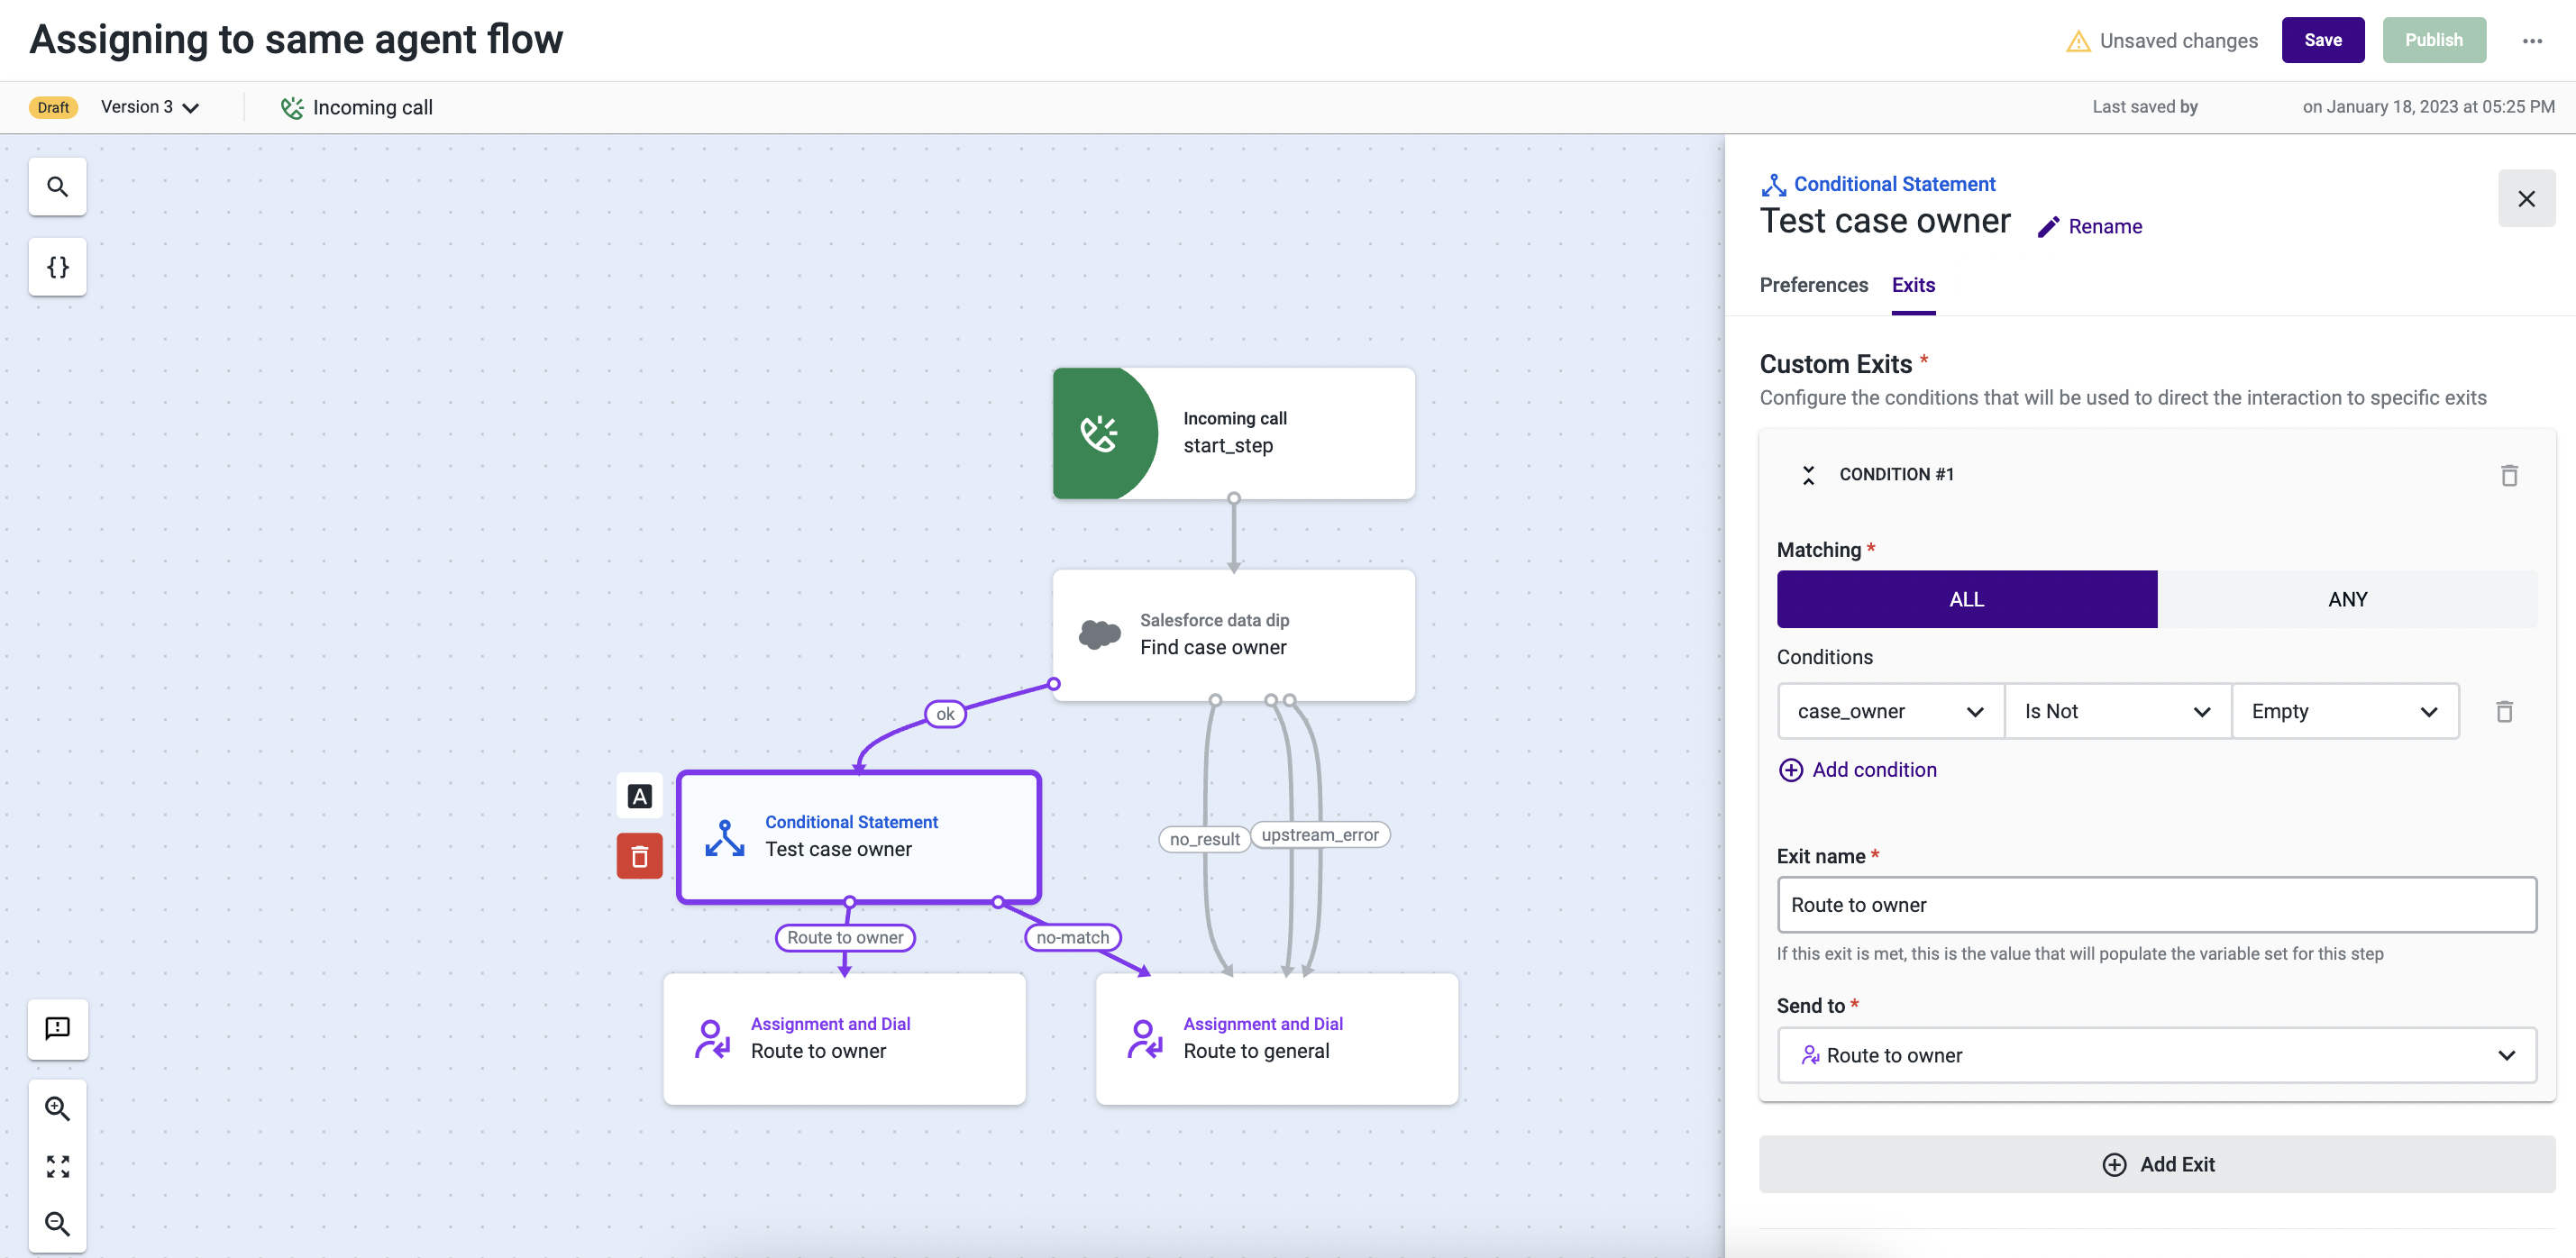
- Open the Conditional statement component, and select the Exits tab.
- Use one of the buttons All or Any the drop-downs in the first “Exit” to create the condition below. Either one of these buttons can be selected, since we're only creating one condition.
case_owner is Not Empty- Under “Send to” add a new Assignment and dial (A&D) component and name it “Route to Owner”.
- Under “No Match”, direct the call to “Route to General” (A&D component).
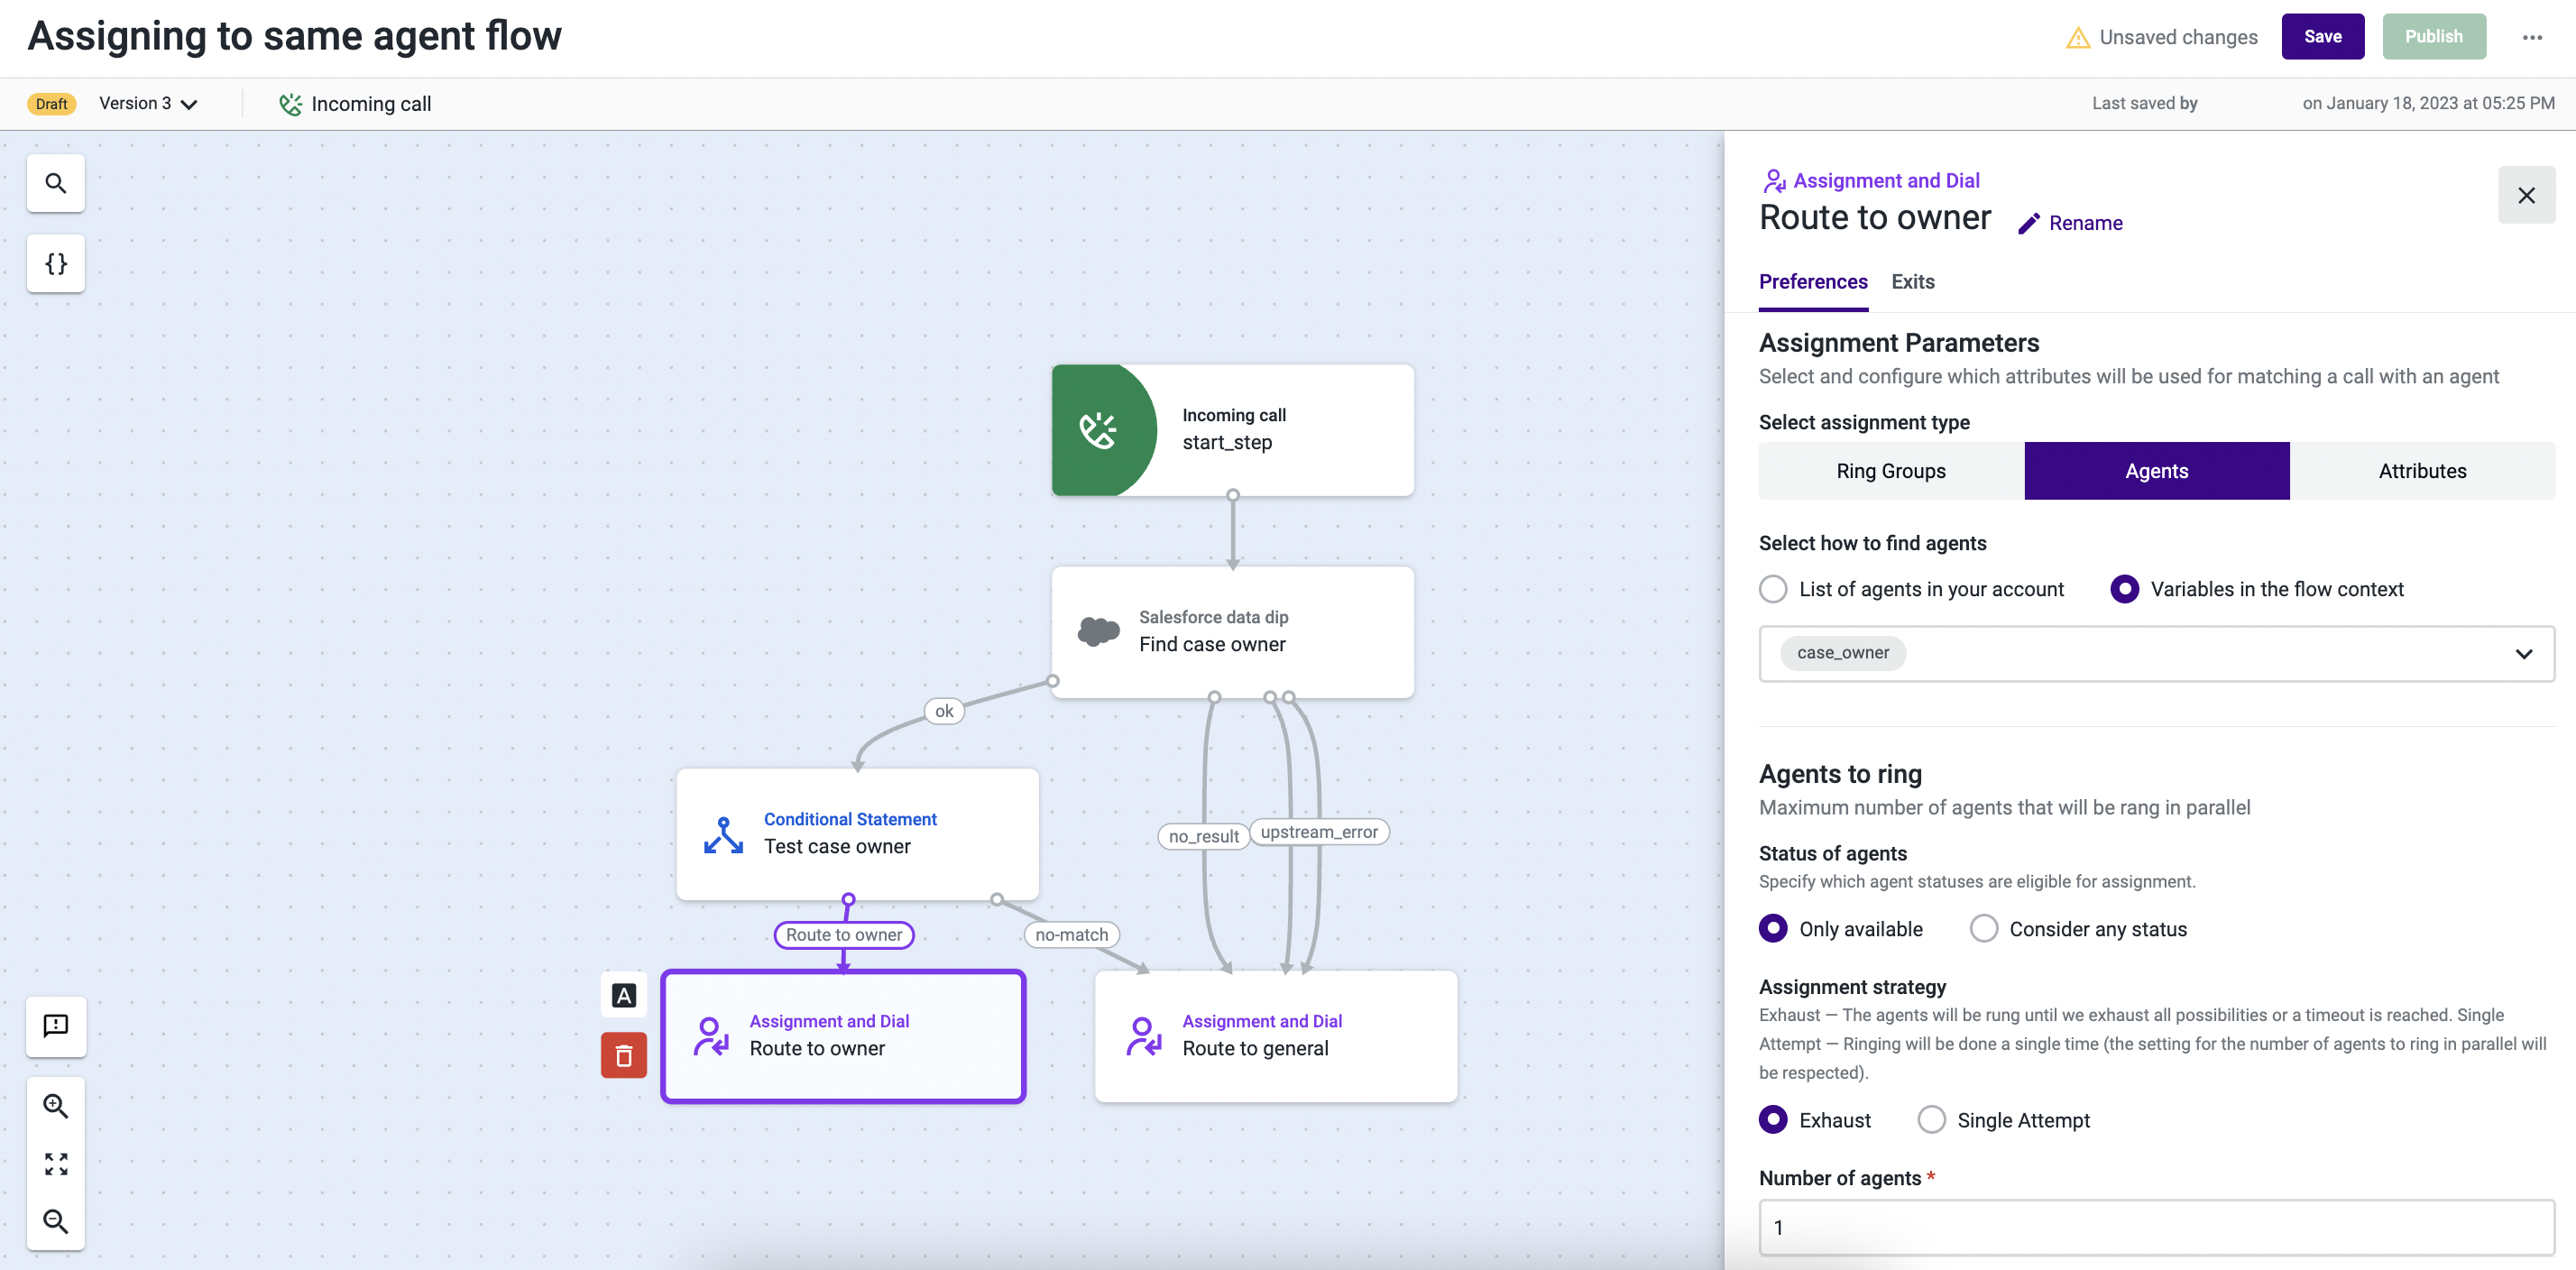
- Open the A&D component named “Route to Owner”.
- Select Agents as the assignment type.
- Under “Select how to find agents”, choose Variables in the flow context and select "case_owner" from the list.
- Complete the configuration of this and the remaining components.
- Save your flow.
From now on, if the phone number calling your contact center exists in a Salesforce case, the call will be routed to the agent who owns the case. If it doesn’t exist, the call will be directed to a general support line.
Notes
- If you have given a different name to your variable (step 3), replace all instances of “contact_phone” with the name of your variable.
- This intelligent routing mechanism can also be implemented in digital interactions, by using the Assign agents to message in "Incoming message" Studio flows.
Updated 3 months ago