Modules
Modules are blocks of steps that can be reused across Studio flows, simplifying flow configuration and maintenance.
By using Modules in Talkdesk Studio, it is possible to centrally manage business logic and change capabilities automatically across all flows that reference a specific Module.
One or more Studio Flows may reuse the logic of a single Module, making it easier, faster, and less error-prone to create and maintain flows.
NoteModules are supported on all types of flows and for post-call activities on voice flows.
In this document, you will find information on:
- Creating a Module
- Using a Module in a Studio Flow
- Modules Compatibility
- Transferring Context between a Module and a Flow
- Exposing Context from a Module
- Editing a Published Module
- Module Versioning
- Exporting a Module
- Deleting a Module
Creating a Module
The experience of creating a Module is similar to the one of creating a flow.
To create a Module, please follow the steps below:
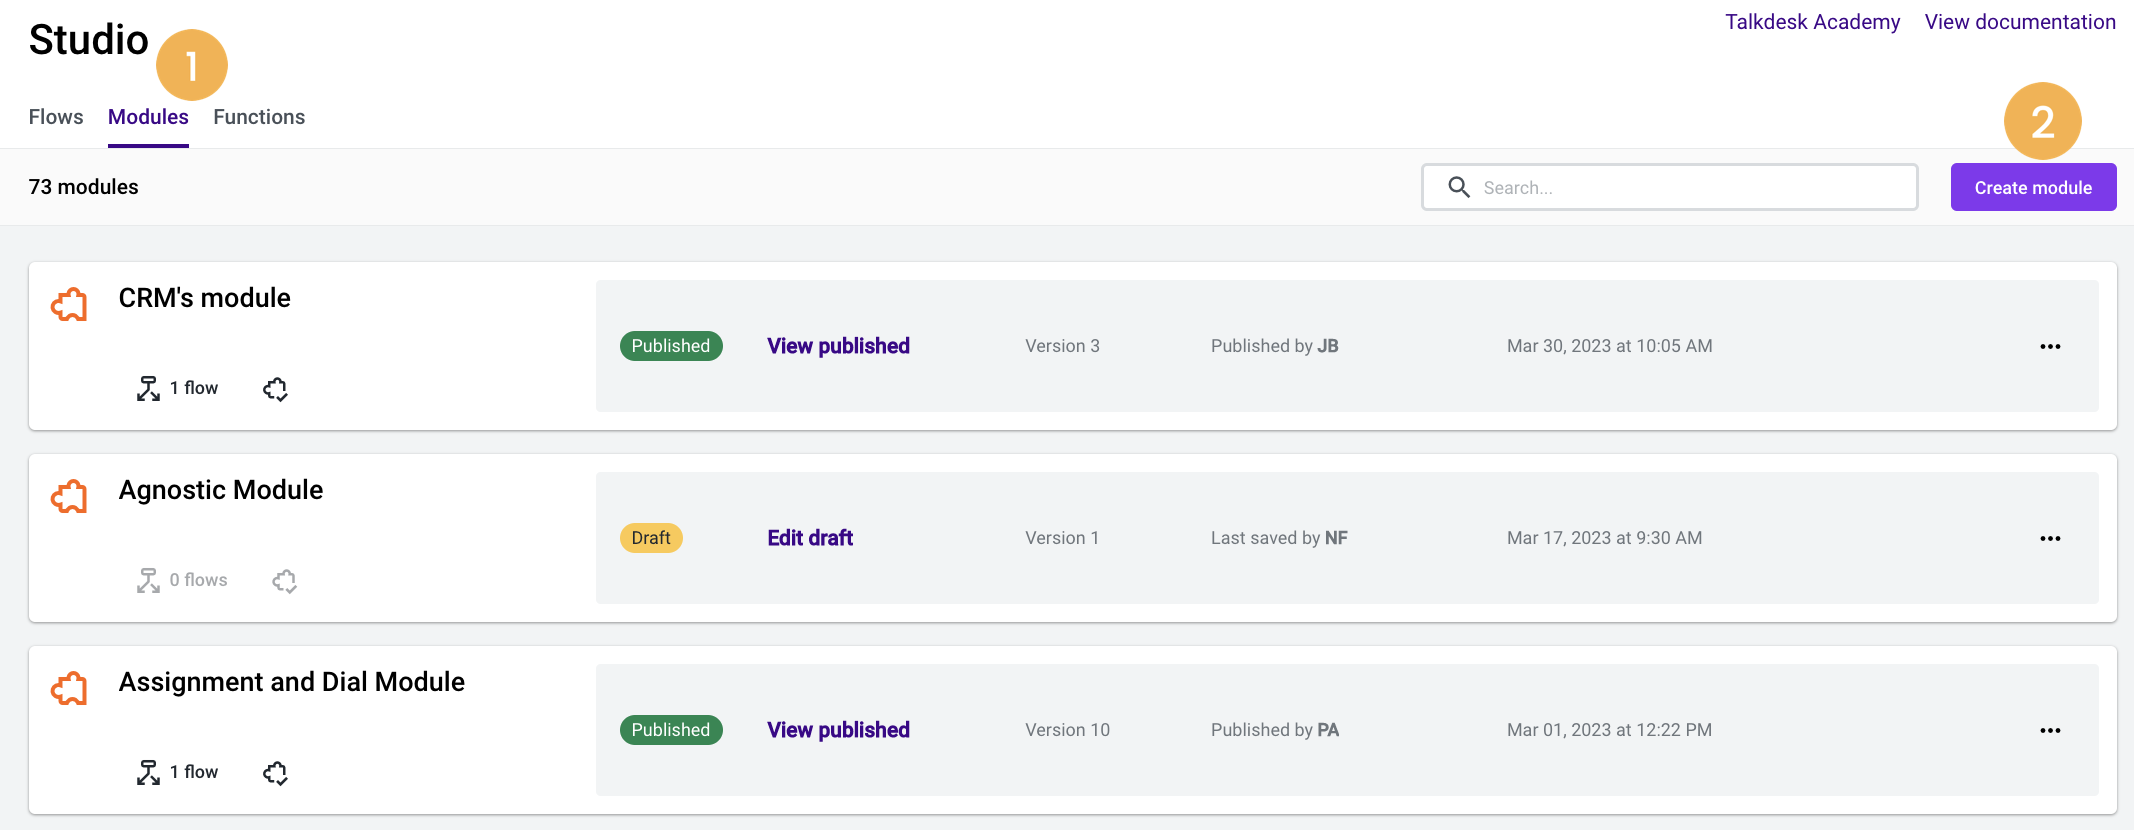
- Select the Studio tab, in the Admin app, and click Modules[1].
- Select Create module[2].

- Choose how you want to create a new module:
- Empty module[3]: To create a new Module from scratch. If you choose this option, add a name and, optionally, a description. Then, click on Create module.
- Import Module[4]: To create a Module from a previously exported JSON file. Drag and drop or choose a file to upload.

- When created, the Module will be listed on the Modules page. Click on it [5] to open the Editor and start configuring the Module.

- The “Begin module” component will be displayed on the canvas. Visit the documentation to learn how to configure it.
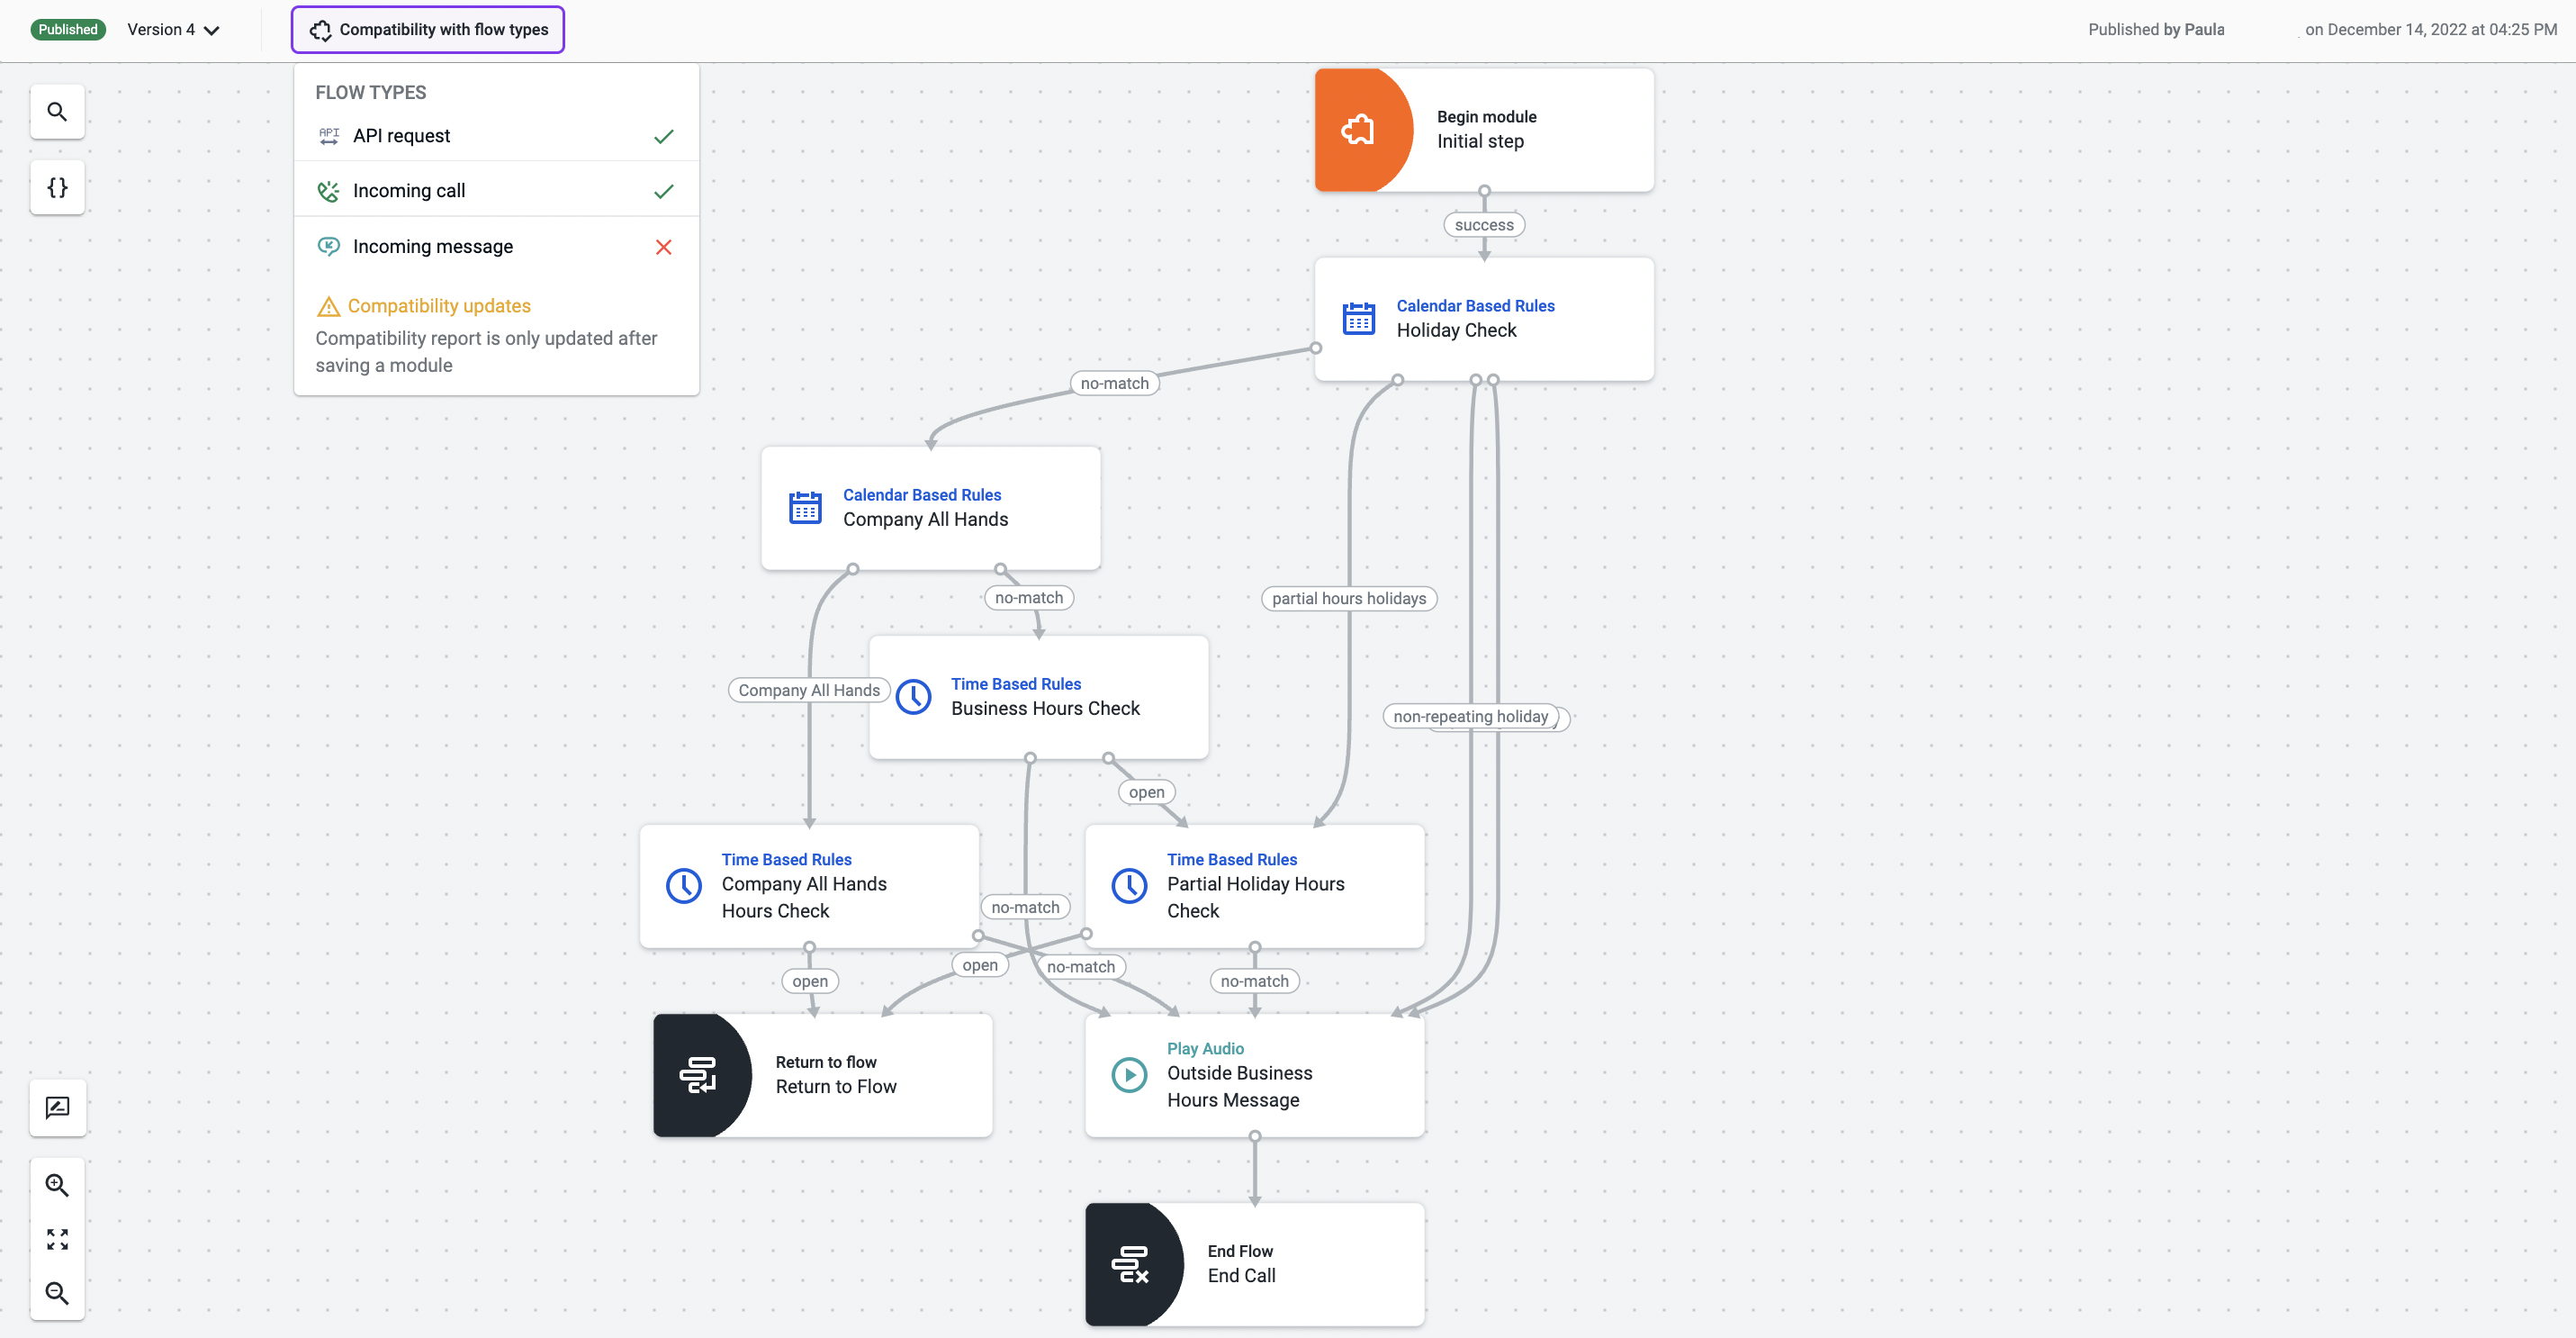
- Since a module can be final or return to the flow, you can add a "Return to flow" step if you wish to guarantee that the parent Studio flow keeps executing after the Module’s execution. In case the module is final, use the “End flow” component. As shown above, you can also use both if you want to create two branched behaviors within the Module. In our example, after the first branch of the Module is executed, i.e., after the component checks in which holiday the call takes place, the execution will take the course defined in the flow. In contrast, in the second branch of the Module, it is defined that if the call takes place on any other holiday when the contact center is closed for the day, a holiday greeting is played to the customer, and the call will end.
- In the “Return to flow” step, create the module exits you want to be exposed in the "Run module" step’s exits to configure the appropriate path to be followed in the flow.
- When finished, click Save to keep your Module in draft mode, or click Publish to make it effective and ready to use in a Studio flow.
NoteOnly published modules can be used in Studio flows.
Using a Module in a Studio Flow
Once you have published your Module, you can use it in a Studio flow as described below:

- Open the Flows tab [1] and select the flow to which you want to add the module [2]. If you are creating a new flow, you can add the module to it after the initial steps.

- Build the flow according to your business needs, and add the “Run module” component to the most appropriate location of your flow.
- On the component’s Preferences tab, select the module you have previously created on the Modules page from the dropdown list [3] to reference and execute it. You can find additional information on this component here.
Modules Compatibility
Modules are compatible with one or several types of flows, depending on the steps of the Module. To know which flow types are compatible with each module, please follow the instructions below:
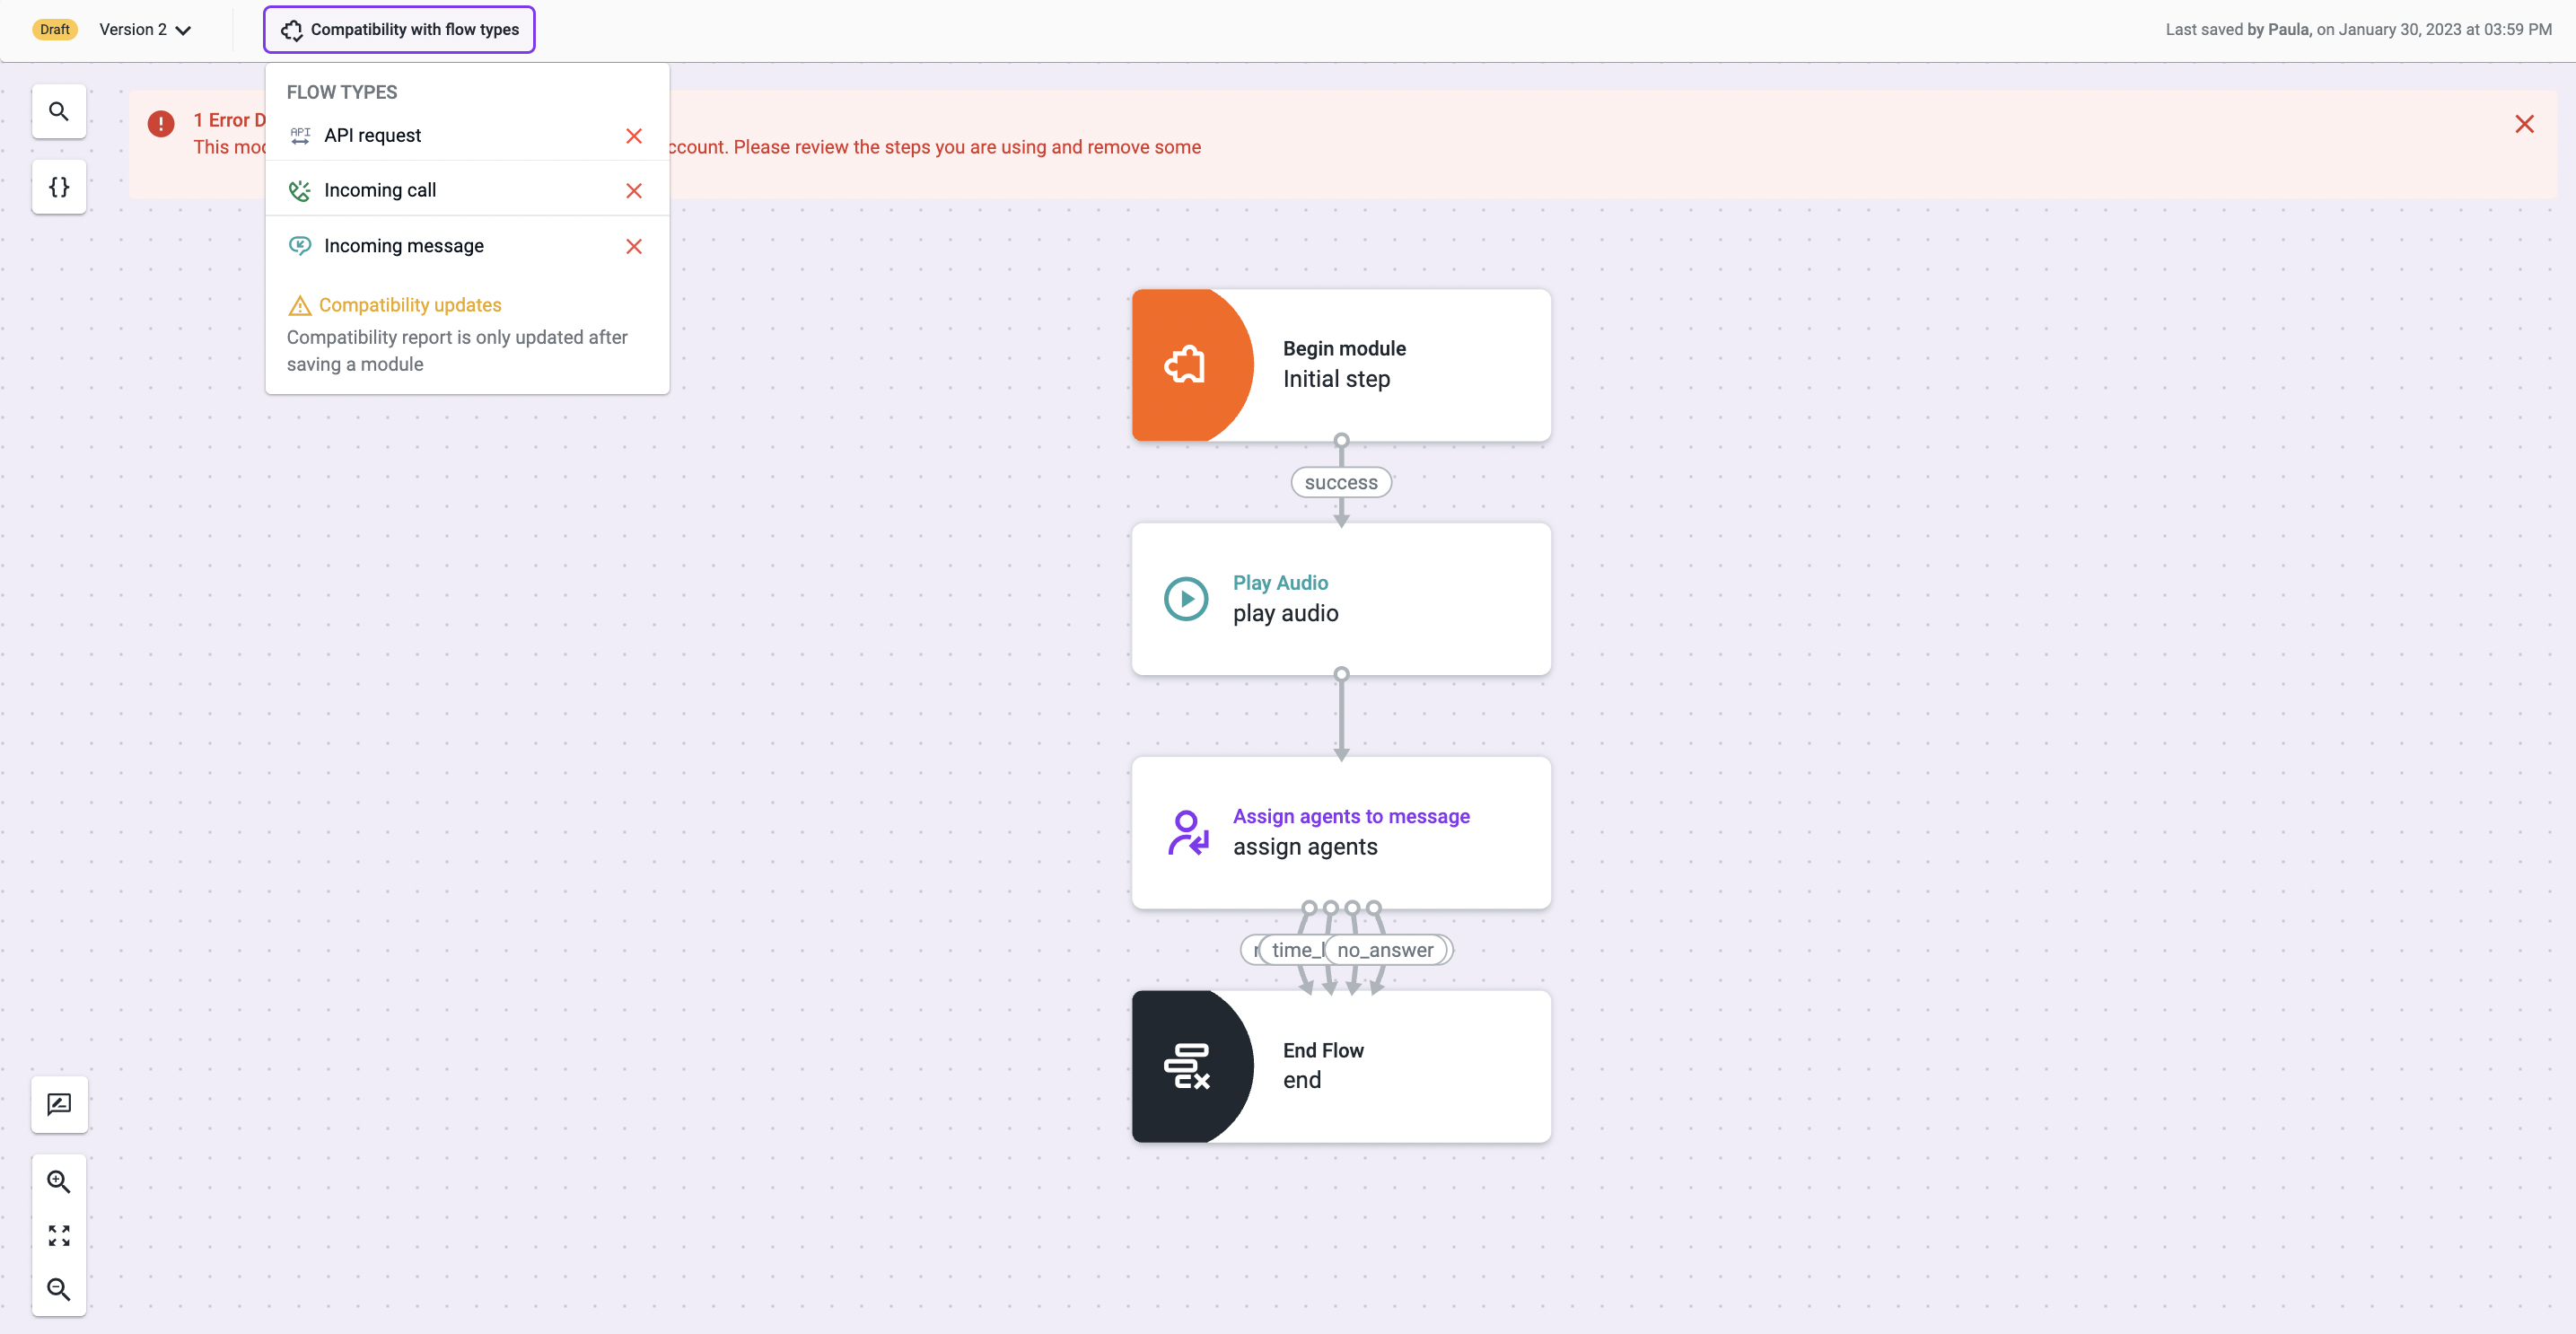
On the Module’s Editor, when creating a Module, but also when saving the flow, and after publishing it:
- Select the “Compatibility with flow types” dropdown to see which “Flow types” can be used in the module. For example, the module in the image below can only be used in the “API request” and “Incoming call” flow types.
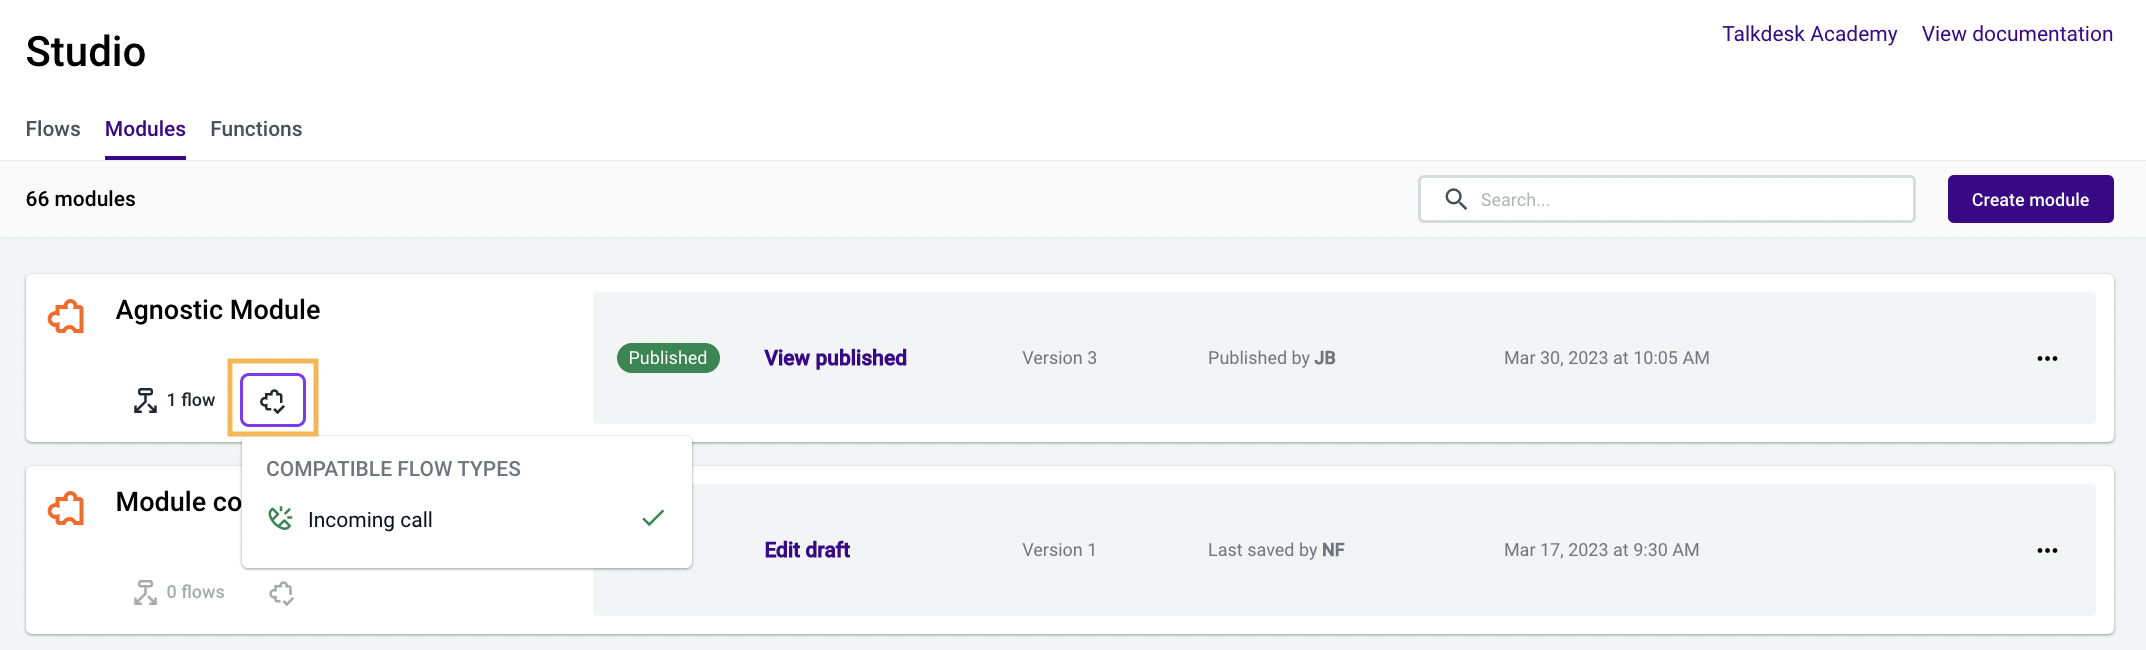
On the Module’s Manager, for both published and draft flows already saved:
- Click on the “Compatibility with flow types” button to see which flow types are compatible with the selected module.
Notes
- In a Studio flow, only compatible modules are listed in the Run module dropdown.
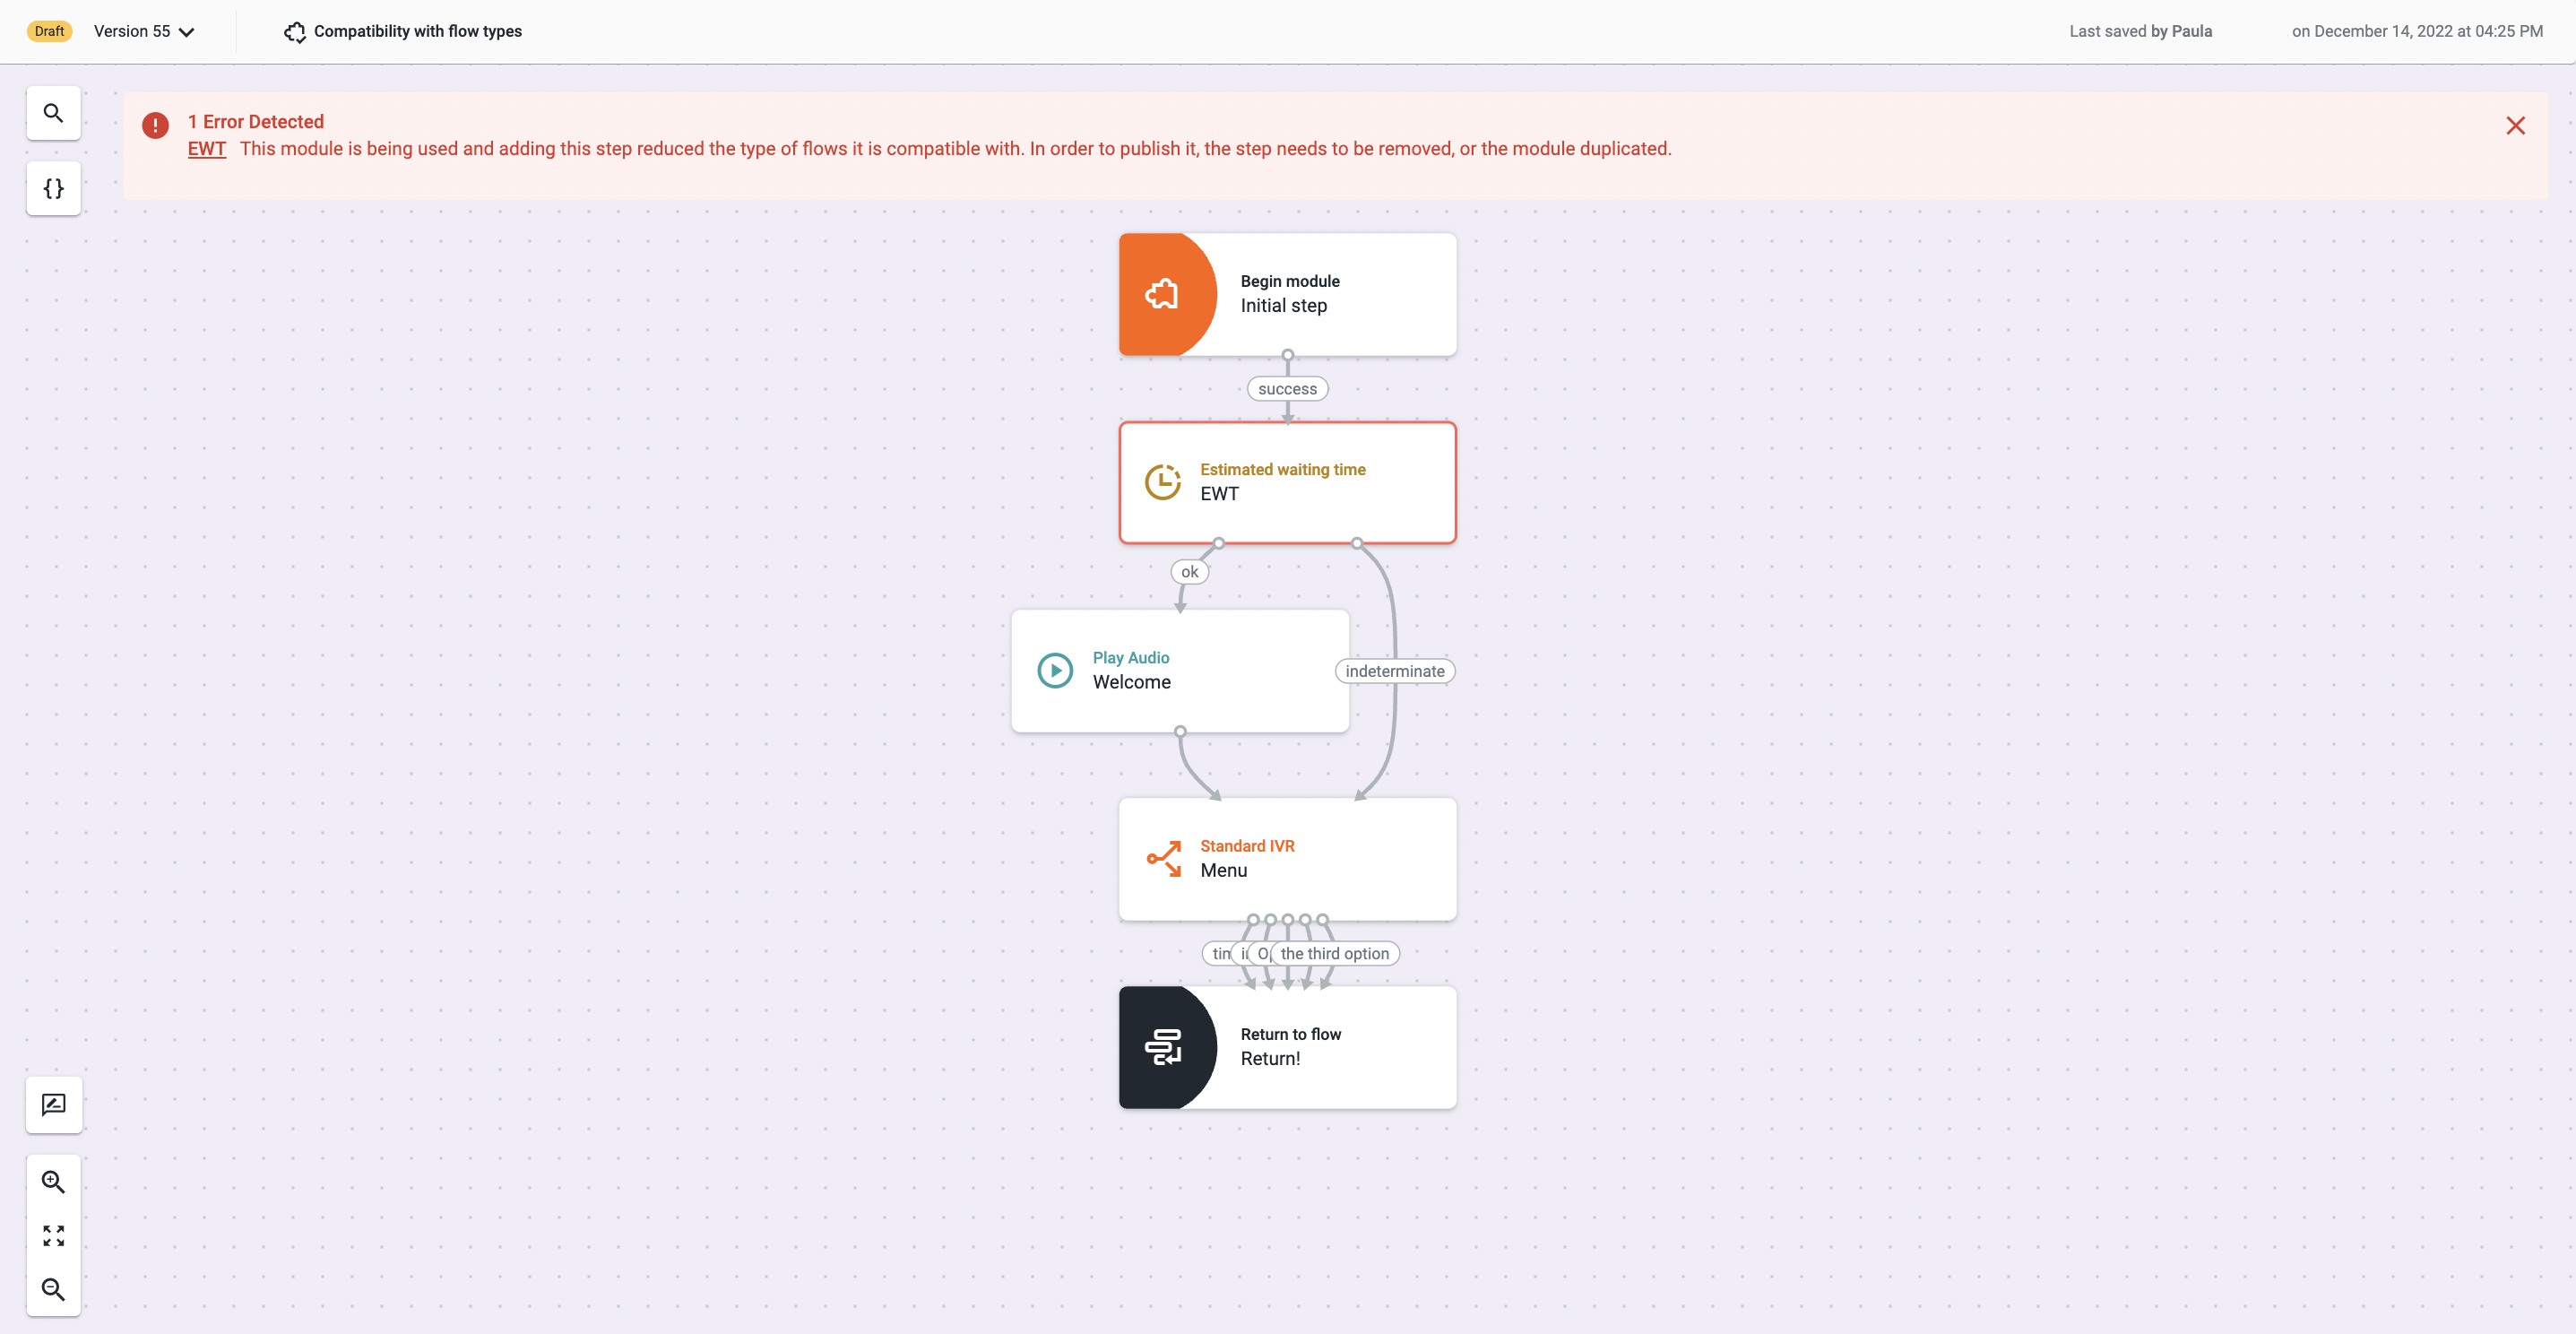
- While editing a module already in use, an error message will be shown if a new step or configuration rule is introduced, affecting compatibility. This is considered a breaking change, and the module cannot be published.
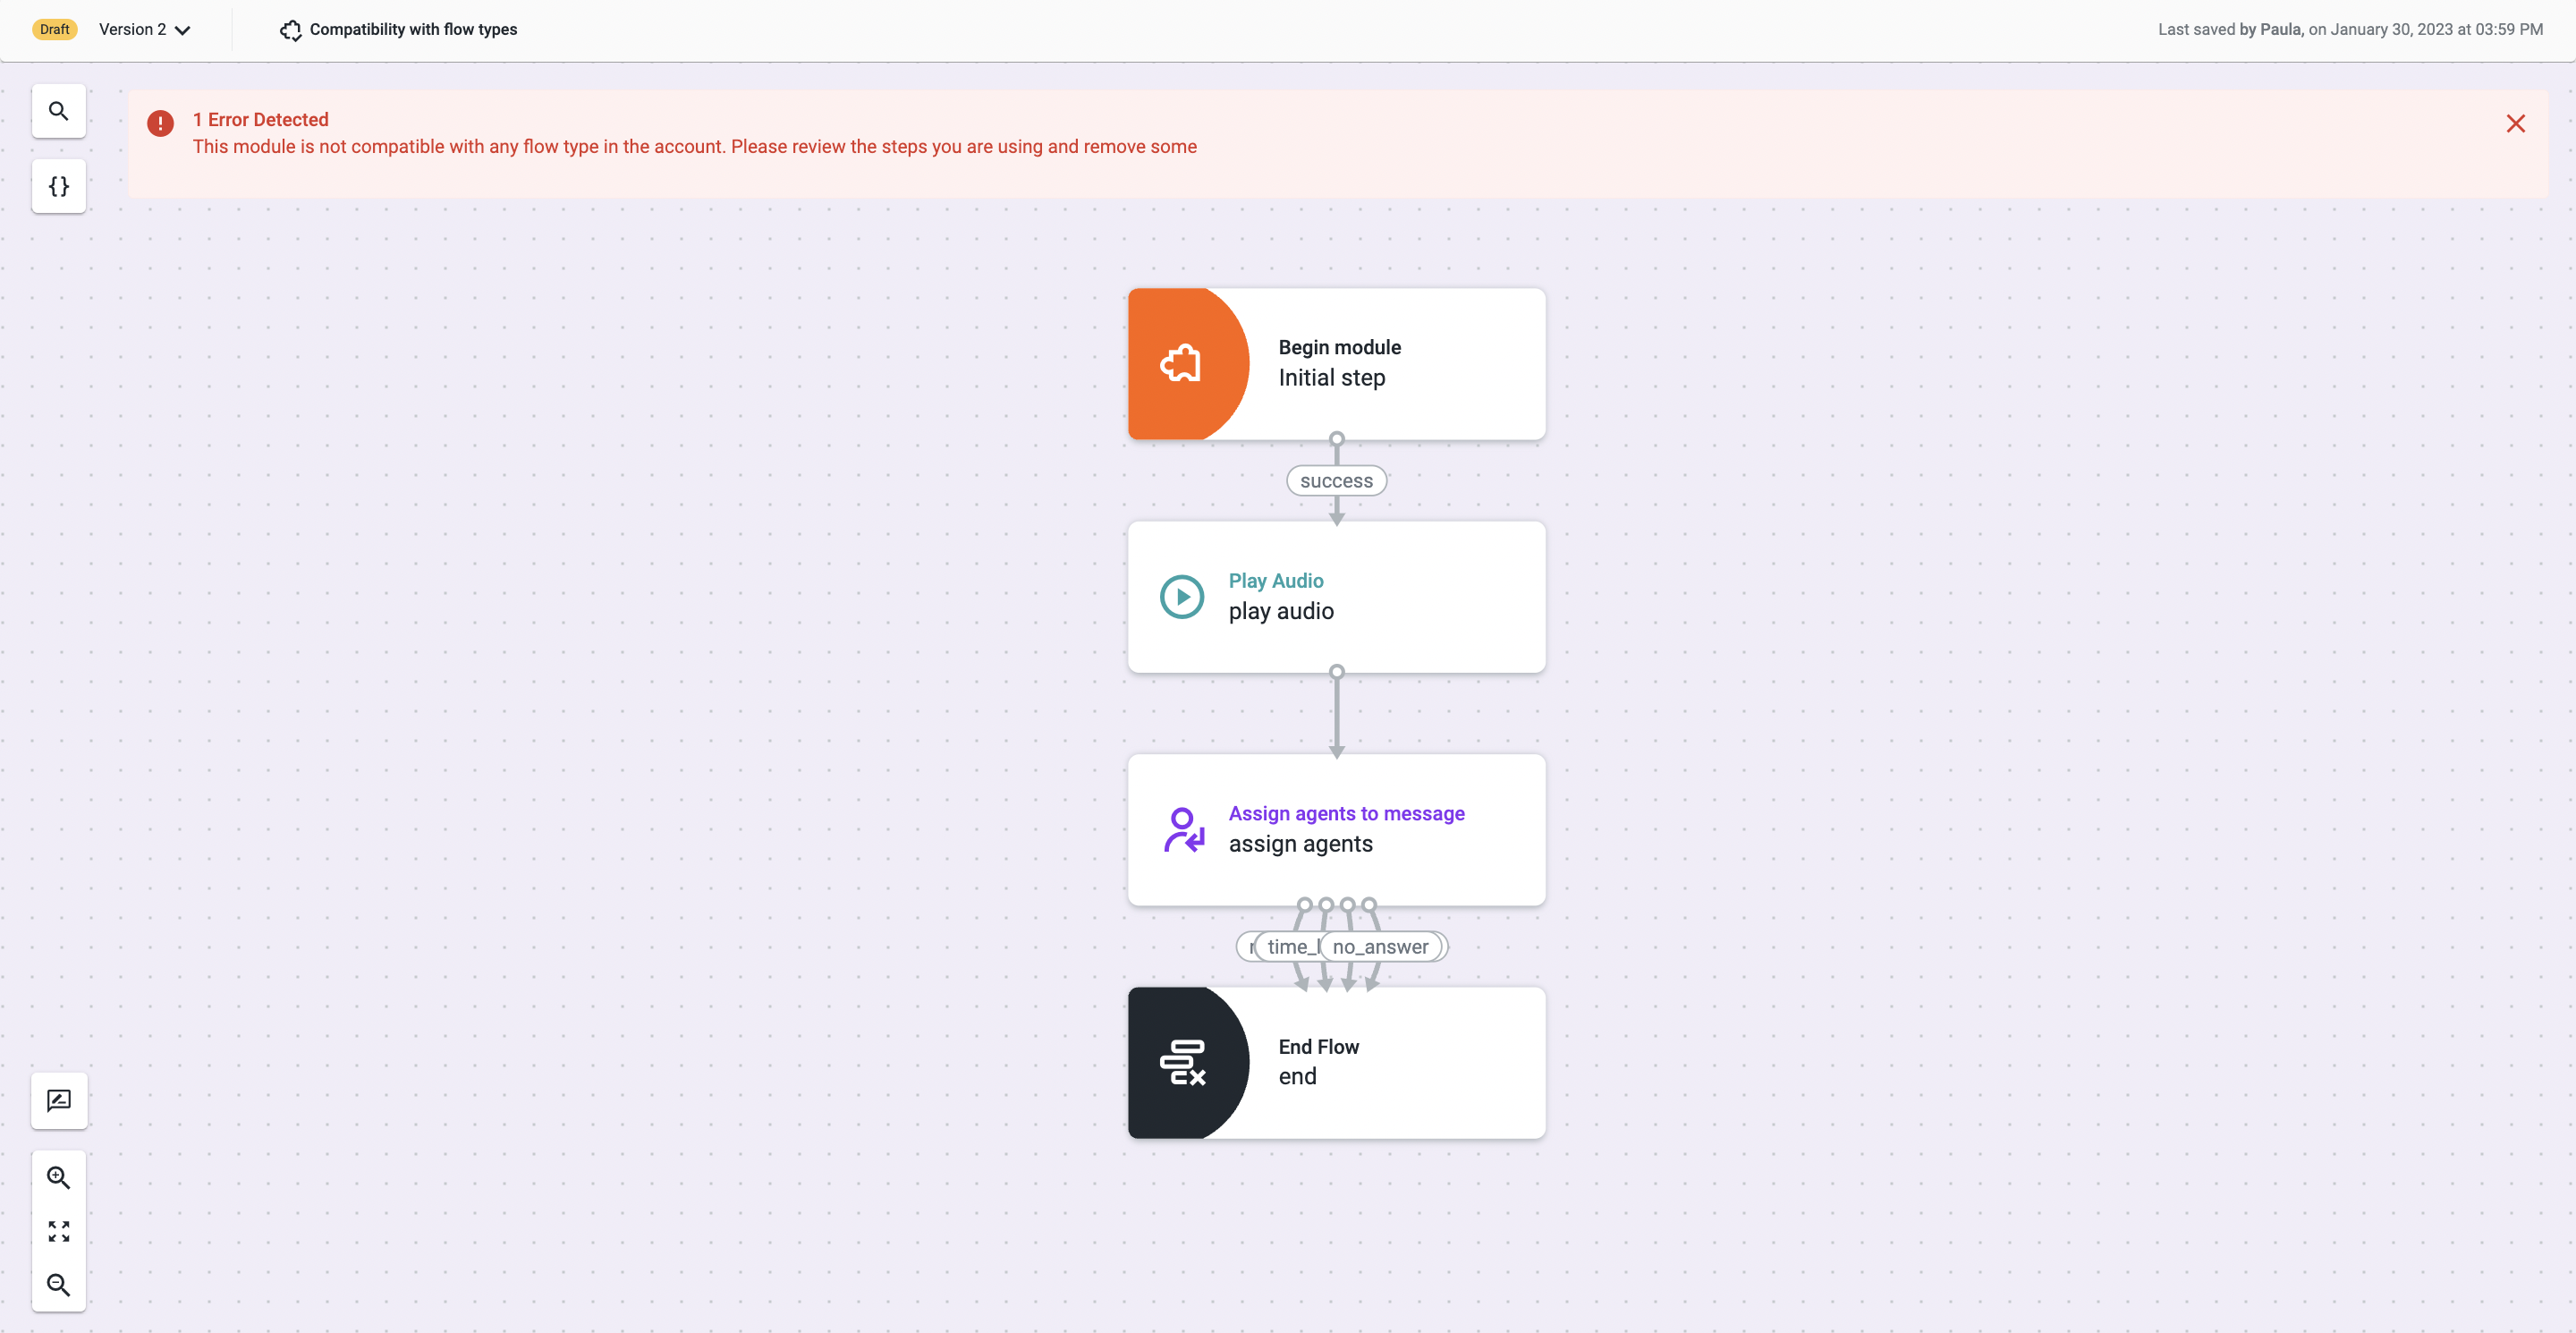
- When saving a module that is not compatible with any flow type, an error message will be shown, and the module cannot be published.
Transferring Context between a Module and a Flow
With Studio Modules, it is possible to transfer context bi-directionally, between the module and the flow(s) that are using it.
This is extremely valuable in case you need to transfer inputs and outputs to and from the module, in scenarios such as the following:
- Passing in the Dialed Number Information Service (DNIS) for customized/unique Hours of Operation.
- Passing in the Automatic Number Identification (ANI) for data dips in a centralized/single place.
- Passing in the ring group for a centralized priority management system across all flows.
To configure the context transfer in the module, set up the inputs in the “Begin module” step, and set up the outputs in the “Return to flow” step, as described below:

To define the input of your module, go to the “Arguments” tab of the “Begin module” component and type in the name of the argument. The argument name is the one that is going to be exposed in the Run module step of the flow referencing the module, under the Input arguments section.
You will also need to select the data type of your input argument. Available data types in a module’s input arguments are:
- String
- Boolean
- Number
Use the “Map to flow variable” field to select an existing variable from the list, or create a new one through the Create variable option. This variable will store the value of the previously defined input argument. If necessary, add more argument names, select the data type, and map them to a flow variable to be later used in the module.

Add a "Return to flow" step to define the module inputs you want to later use in your flow referencing the module. Open the Preferences tab, type in the name of the output you want to define as an output of your module, which is the one that is going to be exposed in the "Run module" step of the flow referencing the module, under the "Outputs" section. You can add new output names and match them with variables from the module, as needed.
Use the Exits tab of the "Return to flow" component to add as many new modules' exits as necessary by clicking on the Add exit option, and then linking them to the step exits previously connected to the “Return to flow” step. Find out more information about module exits here.
When the module is saved and published, and the needed input arguments and outputs are mapped to variables in the flow referencing the module, context will be transferred between the module and the flow. Module input arguments and outputs will be dynamically displayed in the “Run module” step of a Studio Flow that is referencing a Module, depending on the module that is selected.
Exposing Context from a Module
Exposing variables from a module allows you to have the module’s context data displayed to agents in Conversations and available to be used in automations.
To expose variables directly from a Module, please proceed as follows:
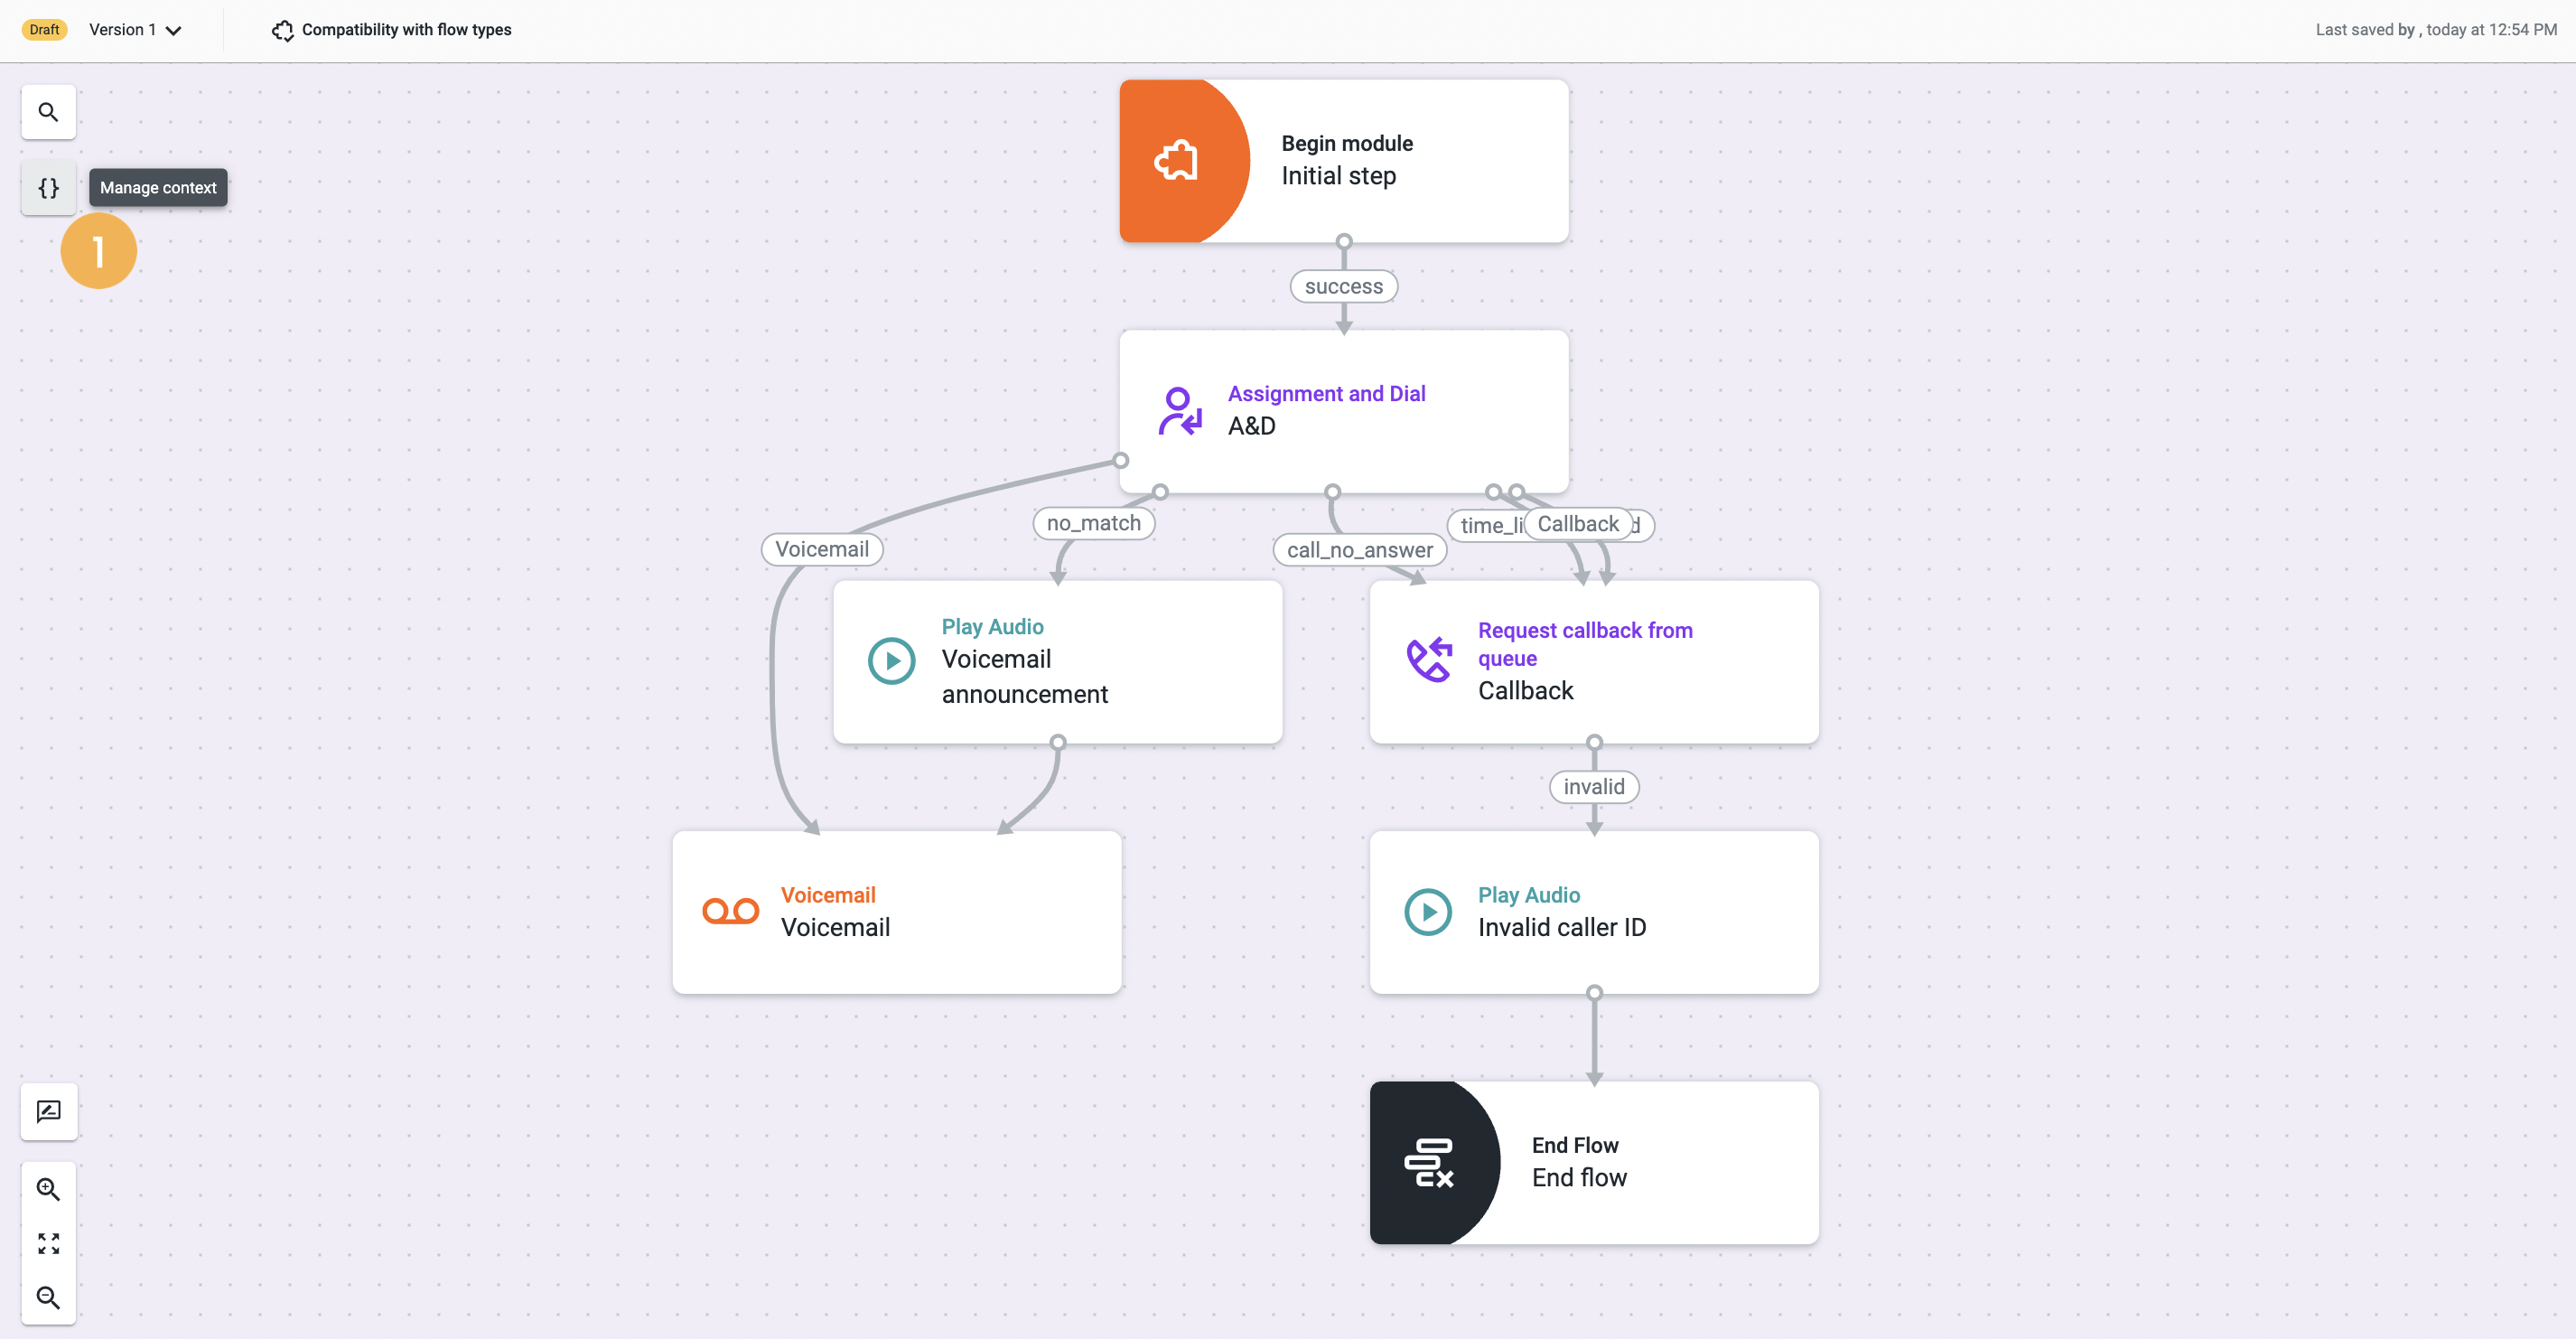
- On the Module editor page, click on the Manage context button [1].

-
Search for the variable you wish to expose by using its name or format [2].
-
Select it [3] and click Save[4].
NoteIf the same variable is used both in the flow and the module or in different points of the module and has different values in these points, it will be rewritten with the last value during execution.
Editing a Published Module
It is possible to edit a published module already used in a Studio flow.
The ability to edit a Module is crucial to ensure that changes can be made to its logic and applied automatically across Studio flows.
To edit a Module, proceed as follows:

- On the Modules page, select the published Module that you wish to modify [1].

- Click Edit[2]. When doing so, a new draft version of the Module will be created, and you will be able to perform all the required changes to your Module.
- When finished, click Save, followed by Publish to make the new Module version effective.
Notes
- After publishing the new version of the Module, the changes will be applied to all Studio flows referencing it.
- If a new module exit is added or removed, the flow behavior may need to be re-configured accordingly.
Module Versioning
A Module can have several versions, allowing you to keep track of any changes over time. Each version can have only one of the following statuses:
- “Draft”: When building your Module, you are working on a draft version.
- “Published”: If your Module is published, it means it’s error-free and that you can use it in a Studio flow.
- “Archived”: Your published Module is archived in a version whenever you publish a new draft. These archived versions can be restored and republished at any time.
If you need to create a new version of your Module, proceed as follows:

- Select the Module that you wish to modify and click on the “More options” icon [⋯] [1].
- Select the Duplicate version to a new module[2] option.
A copy of the existing Module will be created in a draft version and will be added to the list of existing modules on the Modules page.

- If you wish to remove a version of your Module, you will only be able to delete its draft version. To do it, click on the “more options” icon [⋯] [1] and select the Discard version[2] option.
Exporting a Module

- On the Modules page, click on the “more options” icon [⋯] [1] of the Module you wish to export.
- Select the option Export version[2]. A JSON file will be generated and displayed at the bottom of your screen.
Deleting Modules
Deleting published Modules is only possible when there are no flows associated.
To delete a Module, proceed as follows:

- On the Modules page, click on the three-dot icon next to the Module you wish to delete [1].
- Select the Delete module option [2].
- Click Delete on the confirmation message that appears.
NoteWhen trying to delete a module with associated flows, the Delete module option will be grayed out, and a tooltip will appear.
Updated 9 months ago