Preferences
Request Parameters
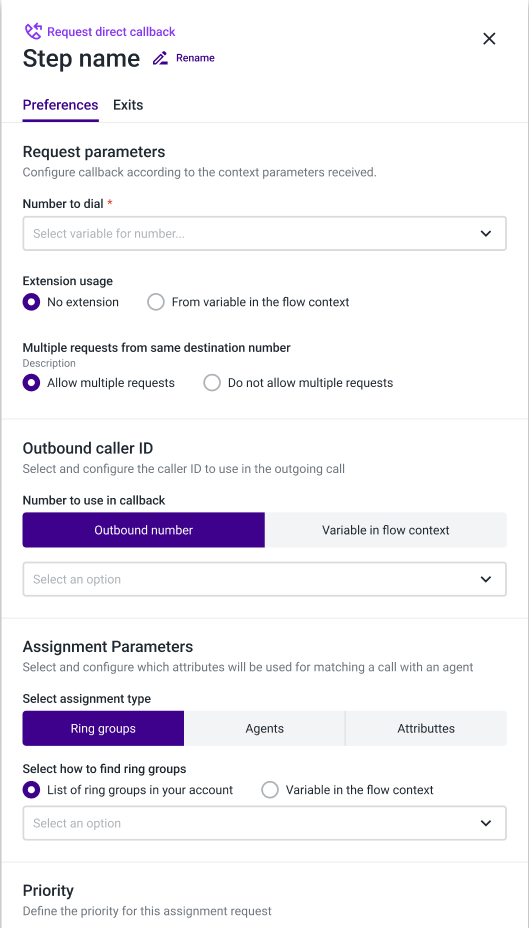
This section enables you to configure the destination number for the callback. The ”Request Callback from Queue” component uses the contact number by default.
Number to dial: If the caller wants to be called back on a different phone number, you should configure a variable in the flow before configuring the “Request callback from queue” component.
Once that is done, in "Number to dial" choose the option 'From variable in the flow context' and select the appropriate variable.
Extension Usage: If you wish to call back an extension number, you'll need to configure a variable in the flow before configuring the “Request callback from queue” component. Then, in "Extension Usage" select the option "From variable in the flow context" and select the appropriate variable.
Multiple requests from the same destination number: If you want to prevent multiple callback requests from the same destination number to a contact number that already has an active callback (callback requested that was not yet executed), please check the option “do not allow multiple requests”. If this option is selected, and there is already an active callback for that destination number, the callback will not be registered, and the step will exit through the optional exit “duplicated request” without being registered.
NoteIf you use a variable in the flow context to set the number to dial, please make sure it is in the E.164 format. You can use a Studio Function in order to manipulate the phone number so that it fits the E.164 format. Please see an example here.

Outbound Caller ID
Number to use on callback: With this option, you can define which caller ID to use to make the outbound call to the contact person. When choosing Use same as inbound call, the number that is used to make the outbound call will be the one the inbound call reached. If instead, you wish to use a different caller ID to make the outbound call to the contact person, you'll need to choose the option Use a different number to manually select an outbound number based on a dropdown list of phone numbers associated with the account or a variable used priorly in the flow.
Assignment Parameters
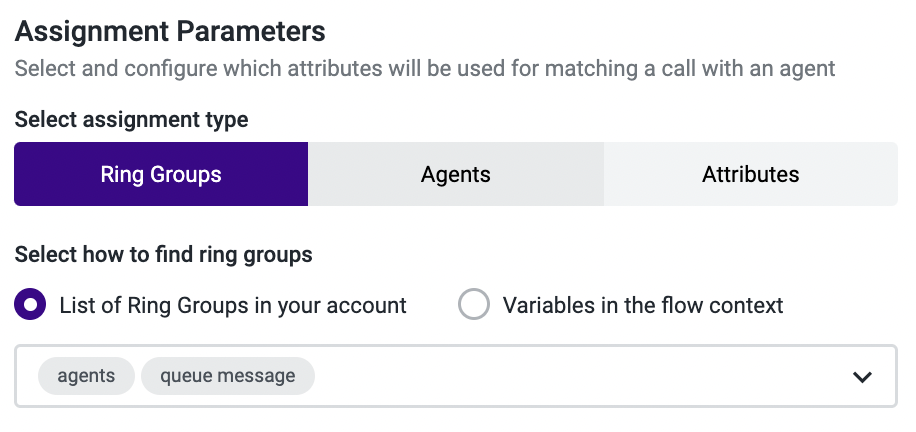
Assignment Type: Here, you can assign an interaction to ring groups or agents. Please note that the two are mutually exclusive, and you can only select one of them per assignment component.
NoteIf you are an Attribute-based routing user, you will also be able to assign an interaction through attributes. If the option Attributes is selected, a Reporting component should also be used in the flow, as a way to correctly report the attribute-based selection.
How to find: For each assignment type, you can select from a list or consider a variable in the flow context. If your selection falls under the “Agents” assignment category, the variable to use will have to correspond to the agent’s email.

Priority
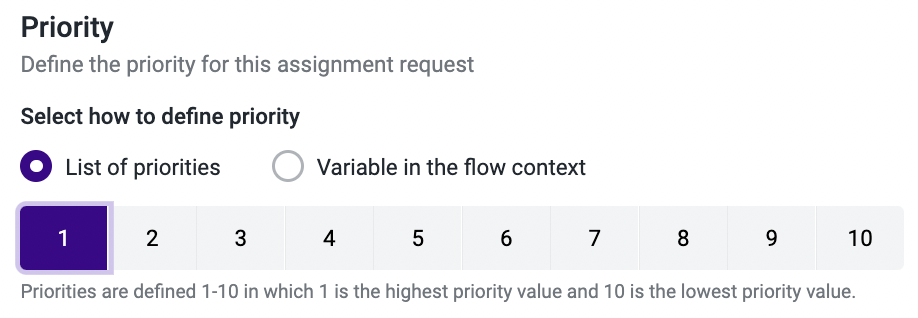
This component allows you to define the priority for each assignment request that goes through each specific assignment step. In other words, you should decide how important the Request Callback from Queue component you are configuring is when compared to the other Assignment and Dial and Request Callback from Queue components you have.
The priority can either be manually selected from a list (priorities are defined from 1-10, in which 1 is the highest priority value and 10 is the lowest priority value) or dynamically gathered from the flow when a numeric variable is chosen from the drop-down menu (e.g., you can use a data dip to get a customer’s ARR [Accounting Rate of Return], followed by a “Conditional statement” component that translates that value into a priority that can be read by the “Assignment and dial” component).
Please note that call priority outweighs any queue time, i.e., if a call with priority 10 has been in the queue for 30 minutes when a call with priority 1 comes in, the call with priority 1 will be handled first.

Maximum Waiting Time
The callback can only take place within a specific timeframe. To configure its timeout, you should insert the required value in the “Time” input. The value should range between 5 minutes and 48 hours.

NoteWhen using a variable to set the maximum waiting time, the valid format should be a numeric value based on hours, for example:
- 03:00:00, max_wait_time_variable = 3
- 00:15:00, max_wait_time_variable = 0.25
- 02:30:00, max_wait_time_variable = 2.5
An invalid value on the variable will be discarded and the maximum waiting time will be set with the default value of 3 hours (03:00:00).
Messages to Play
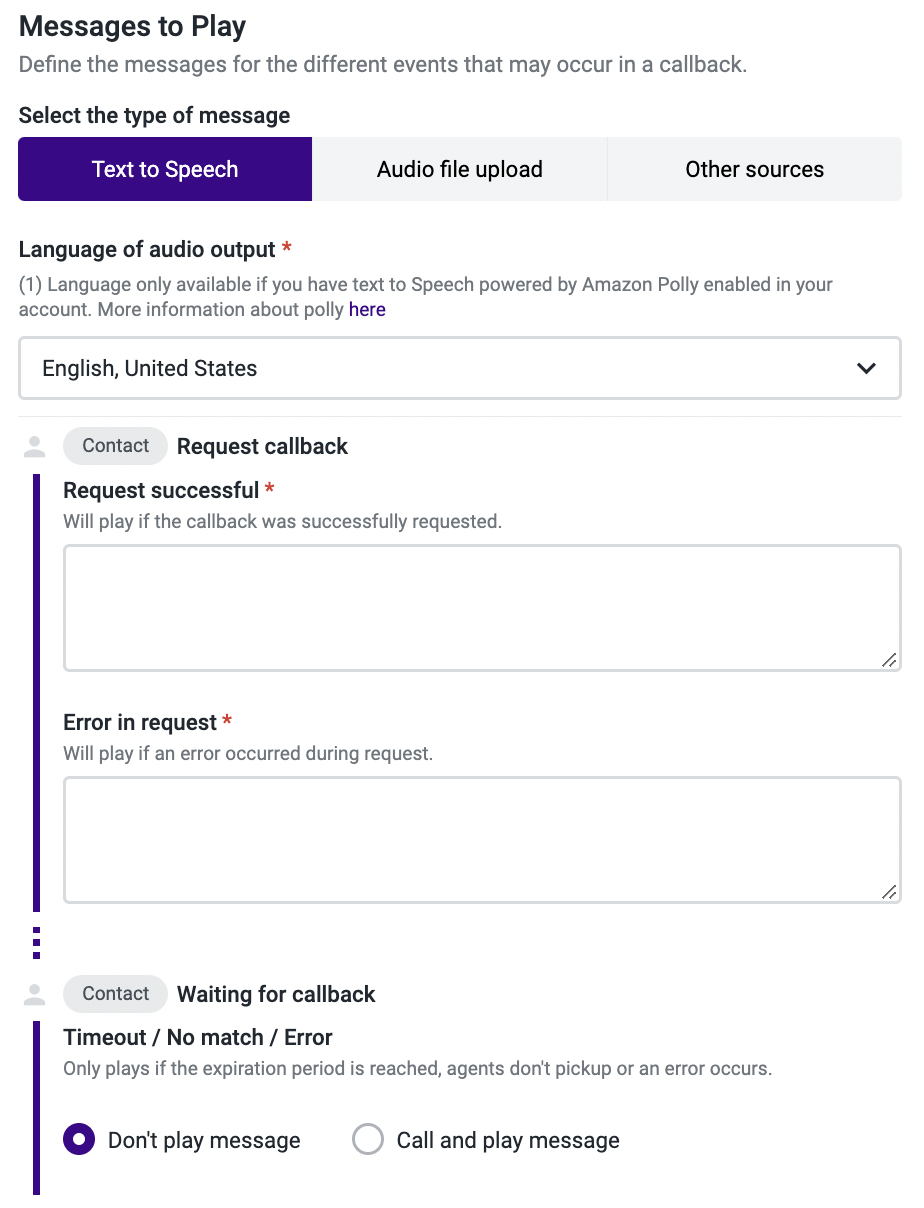
In the “Request Callback from queue” component, you'll want to configure audio messages for your callers in the following scenarios:
Request Successful: in case the caller's request for a callback is successful.
Error in Request: in case the caller's request for a callback is unsuccessful. If this happens, the caller will need to call the contact center again.
Timeout / No Match/ Error: in case the maximum waiting time is reached, all matching agents are attempted but reject/don’t answer the call, or when an error occurs.
In the Studio Execution Report, in these scenarios, you will see the following values on the callback’s exit:
- Time_limit_reached: When the maximum waiting time is reached.
- agent_rejected: When matching agents reject/don’t answer the call.
- no_match: If no agent matches the assignment (this can happen, for example, when you remove all agents from a ring group and use the ring group to assign the callback to).
- error: If an error occurs.
You can configure the messages in several ways: by using the Text to Speech function, by uploading an audio file from your computer (Audio File Upload), or by inserting a URL or a variable used previously in your call flow (Other Sources) to access and play an external audio file.
NoteClick here to know more about using Text-to-Speech powered by Amazon Polly.
Please note that only one type of message is allowed per Callback component, i.e., you cannot have a Text to Speech message for "Request Successful" and an Audio File Upload message for "Error in Request".

Please click here to learn more about the supported audio files and some best practices for audio recordings.
Updated 3 months ago