Configuring Routing Settings
Please follow the instructions below to learn how to how assign a call to agents or ring groups using the Assignment and Dial component.
Assigning a call
When assigning a call, you can select from different parameters to determine the best agent or group to answer the call:
- “Agents” (the call can be assigned to one or multiple agents).
- “Ring Groups” (the call can be assigned to one or multiple ring groups).
- “Attributes” (select which "Attributes" an agent needs to have and their proficiency level, in order to be considered for the assignment attempt).
NoteYou can find more information about these parameters in this article.
As an example, let’s assign the calls that reach our support IVR menu option to a list of ring groups:

- Select the Assignment and Dial (“Support queue”) component and click on Preferences[1].
- Click on Ring Groups[2].
- Make sure the List of Ring Groups in your Talkdesk account option is selected and click the drop-down list [3].
- Tick the box to select all ring groups, or select the individual ring groups.
- Click “Save”.
NoteYou may notice that some errors appear each time you save the flow. This is normal and will continue until all steps are complete, and the flow is ready to be published.
You must now select how many agents should be rung at a time, define the priority of your calls to support, define a maximum waiting time, and choose the music to play to your callers as they wait for a support agent to answer the call:
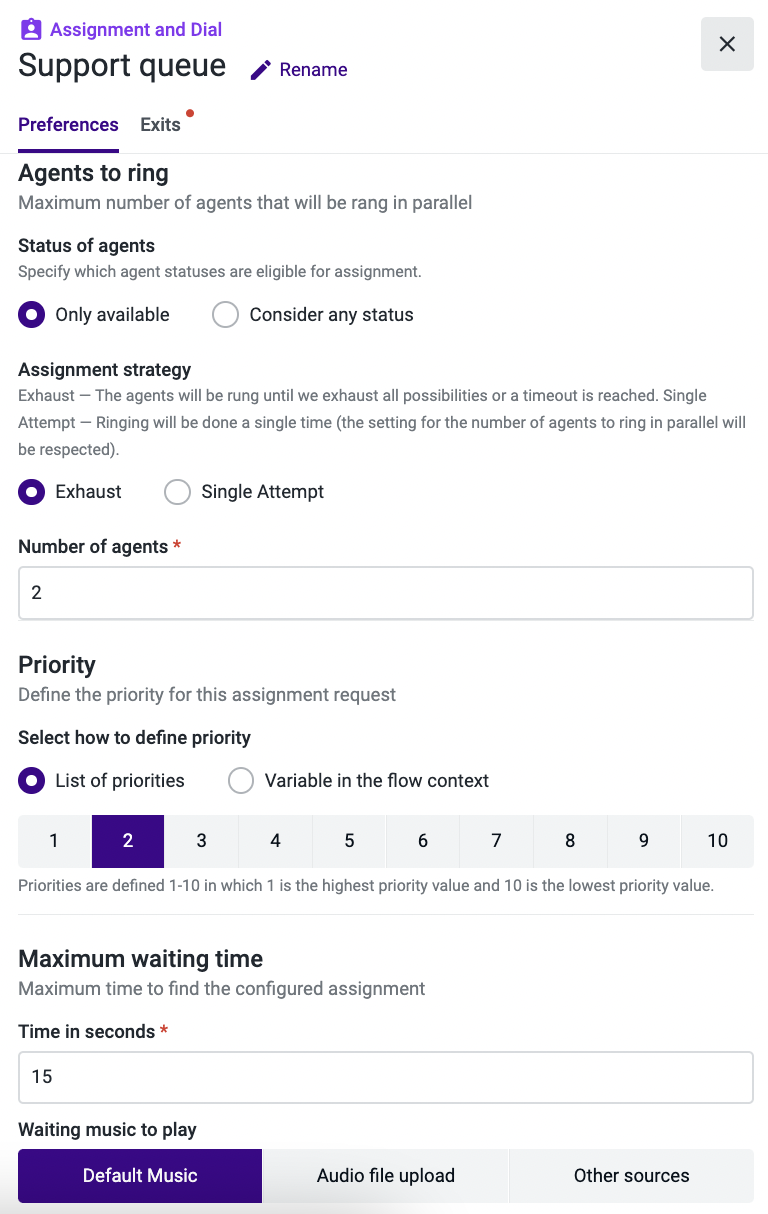
Interactions are handled by the highest priority level. If different interactions have the same priority, the one that has been in the queue the longest will be assigned first.
Agents need to be in the “Available” status to receive interactions. If multiple agents match the condition, then the “most idle” agent(s) is/are chosen. Idle time here is defined by the time spent between the last interaction that was handled by that agent and the time of the assignment request. An agent that has been idle the longest will be chosen first.
For now, let’s complete our support line configuration by defining what to do when there was at least one successful dial attempt but no agent answered the call, and when there was a match, but all agents were busy and the configured timeout was reached:
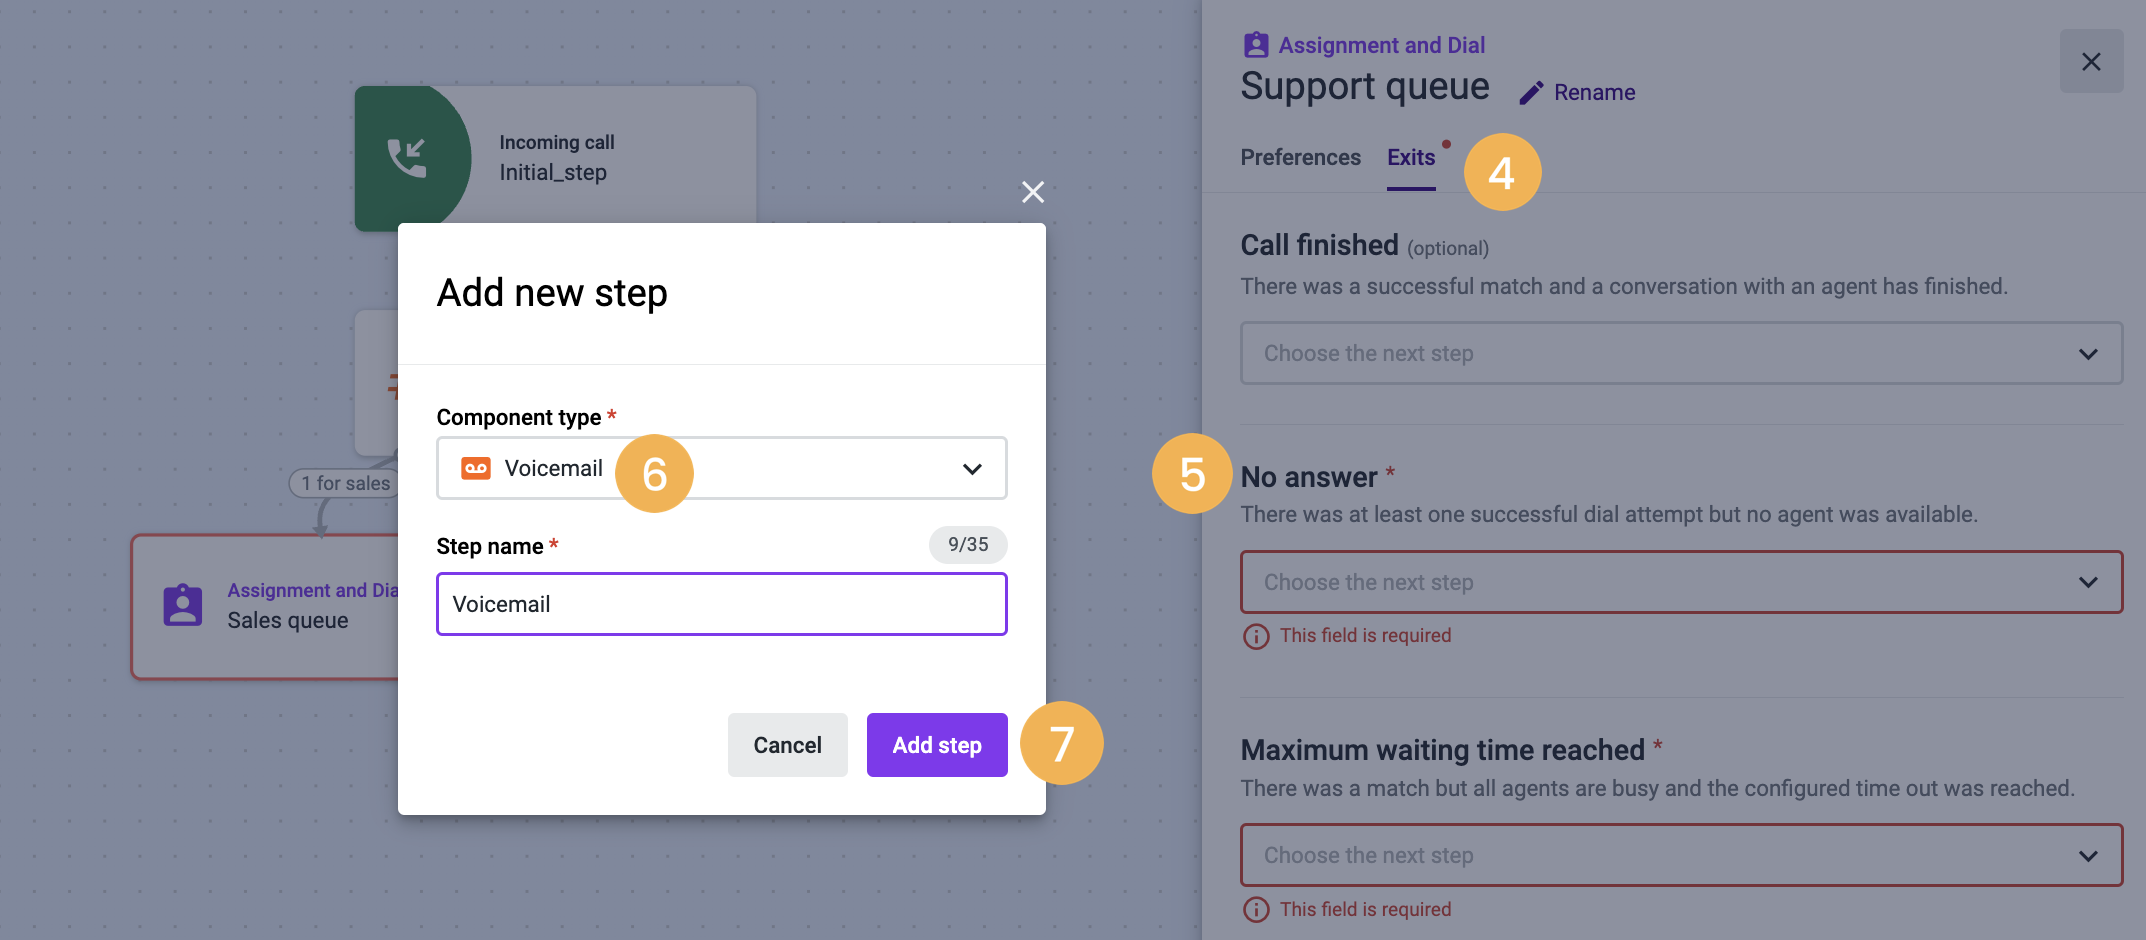
- Select the Exits[4] tab.
- On the “No answer” section [5], select Add new step.
- From the "Component type" drop-down menu, select Voicemail[6].
- Type in a name for this exit step: “Voicemail”.
- Hit Add Step[7].
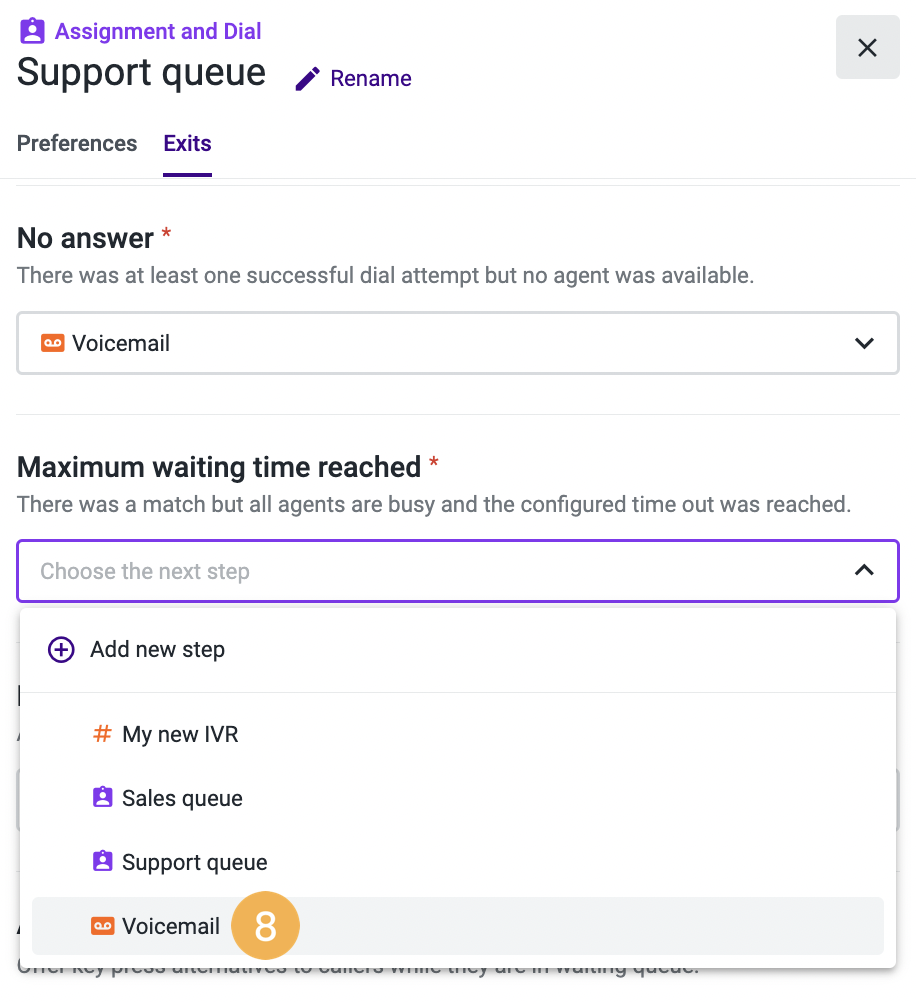
- On the “Maximum waiting time reached” section, select Voicemail[8] from the drop-down menu.
- On the “No match found” section, expand the drop-down menu and select Voicemail.
- “Save” your changes.
If you want to give your callers one or several ways out of the waiting queue:
- On the “Alternative Exits” section, click Add Exit.
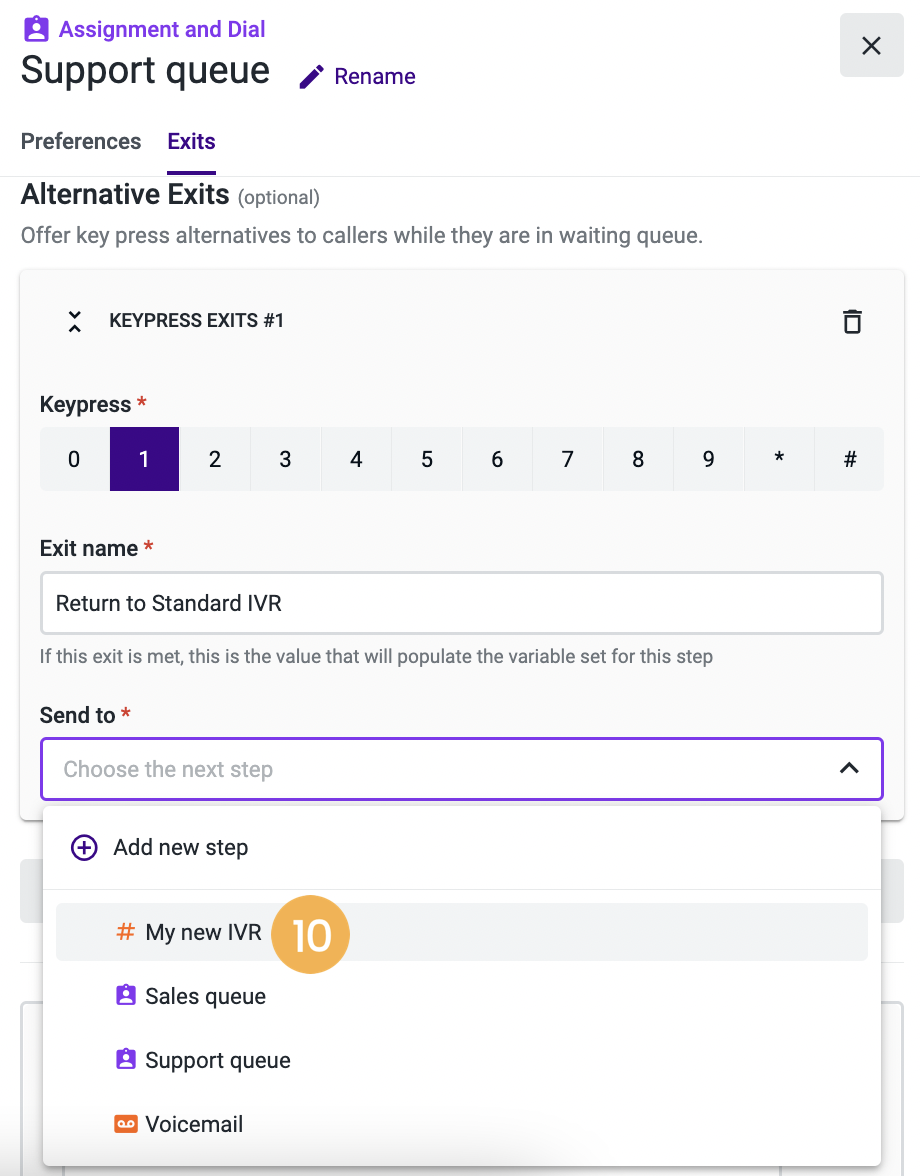
- In "Keypress Exits #1" select 1.
- We will have option 1 sending the call back to the Standard IVR, so we’ll name our Exit: "Return to Standard IVR".
- On “Send to” select My new IVR (the name we gave to our Standard IVR component) [10].
- “Save” your flow.
NoteThe "Support queue" component is now configured. Please follow the same steps described above for the "Sales queue" component, adjusting your choices accordingly.
When both components are configured, it’s time to work on the newly added "Voicemail" component. In this component, you are able to assign voicemail messages left by customers to specific agents or ring groups.
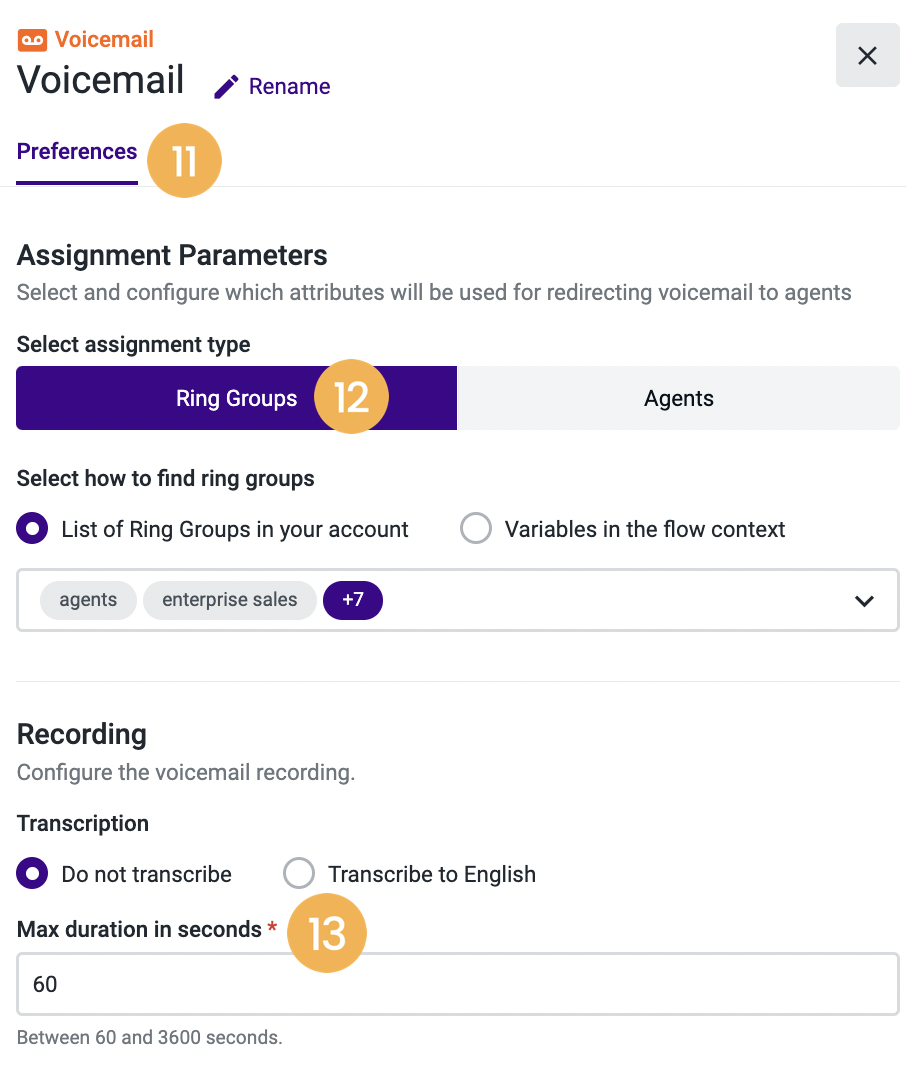
- Hit the Voicemail component and select the Preferences[11] tab.
- Click the Ring Groups[12] button.
- Make sure the list of ring groups in your Talkdesk account option is selected and click the drop-down list.
- Tick the box to select all ring groups or select the individual ring groups to which the voicemail will be assigned.
- Go to the “Recording” section and type in the maximum amount of time in seconds that each voicemail message will last [13].
- “Save” your changes.
- Now that your call flow is completely configured, click “Save” and then “Publish”.
Updated 3 months ago