Playing a Message with the Estimated Waiting Time
Talkdesk Studio™ can be used to provide flexibility and convenience to the caller while managing the wait time efficiently.
To play a message to a caller regarding the estimated waiting time and offer them the choice to wait for an agent or request a callback, please follow these steps for implementation:
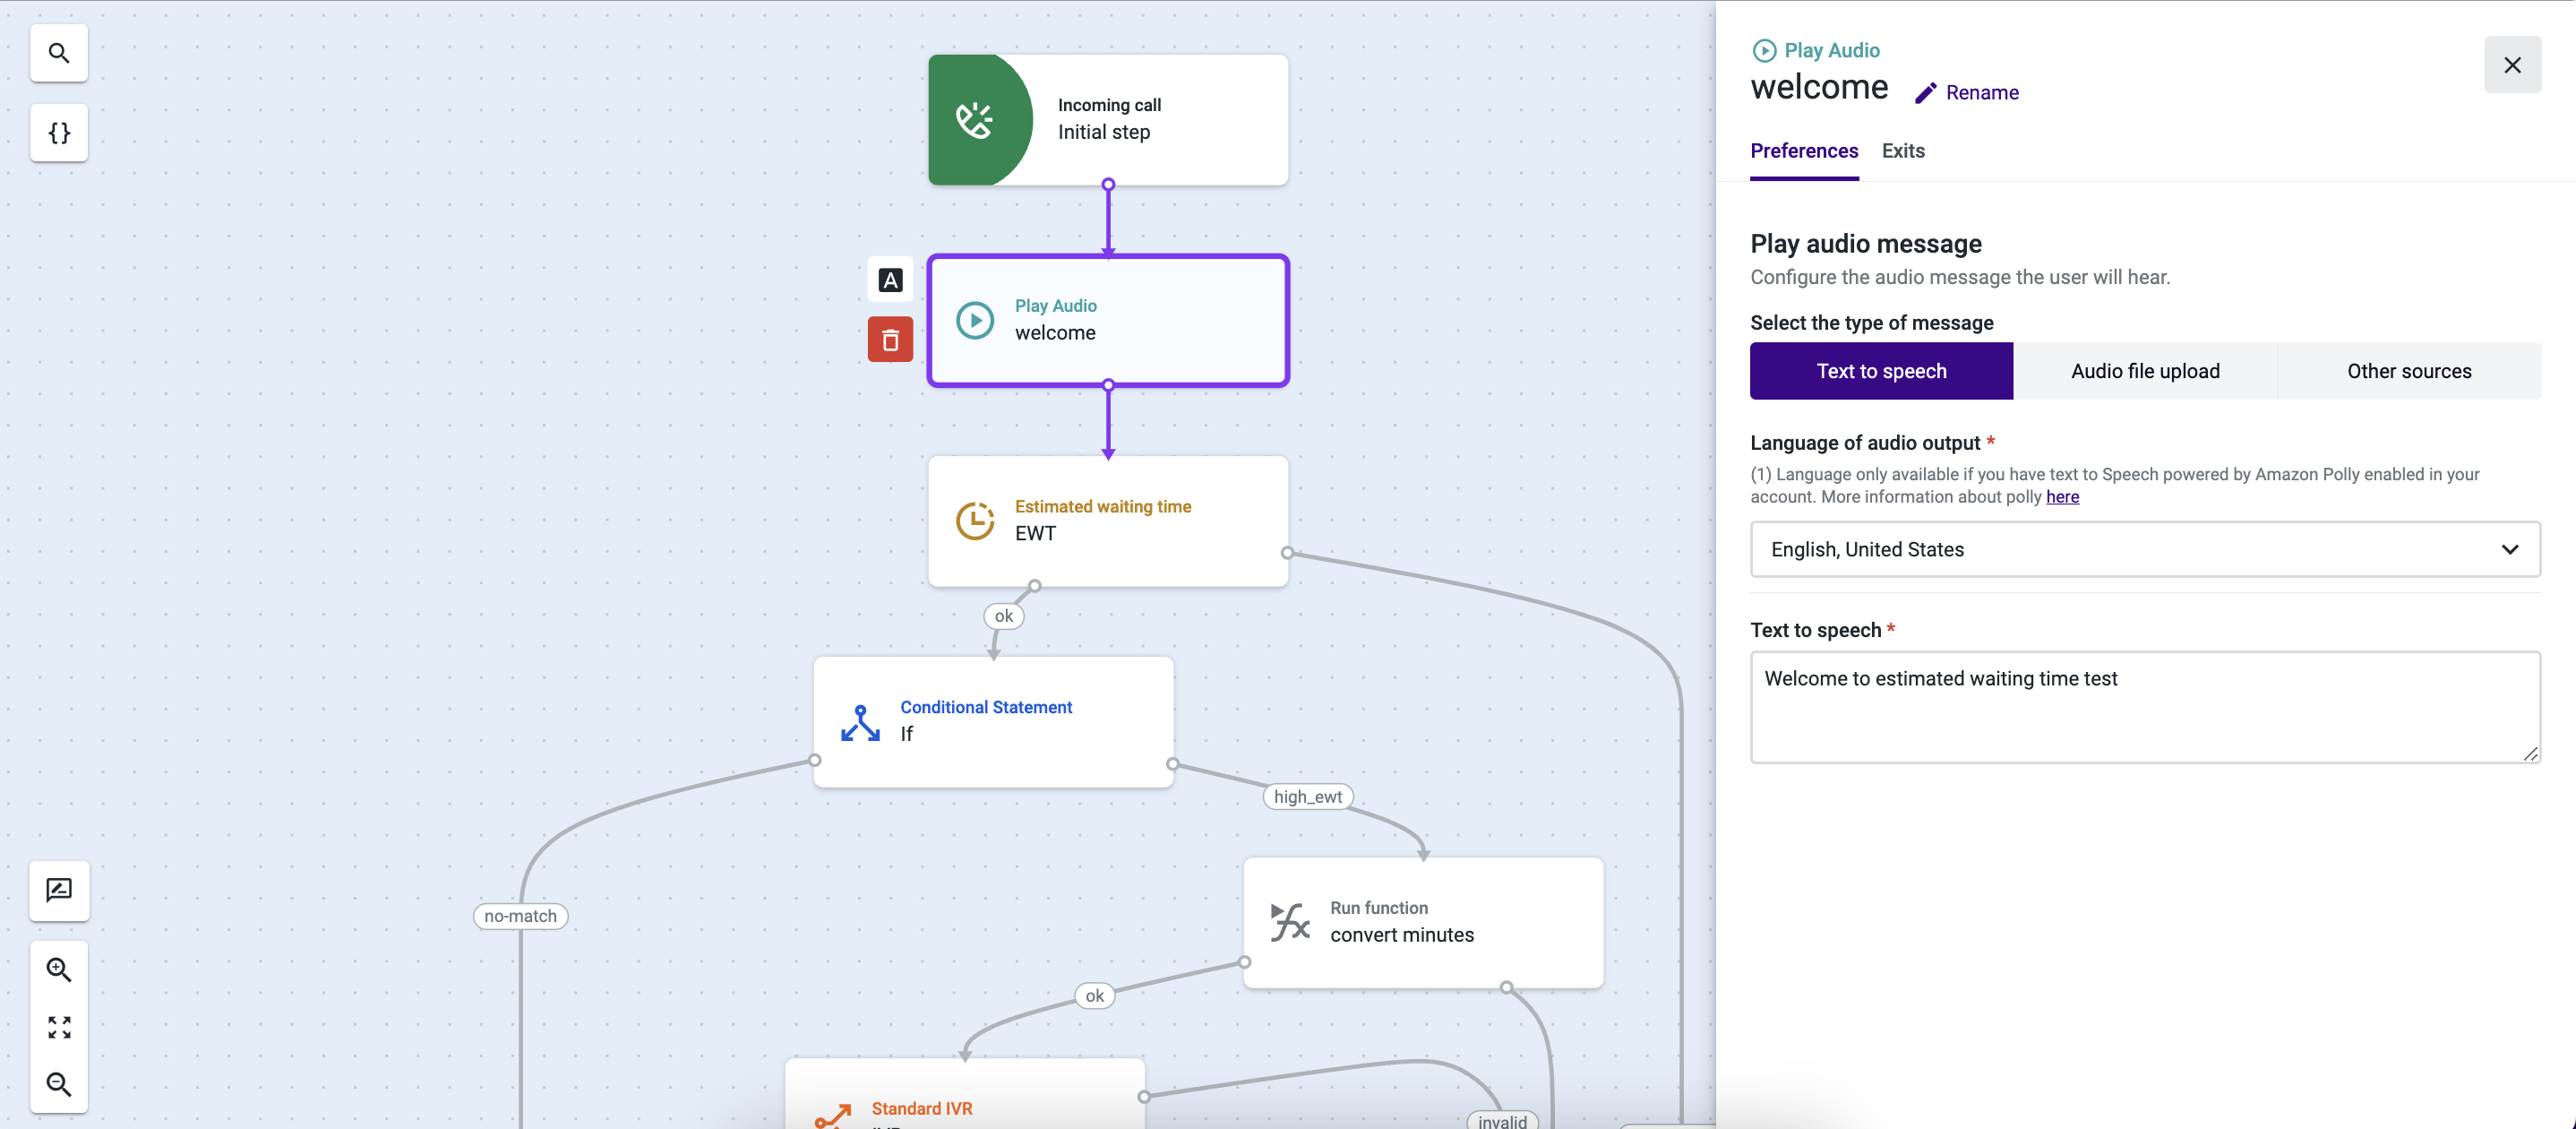
- Add a “Play Audio” component after the initial “Incoming call” step. Use the “Preferences” tab to configure a pre-recorded or dynamically generated message that should work as a welcoming message.
- Use the “Exits” tab to add an “Estimated waiting time” (EWT) component to the flow.
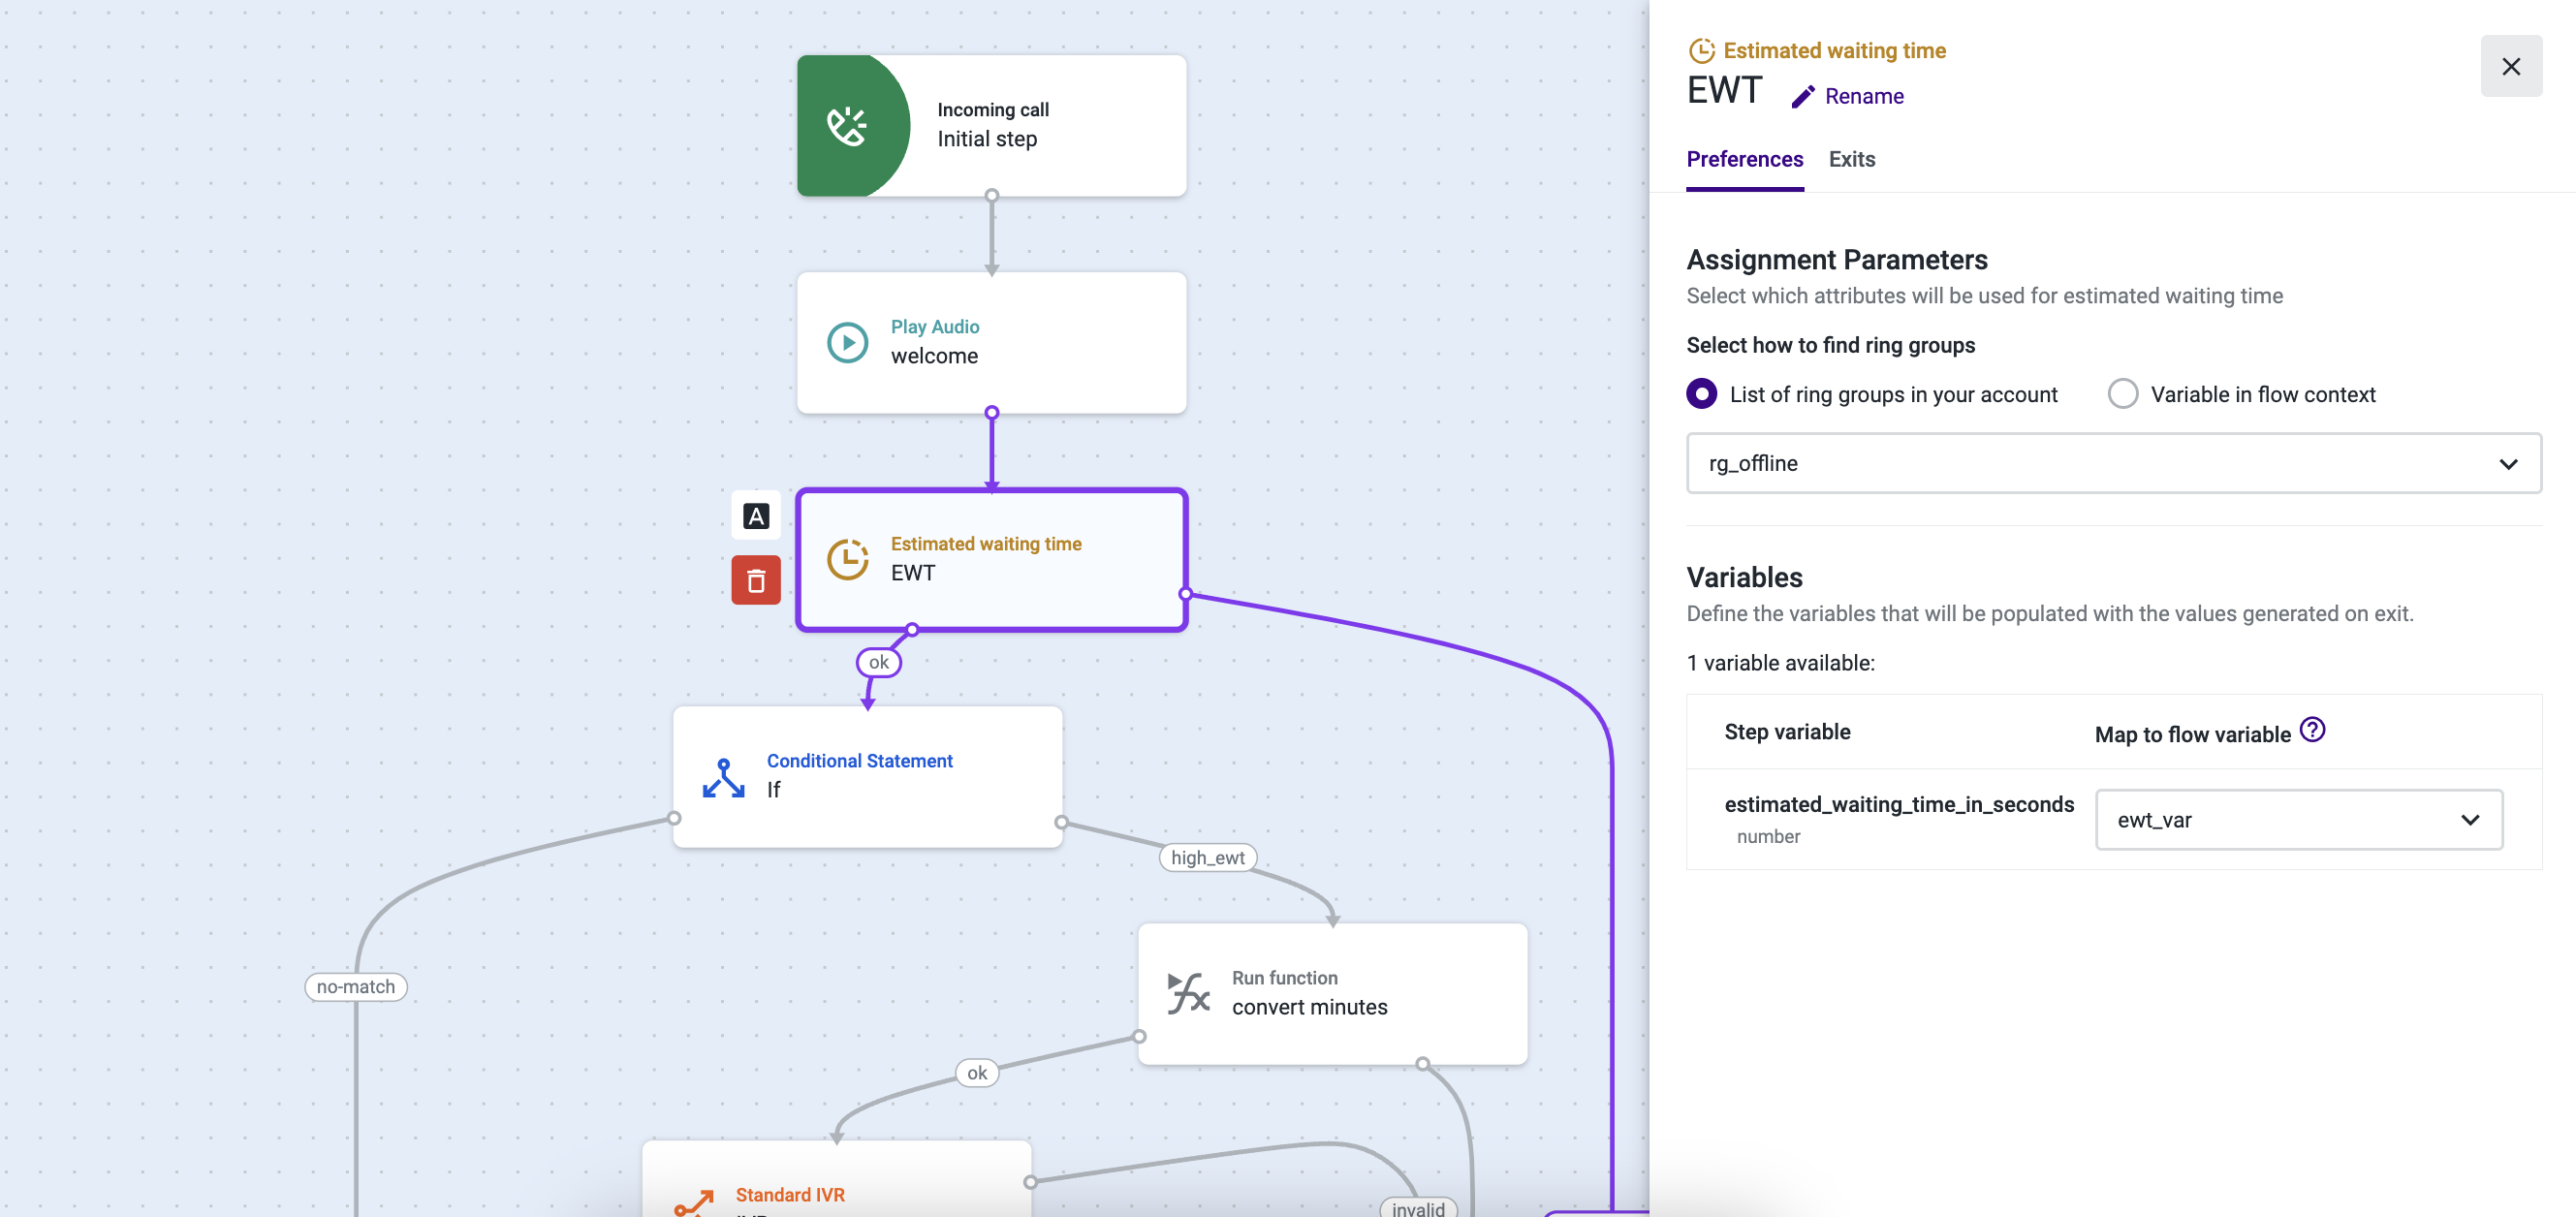
- Once within the EWT component that we will use to get the estimated waiting time for a specific ring group, select List of ring groups in your account and choose a ring group from the dropdown menu or create a new one. Then, select or create a variable. By using these options, the component will calculate the estimated waiting time based on factors such as the number of callers in the queue, average handling time, and agent availability, and it will store the estimated waiting time in seconds for the selected ring group within a flow variable.
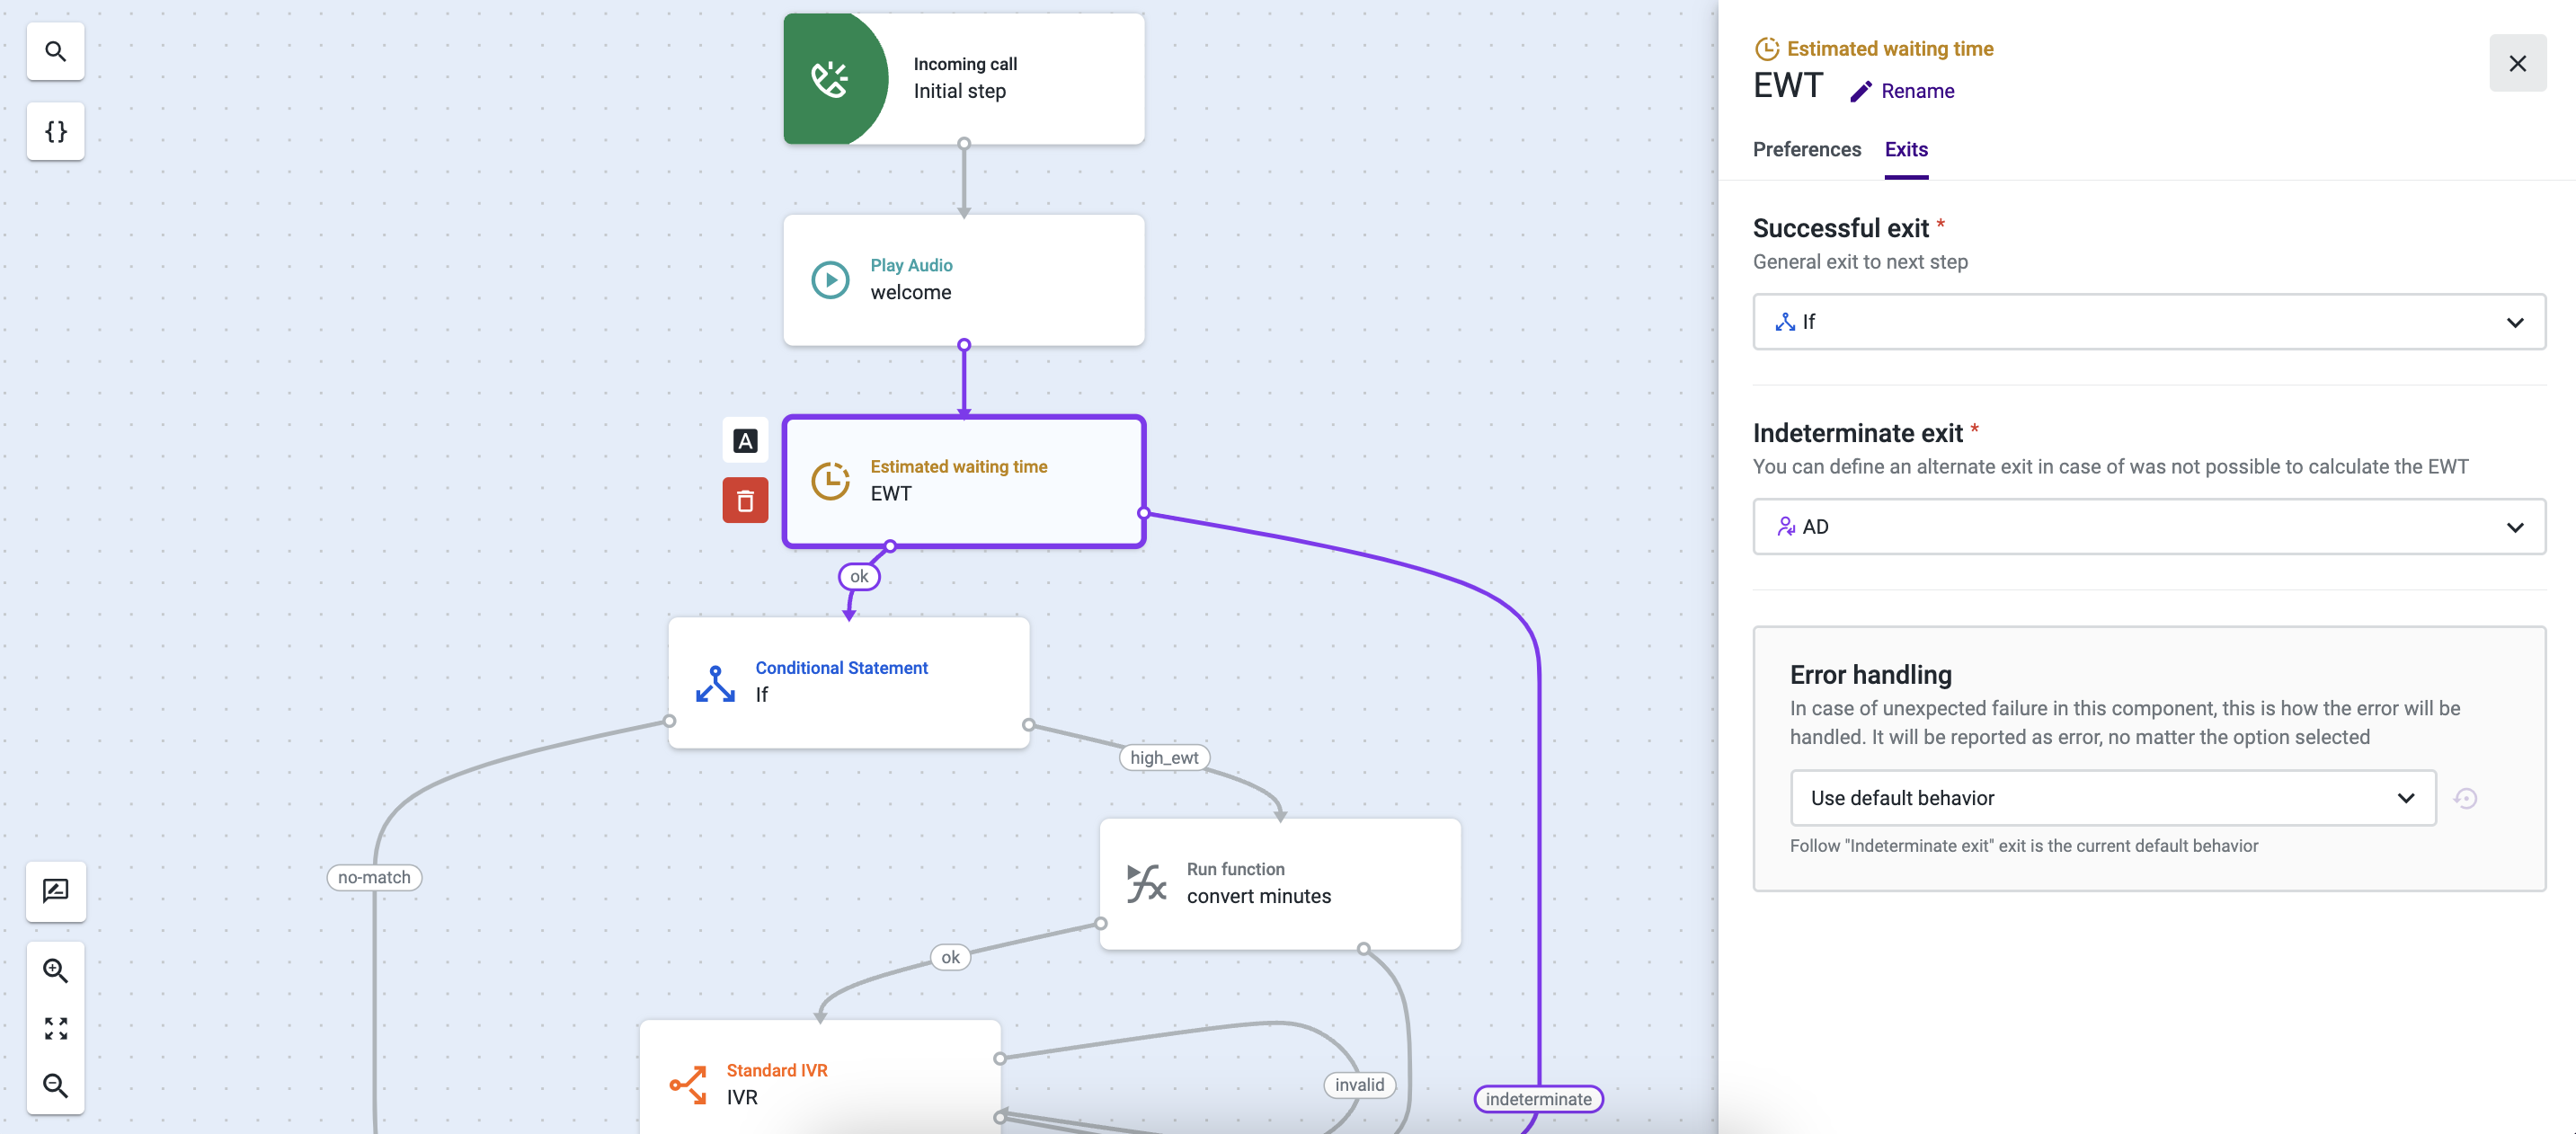
- In the “Exits” tab of the EWT component, define the “Successful exit” that will direct the call toward the next logical step, which in our example is the “Conditional Statement” component. Define an “Indeterminate exit” that the system should use if the component is unable to calculate the estimated waiting time. In our example, we’ve used an “Assignment and dial” component for this purpose.
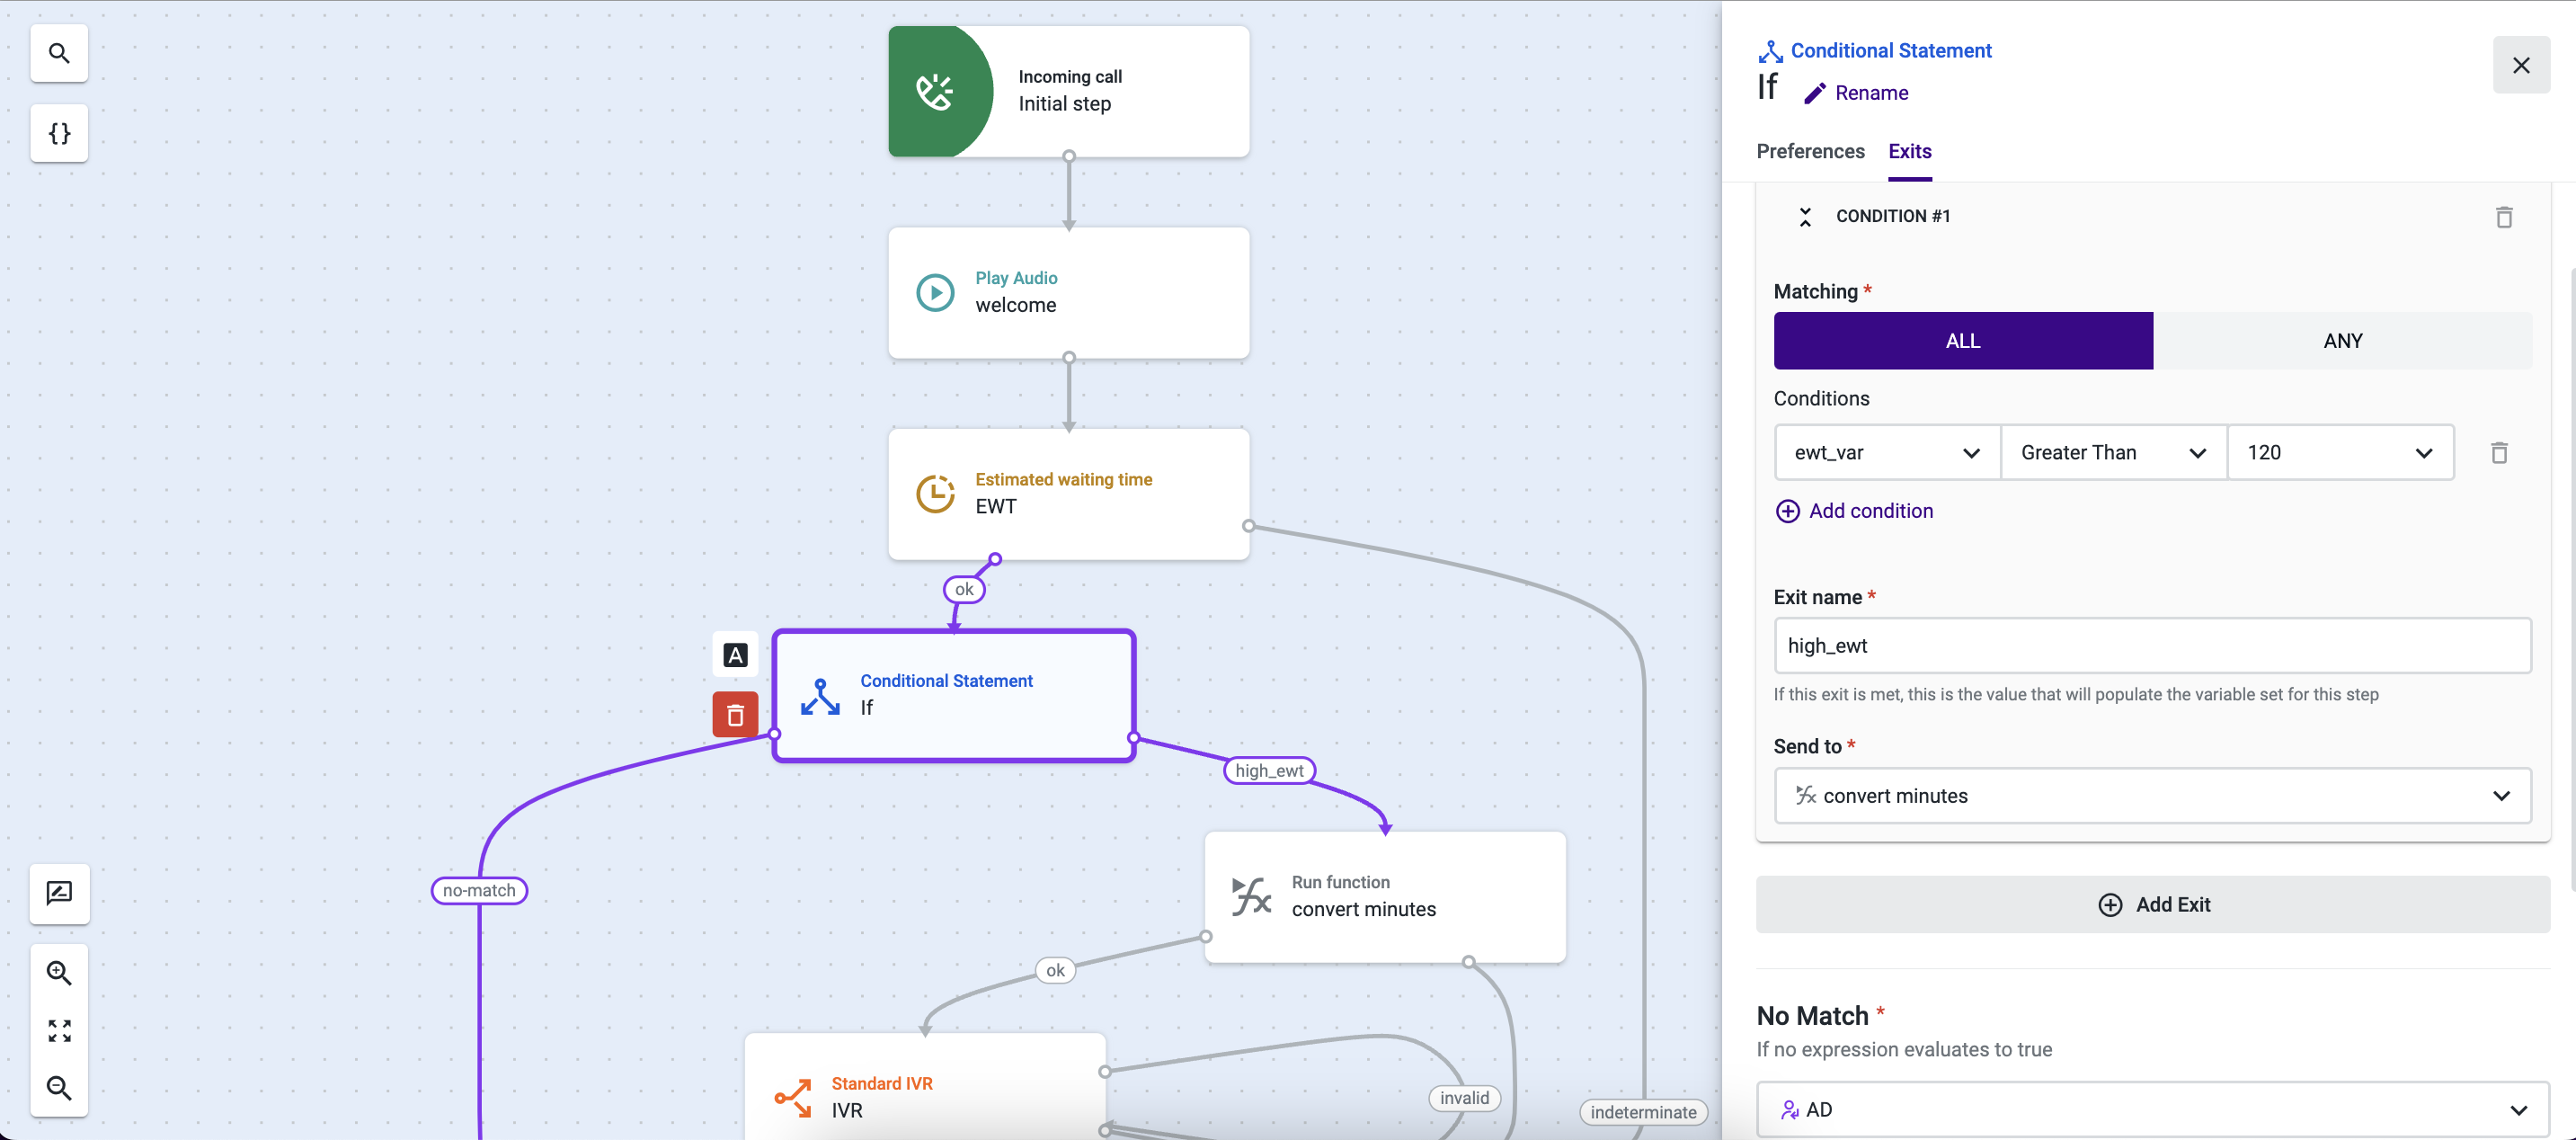
- In this use case, the “Exits” tab of the “Conditional Statement” component is being used to direct the call to a “Run function” component if the value retrieved from the EWT variable is greater than 120 seconds. As it enables callers to make decisions and follow different paths based on the EWT value, it is considered the “long waiting time path” for giving callers the option to continue waiting.
If the system does not find a match for this condition, the call will be routed to the “Assignment and dial” component added previously in point 4.
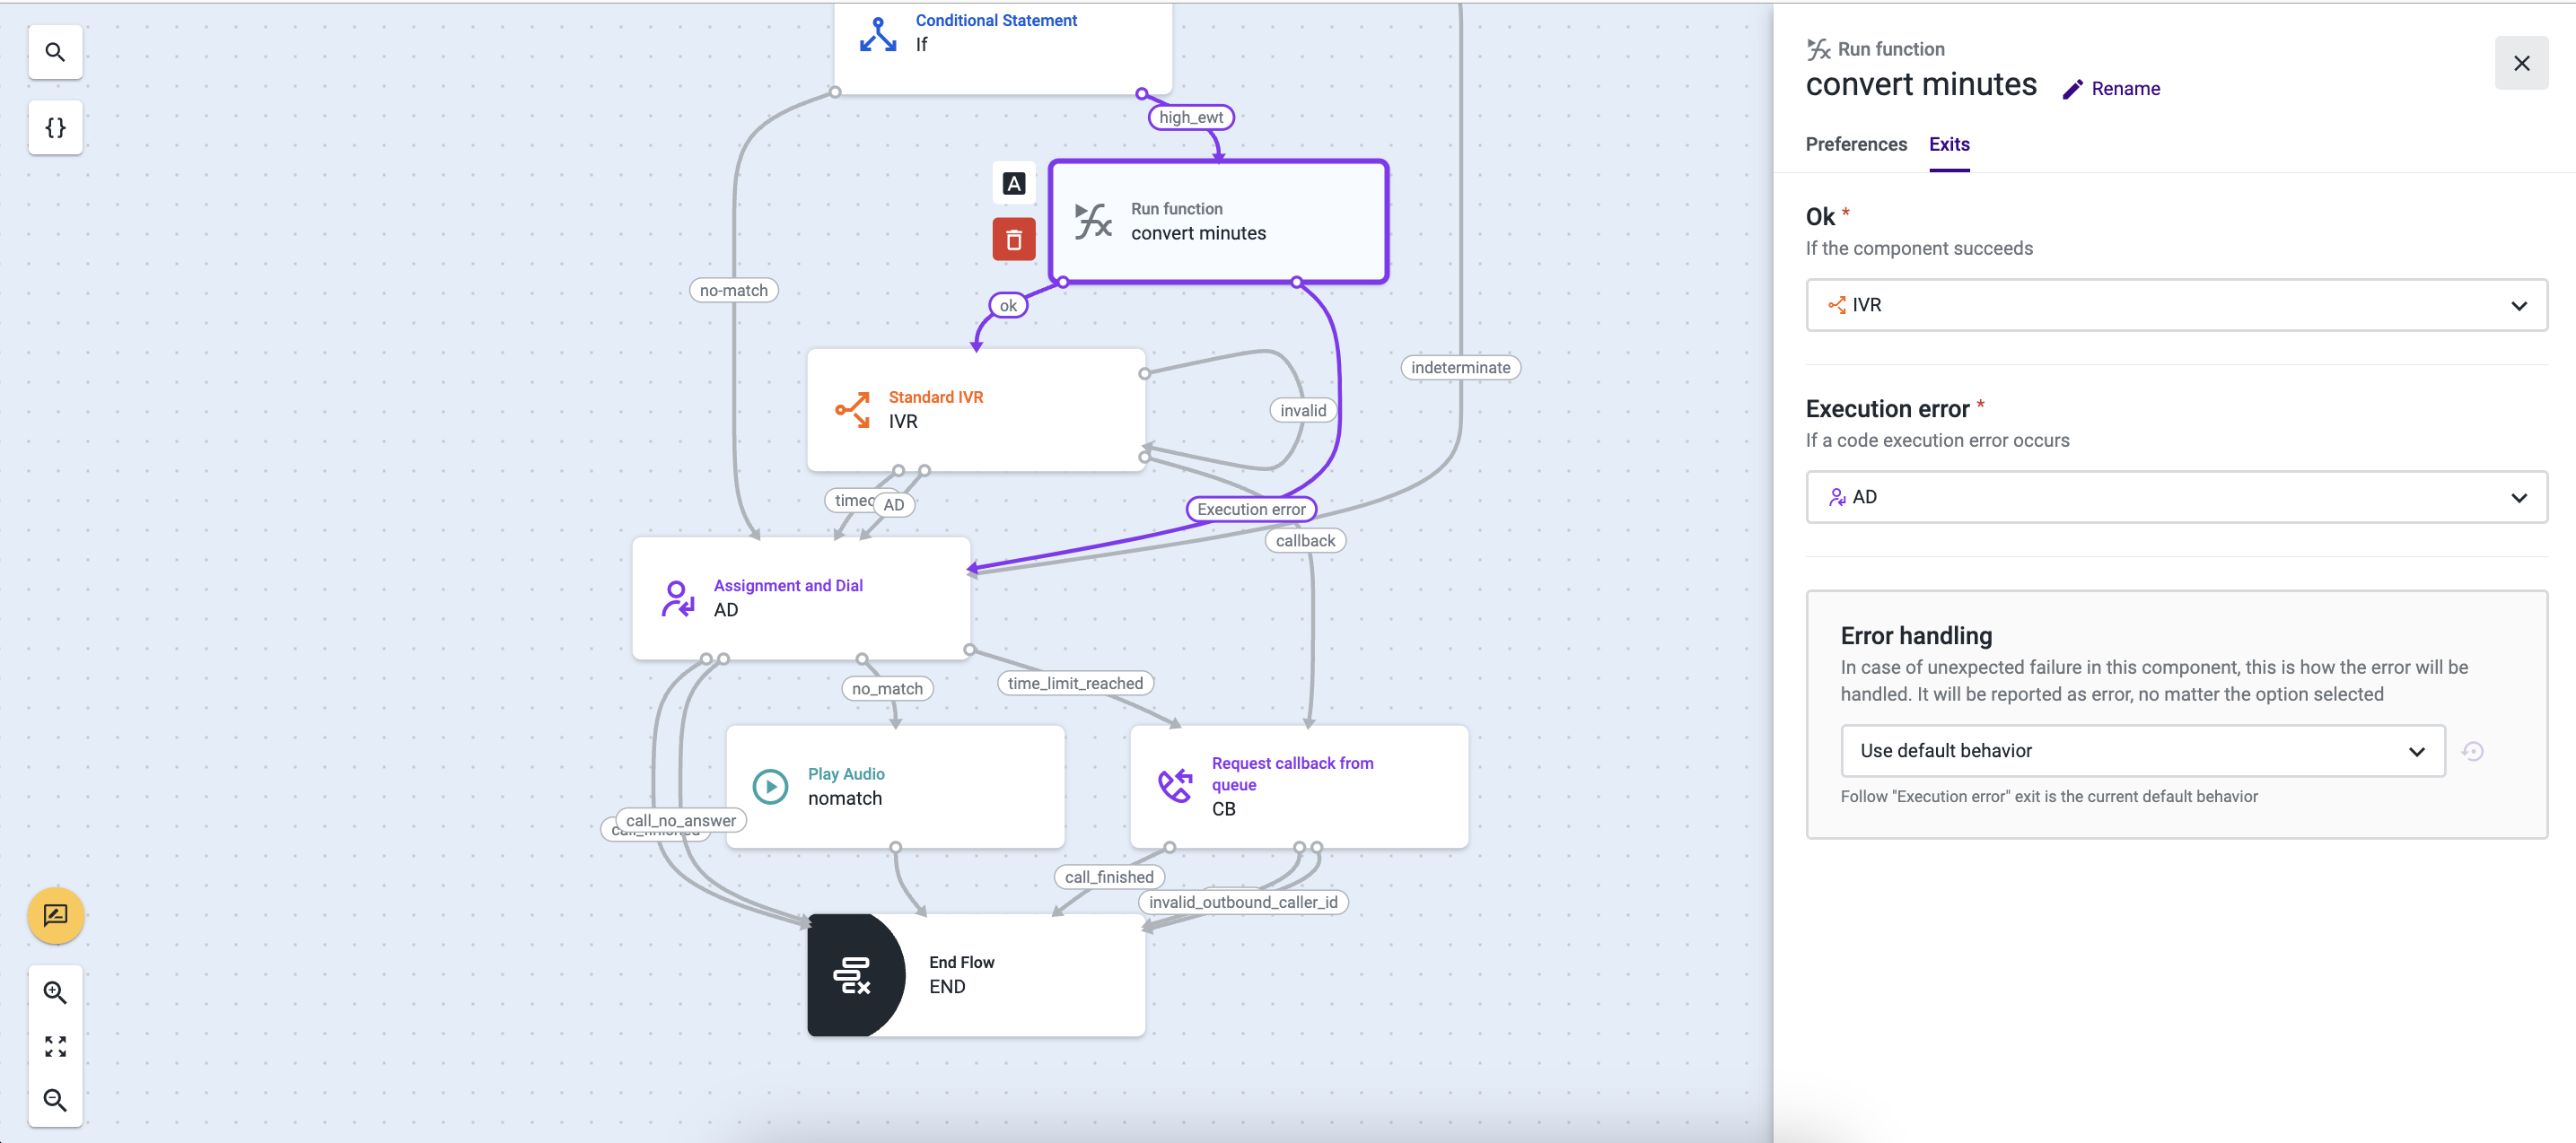
- In the “Preferences” tab of the “Run function” component, select or create a function that will enable you to convert the estimated waiting seconds to minutes. This information will be used to convey the message to the caller in the “Standard IVR” component that will be added as the “OK” exit on the “Run function” “Exits” tab. In this tab, define an exit for the “Execution error” situation. In our example, in case of a system execution error, we’ve decided to route the call to the previously created “Assignment and dial” component.

- In the “Standard IVR” component, configure the message that will be played to your callers, which should include the estimated waiting time information. The message should be clear, and concise and provide relevant instructions or options for the caller, namely regarding the key numbers to use if the intention is to remain waiting in queue or to request a callback after the estimated waiting time message is provided. In our example, we’ve defined “1” as the keypress to use to wait in the queue until the call is assigned to an agent through an “Assignment and dial” component and “2” to “Request callback from queue”.
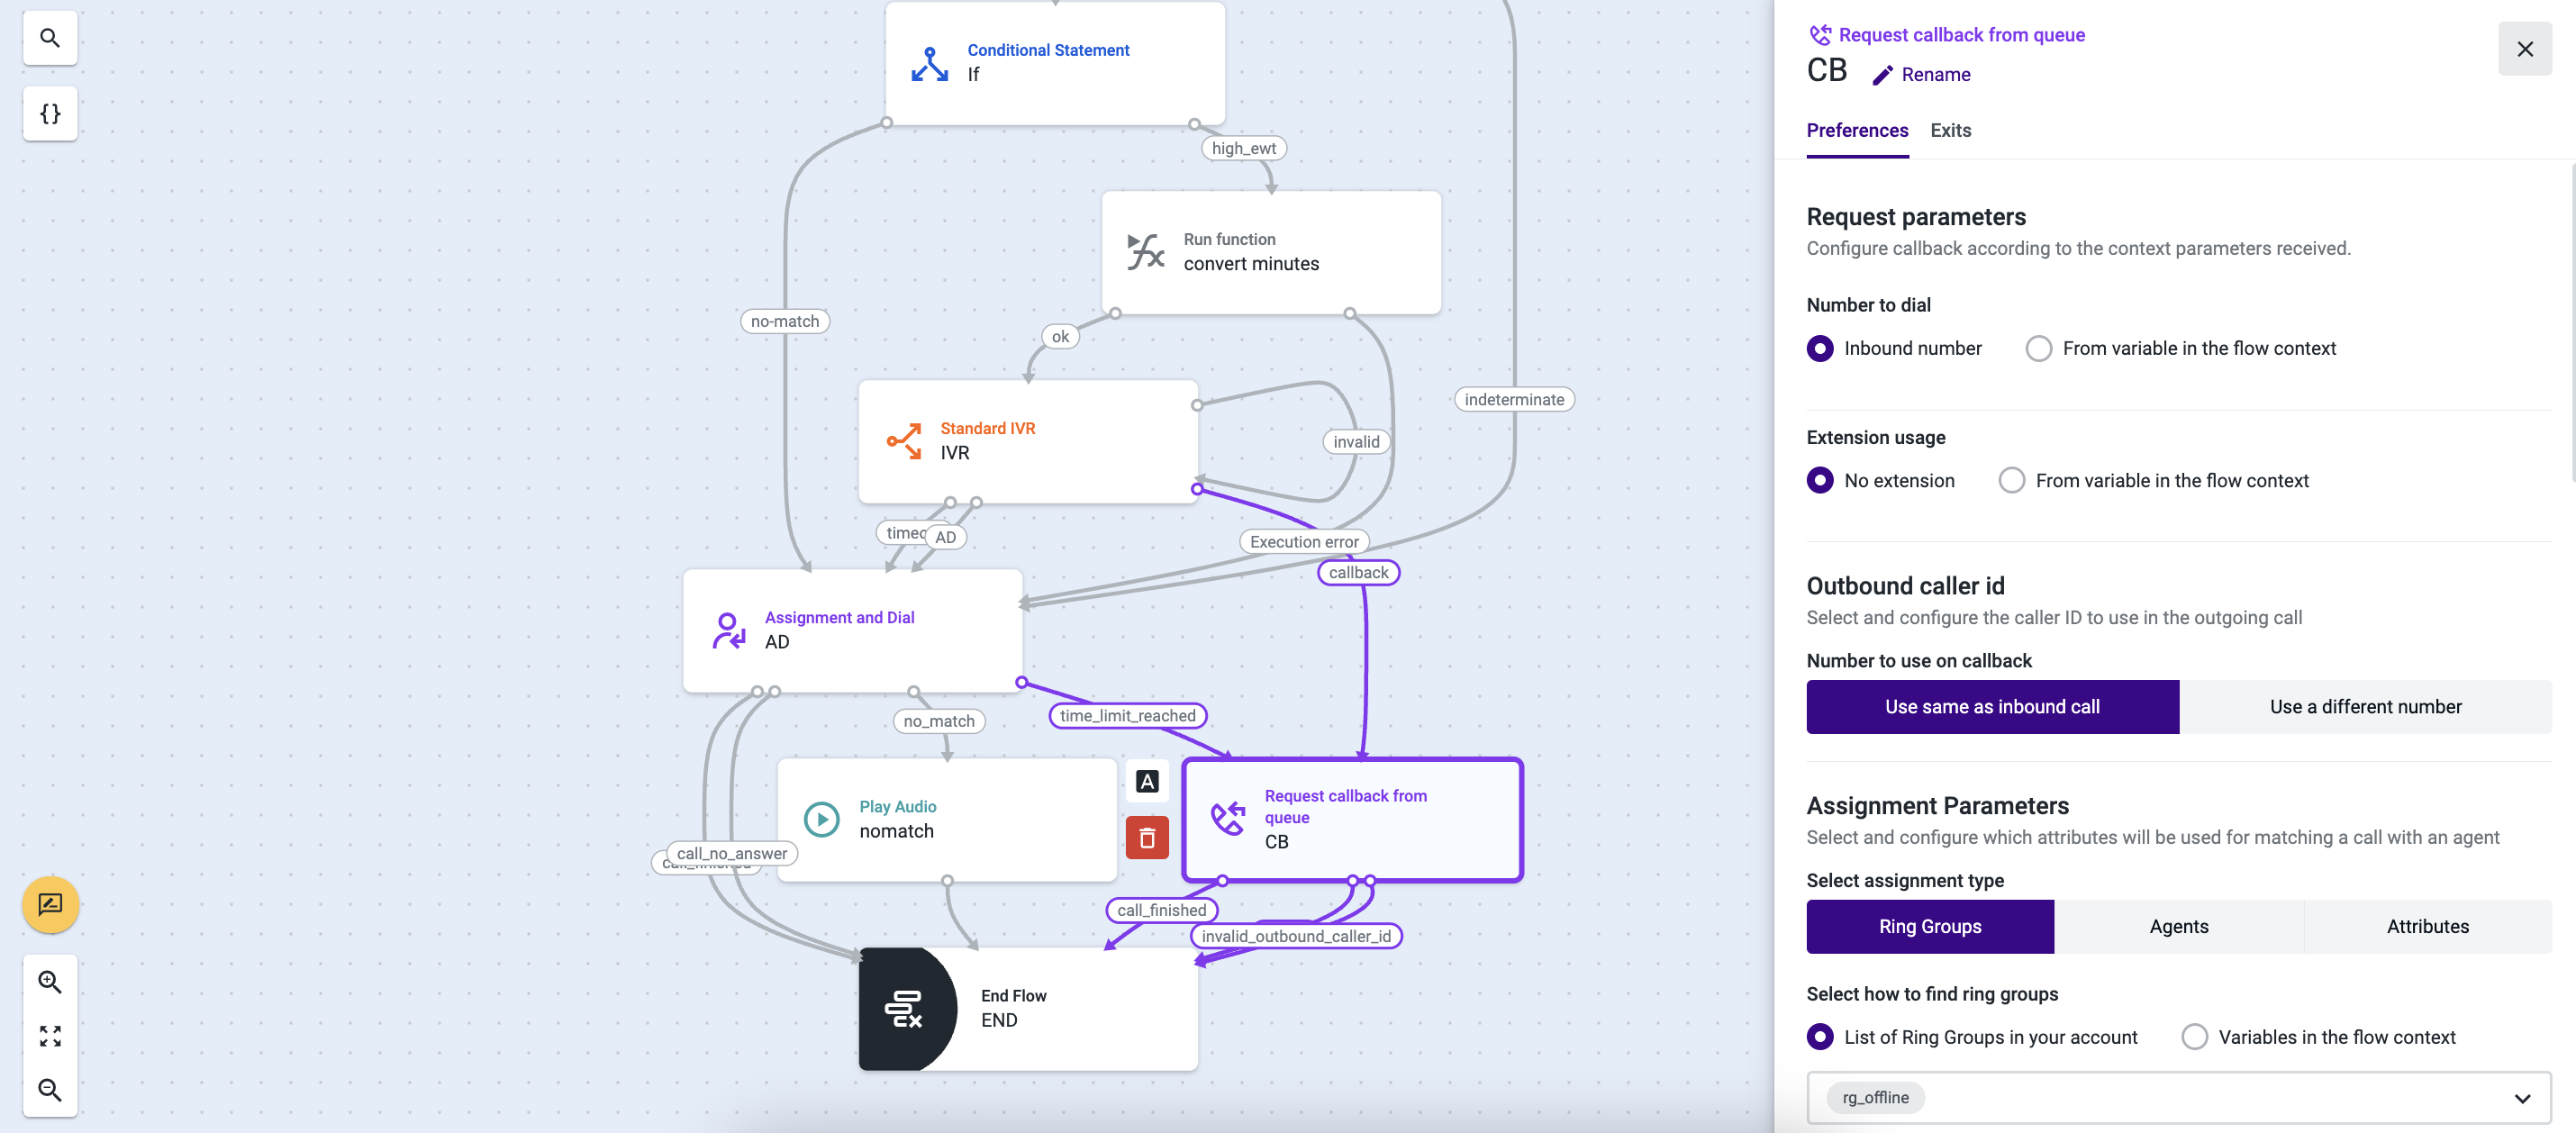
- The “Request callback from queue” component should capture the preferred caller ID, the destination number for the callback, and the intention to assign an interaction to ring groups or agents. In this tab, you can also define the priority for each assignment request that goes through each specific assignment step and configure audio messages for your callers in different situations. In case the conversation with an agent was successful, and the call has finished, the contact is calling with an anonymous or invalid caller ID, or if the selected caller ID is invalid, we have decided to end the call by defining an “End Flow” component to cover all the exits of the “Request callback from queue” component.
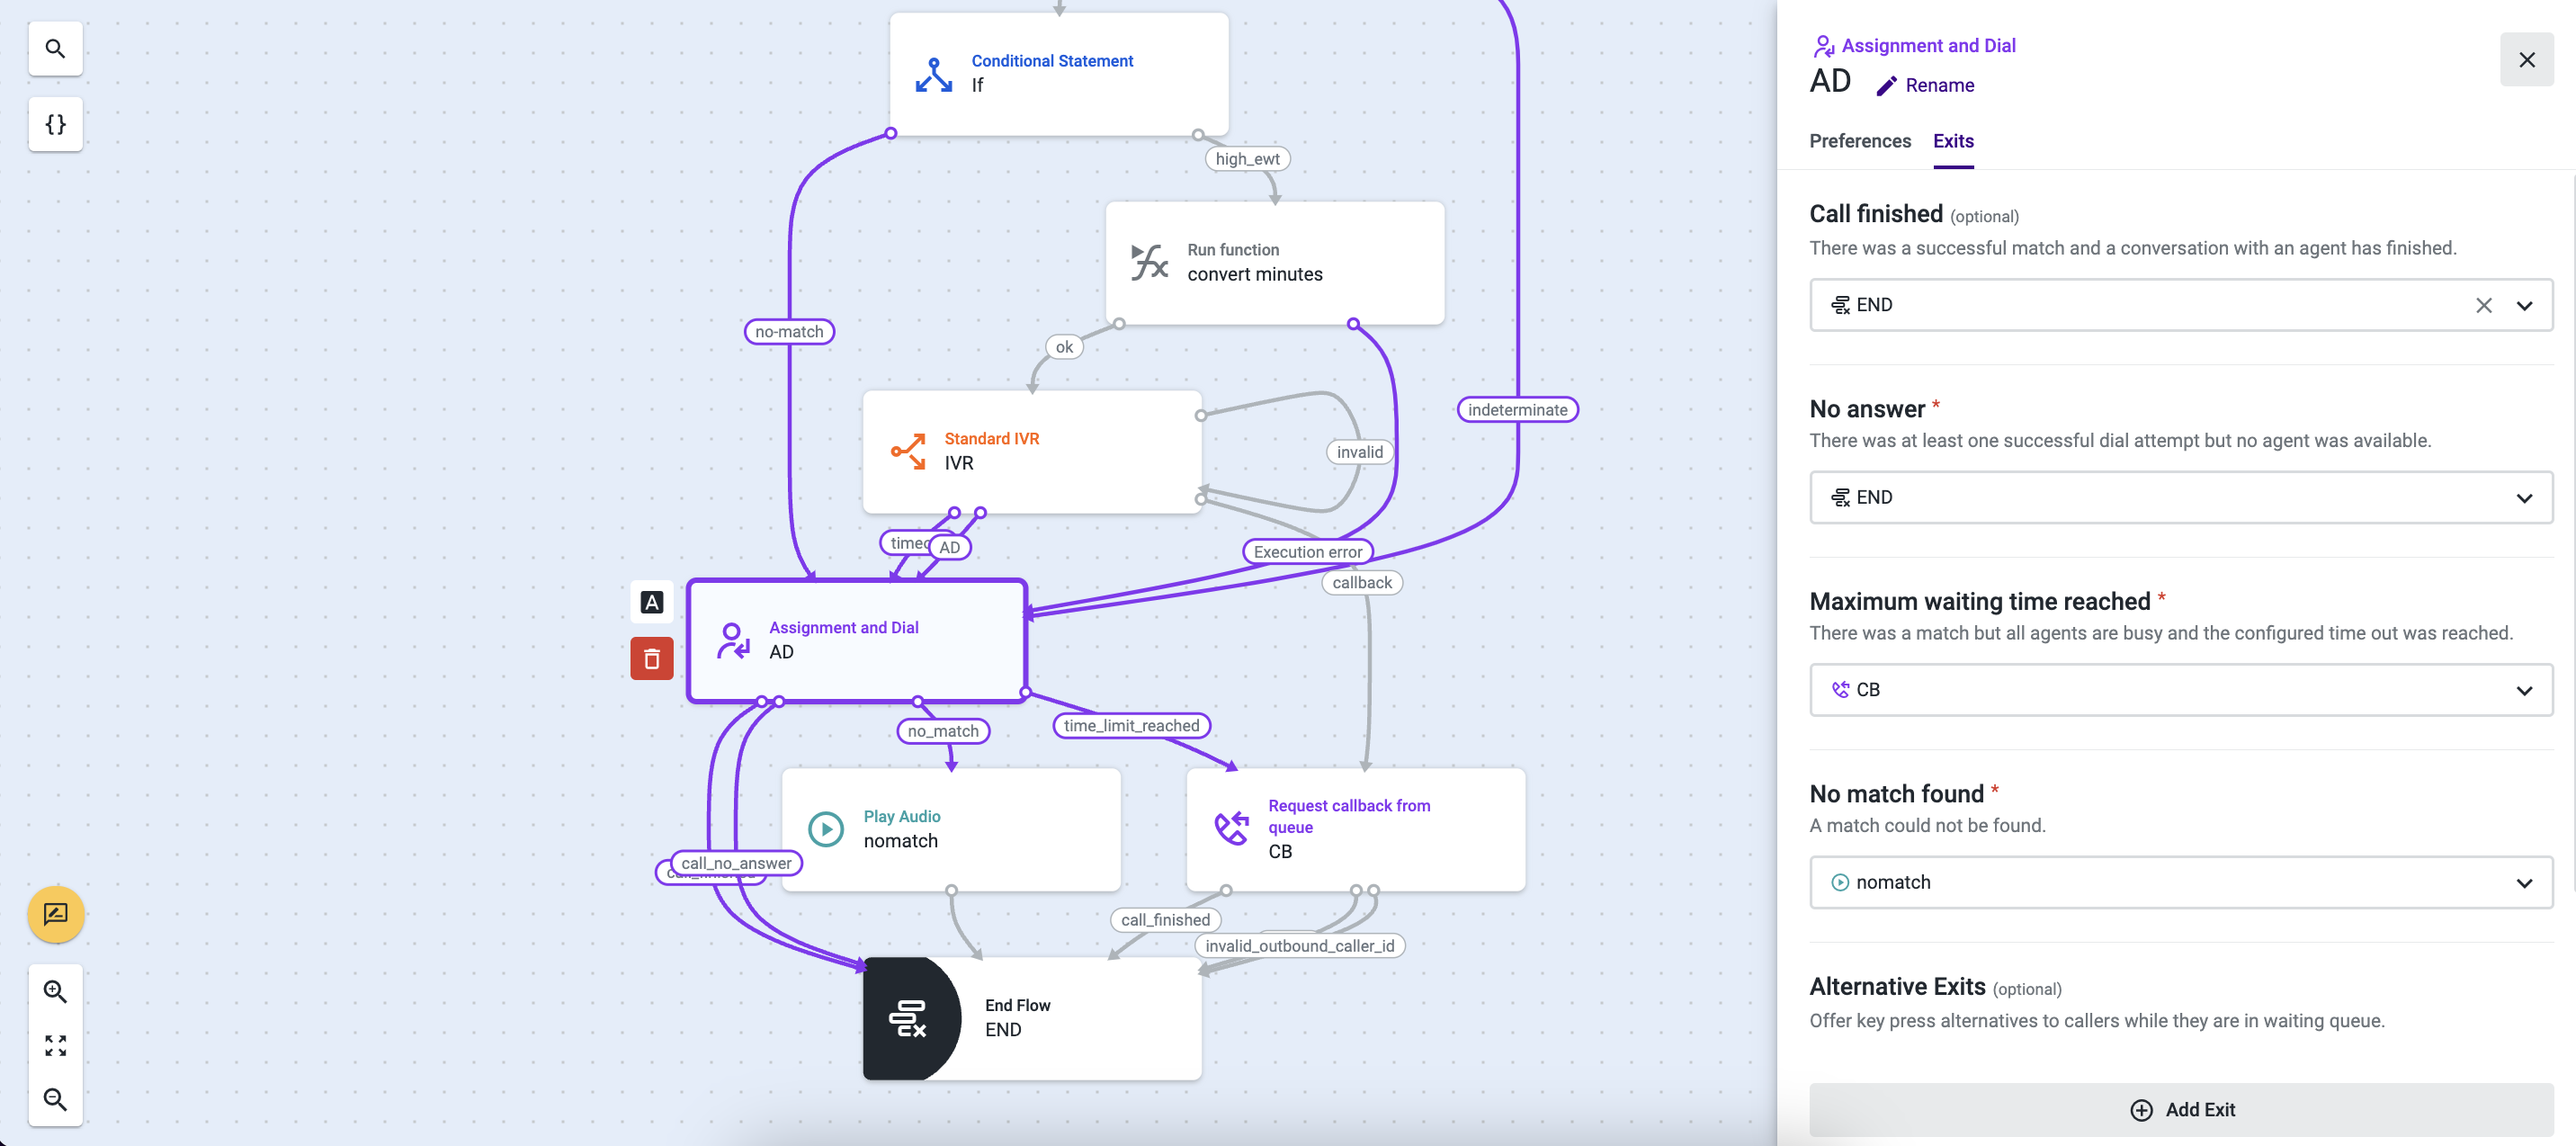
- Back to the “Assignment and dial” component, configure the assignment “Preferences” according to your needs. As for the exits, we’ve used the “Request callback from queue” component to forward the call in case the timeout is reached and a “Play Audio” component to inform the caller of the impossibility of taking the call. For every other situation, we’ve decided to end the call, by directing it to the “End Flow” component.
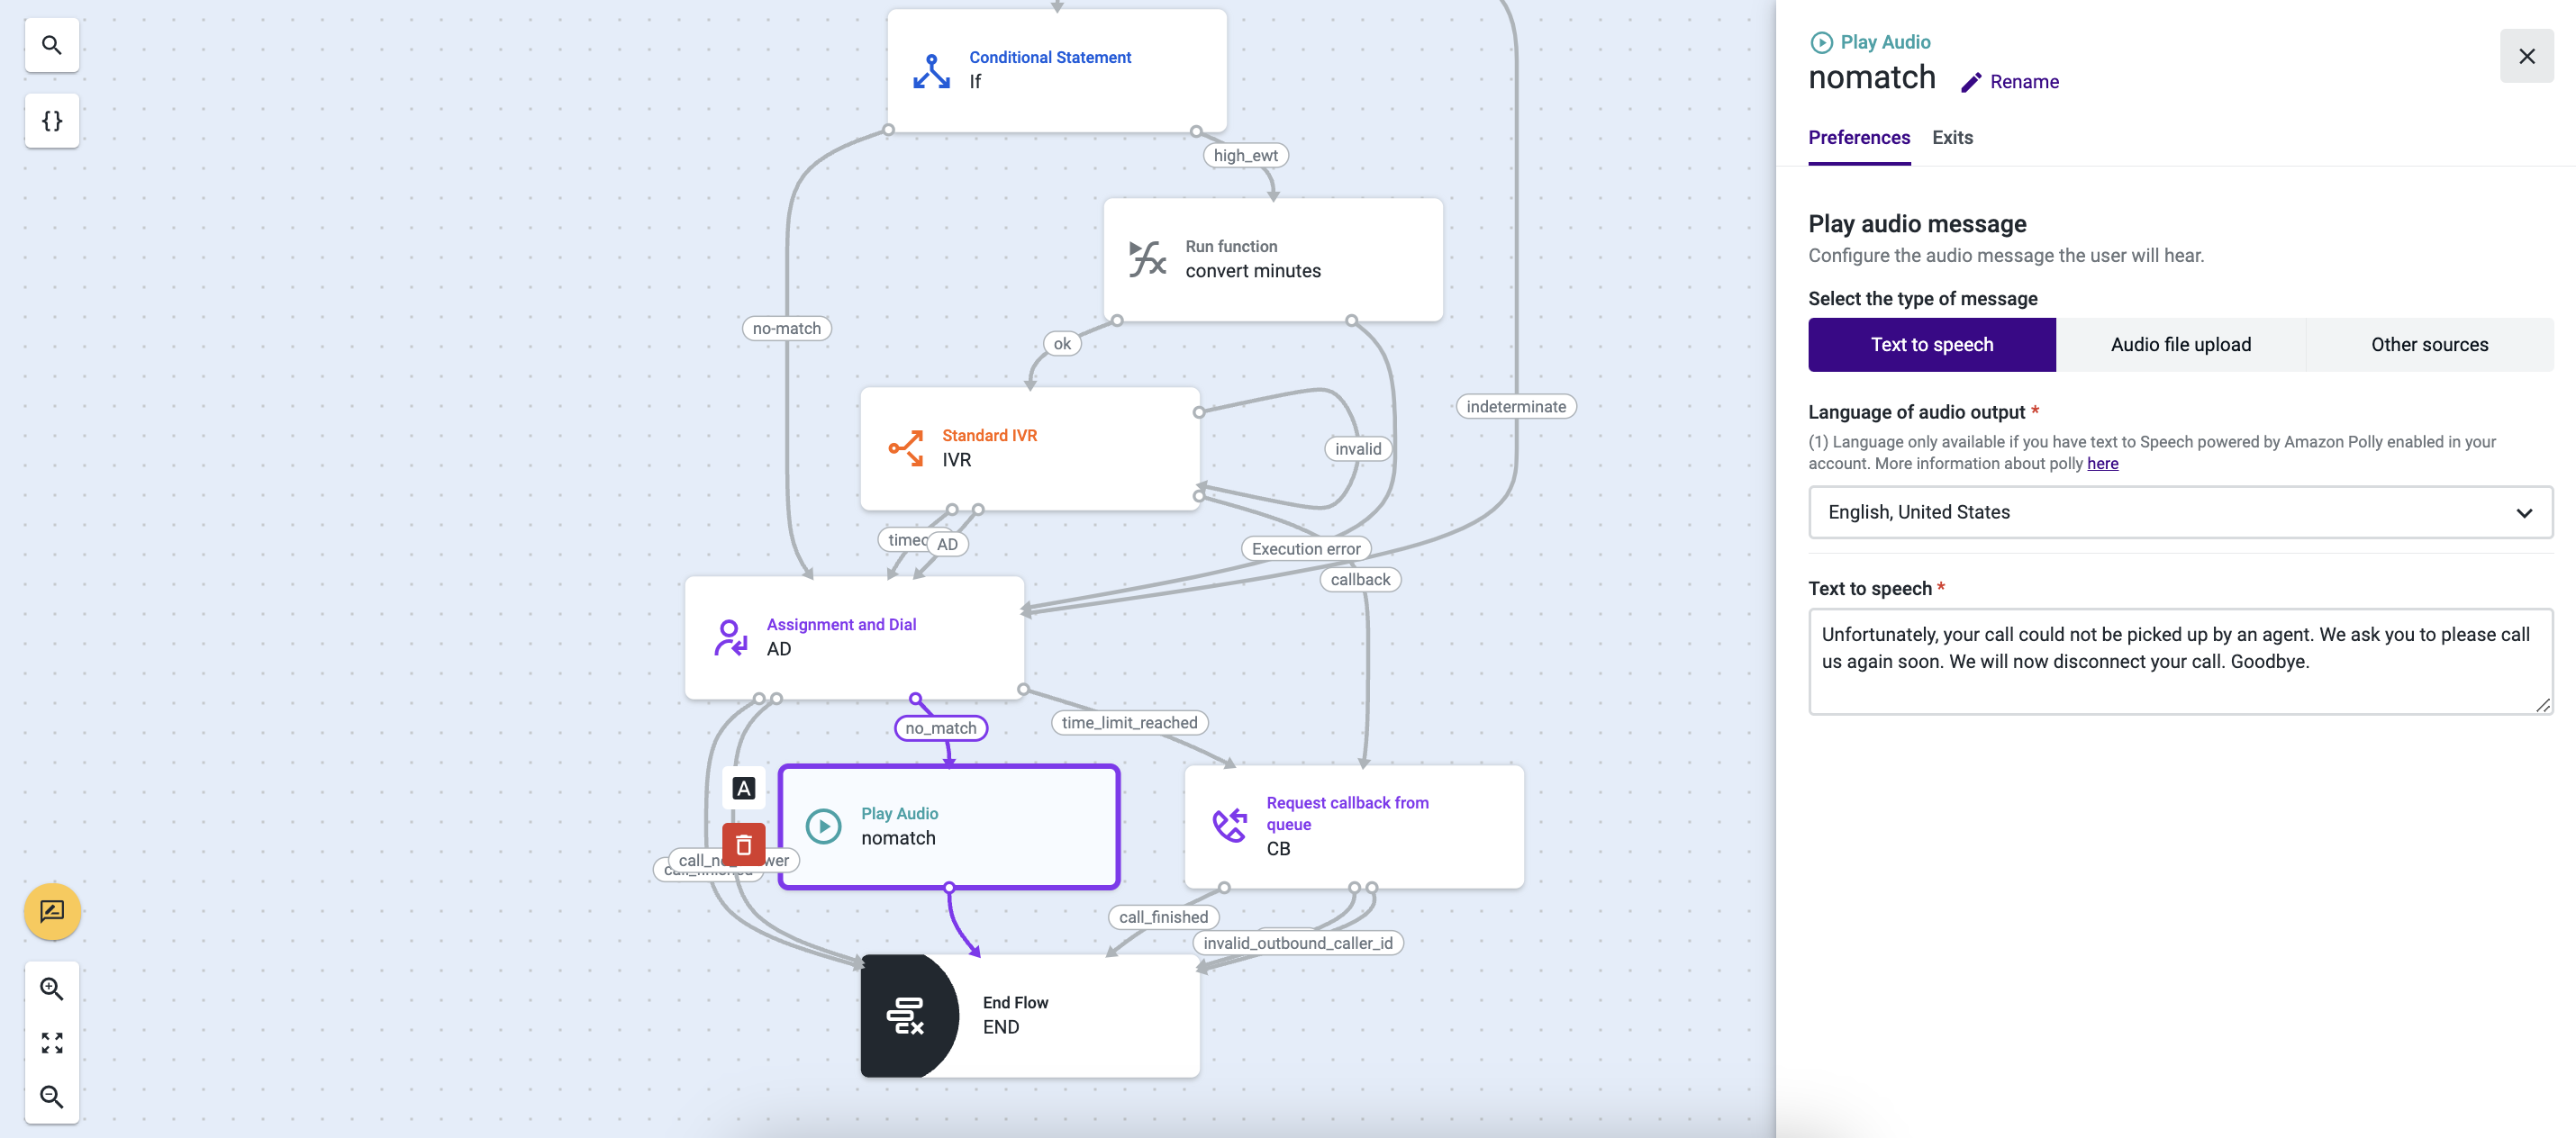
- Configure a message to play to the caller in case there was not a match between the preferences you have defined in the “Assignment and dial” component and the current call, making it not possible to be answered by an agent. Use the “Exits” tab to select the previously added “End Flow” component and terminate the call.
Updated 9 months ago