Number Capture for Request Callback from Queue
When your callers are waiting to be connected to an agent, you can give them the choice to request a Request Callback from Queue. This callback can be made to any phone number your callers choose, and not just the one they are calling you from. It’s as simple as adding and configuring the Input IVR and Request Callback from Queue components to your flow.
Please follow these instructions to configure a Request Callback from Queue to a custom number:
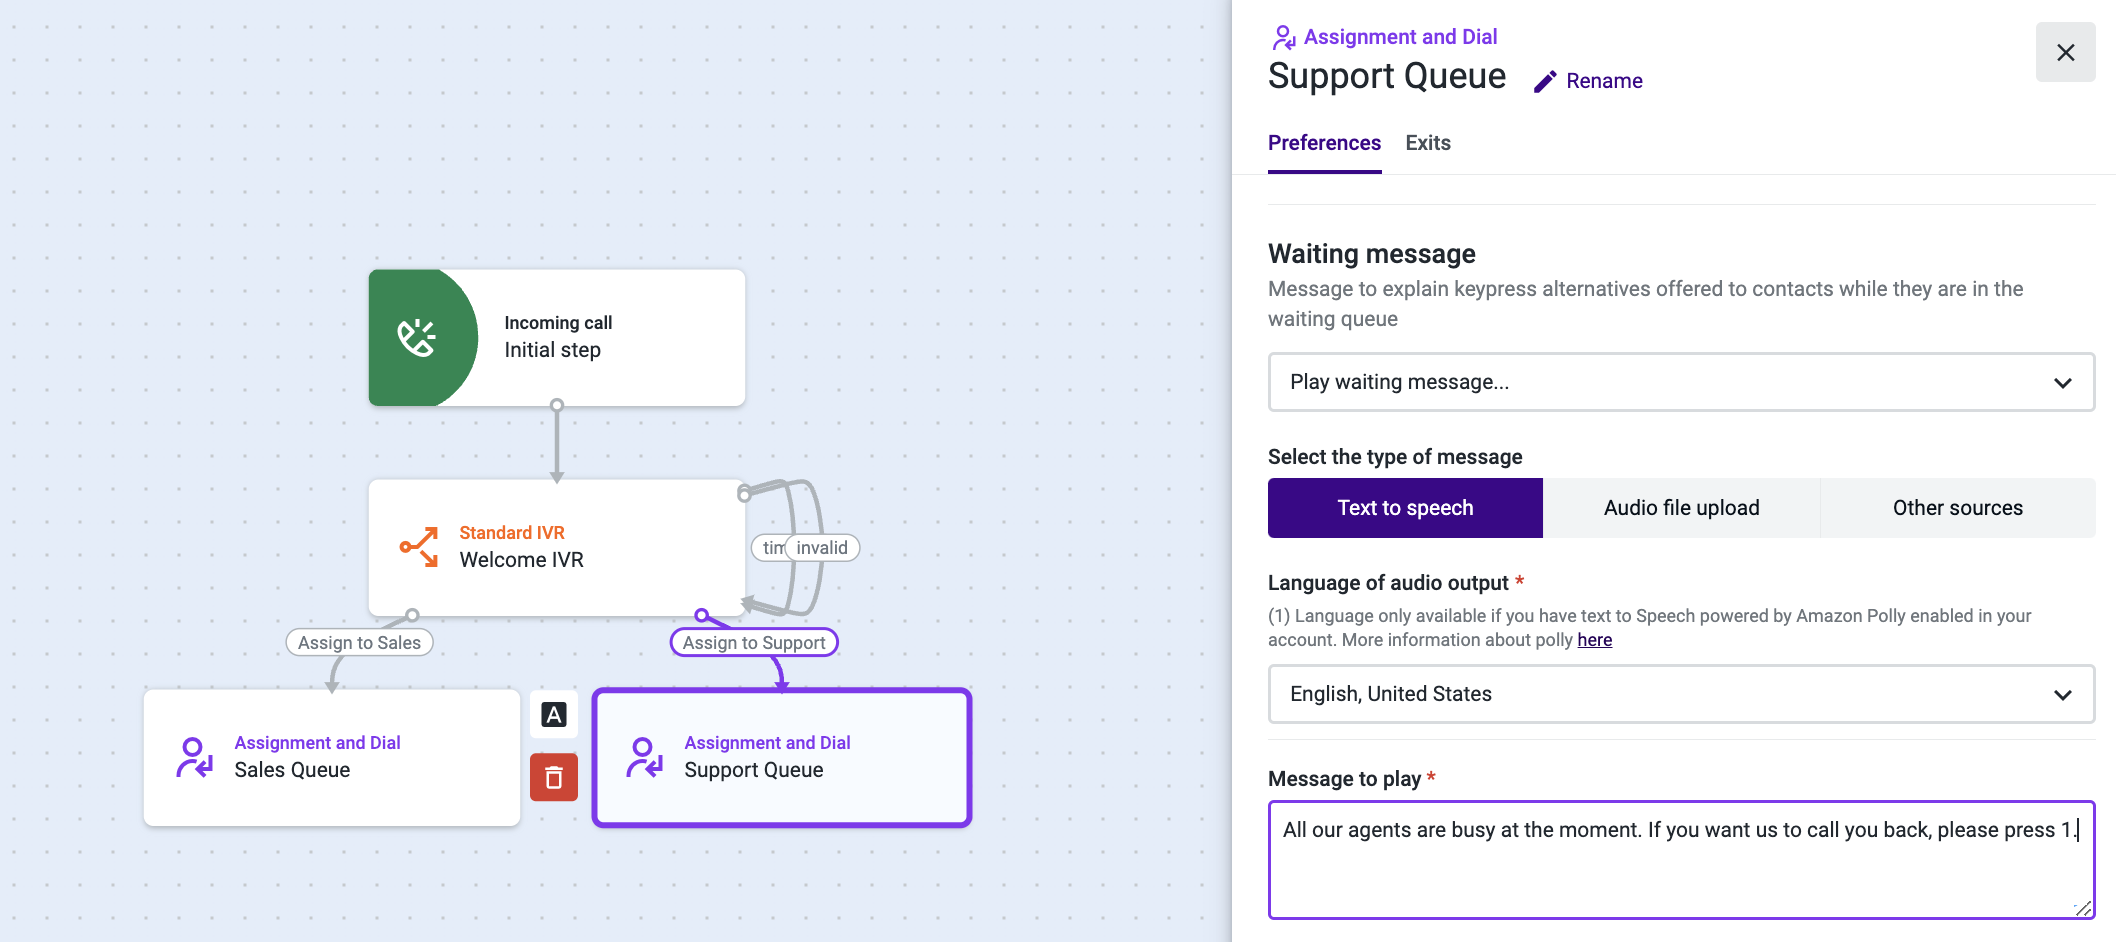
- Add the Assignment and dial (A&D) component to your flow.
- Open it and select the Preferences tab.
- Scroll down to the “Waiting message” section, click on the drop-down, and select "Play waiting message…" .
- Choose Text to speech as the message type, and select the language in which you will be writing your message.
- In the “Message to play” text field, type a message informing your callers they will be offered a callback. Example: “All our agents are busy at the moment. If you want us to call you back, please press 1.”
- Under “Delay in seconds”, insert the number of seconds callers will wait in the queue until they hear the waiting message for the first time. We’ve chosen 45 seconds for our example.
- Select "Repeat every..." and insert the number of seconds between each message repetition. We’ve added 30 seconds.
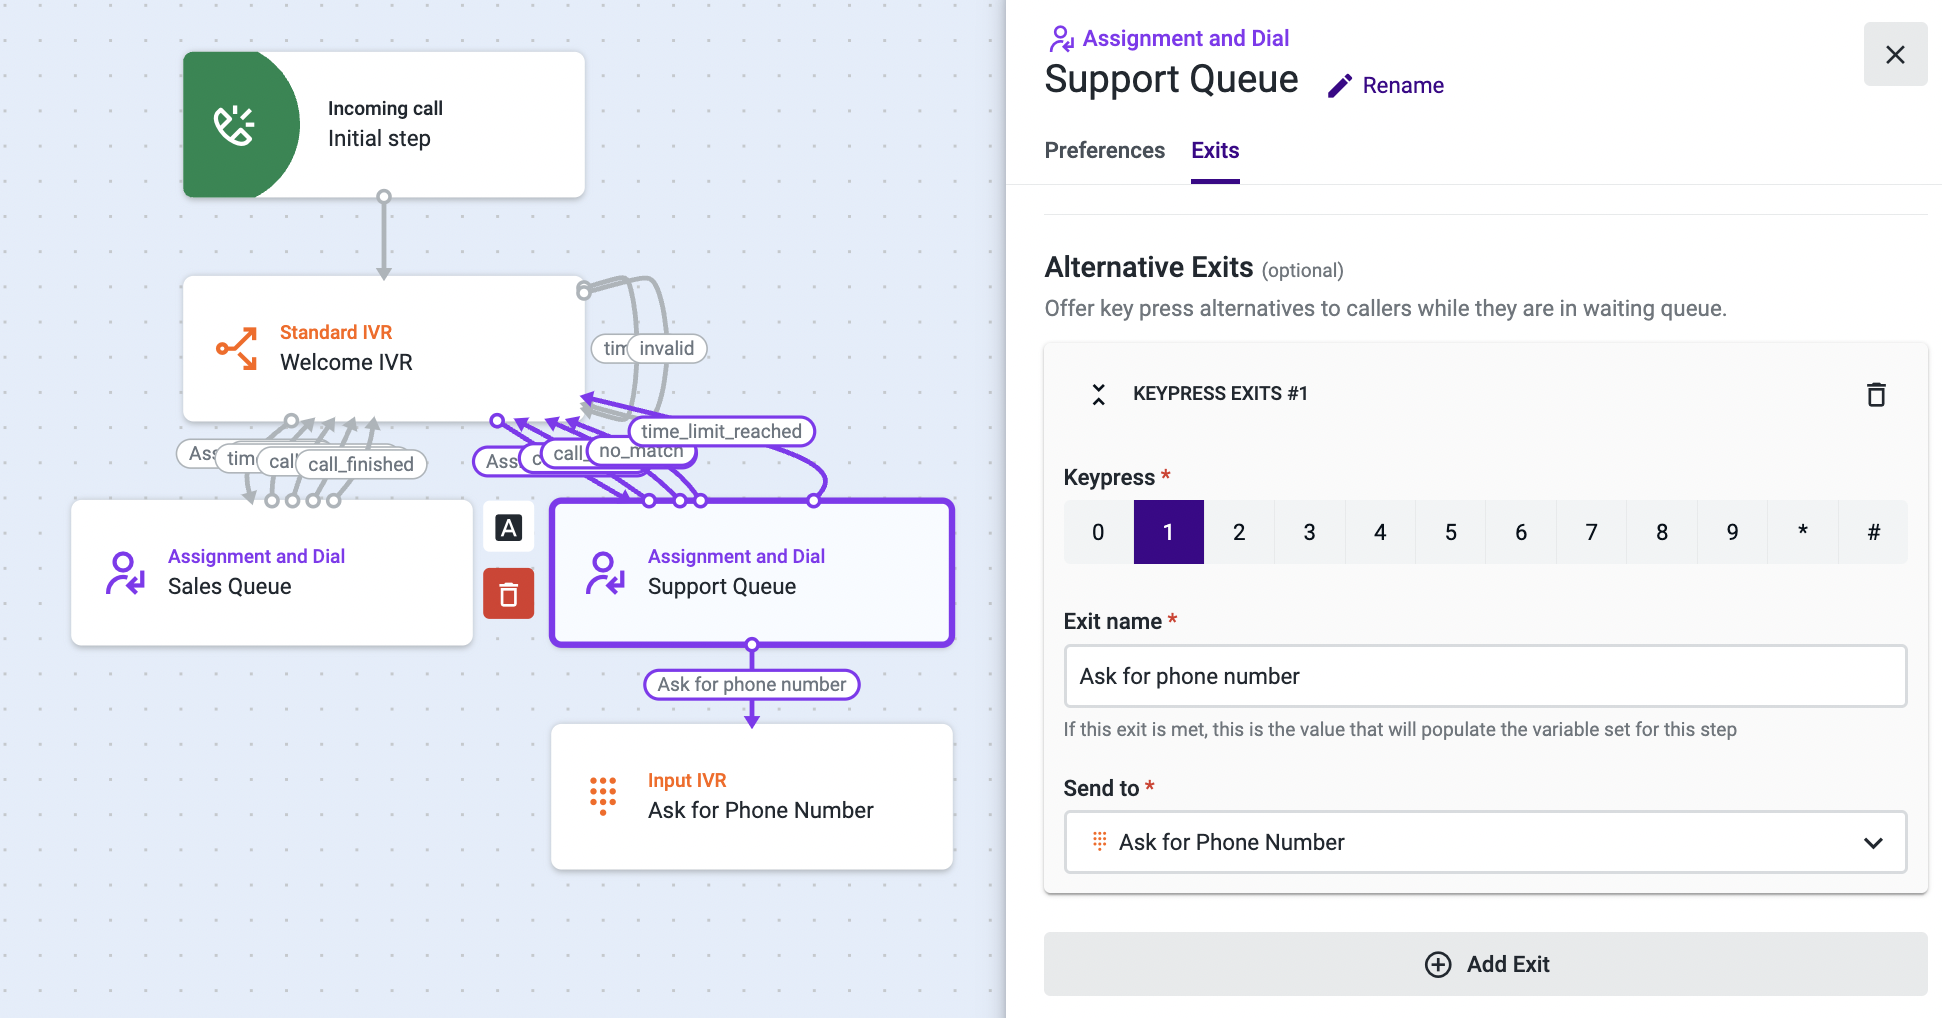
- Select the Exits tab and scroll down to “Alternative Exits”.
- Click on Add Exit.
- Choose 1 as the key that the caller should press to leave the queue.
- Name the Exit, and under “Send to”, add the Input IVR component.
- Complete the configuration of the A&D component.
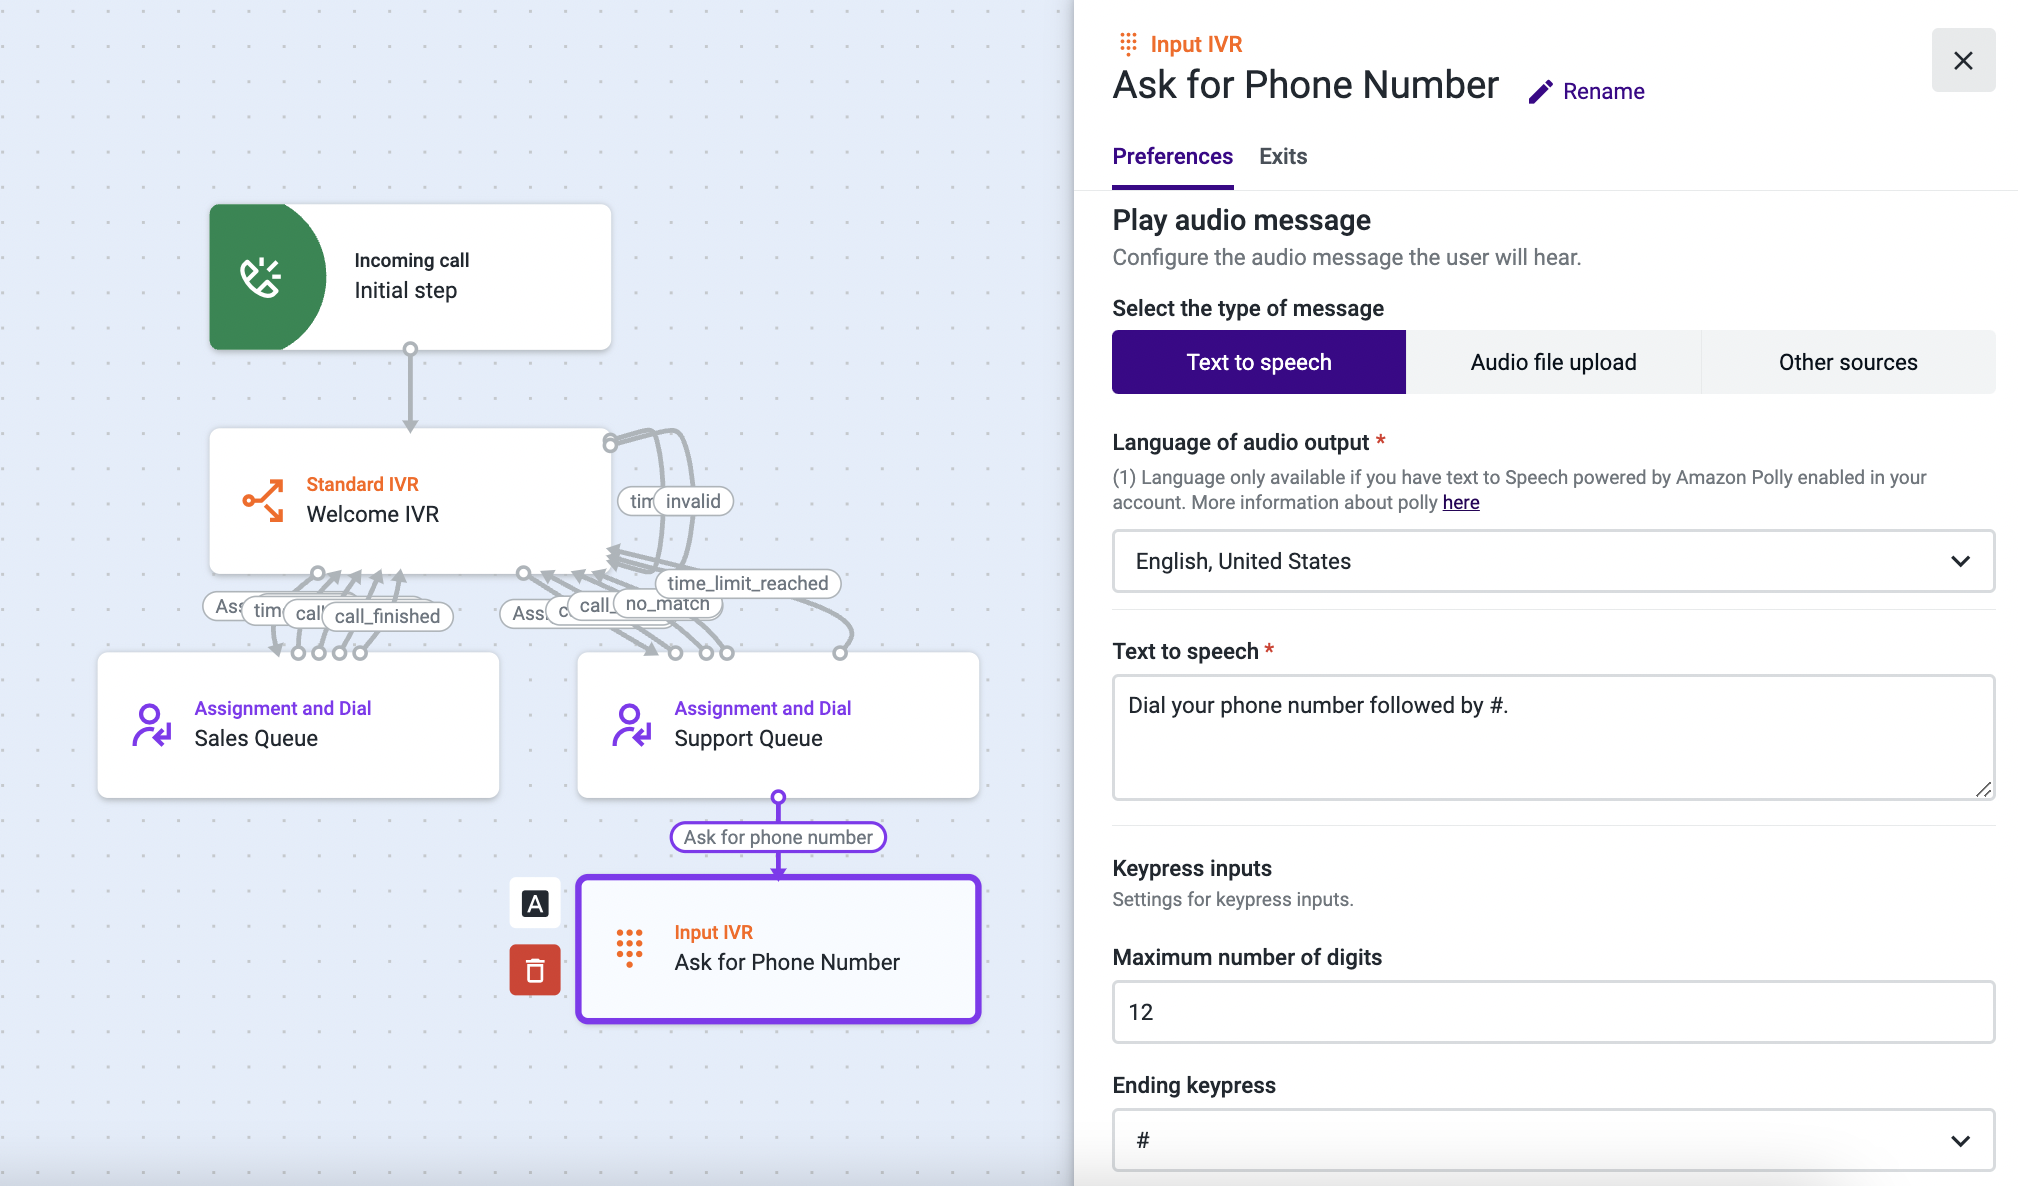
- Open the Input IVR component.
- Choose Text to speech as the message type, and select the same language you chose in step 4.
- Type a message informing your callers that they need to dial the phone number they want to be called back on. Example: “Dial your phone number followed by #.”
- In “Keypress inputs”, select the maximum of digits the caller can dial and an “Ending keypress”.
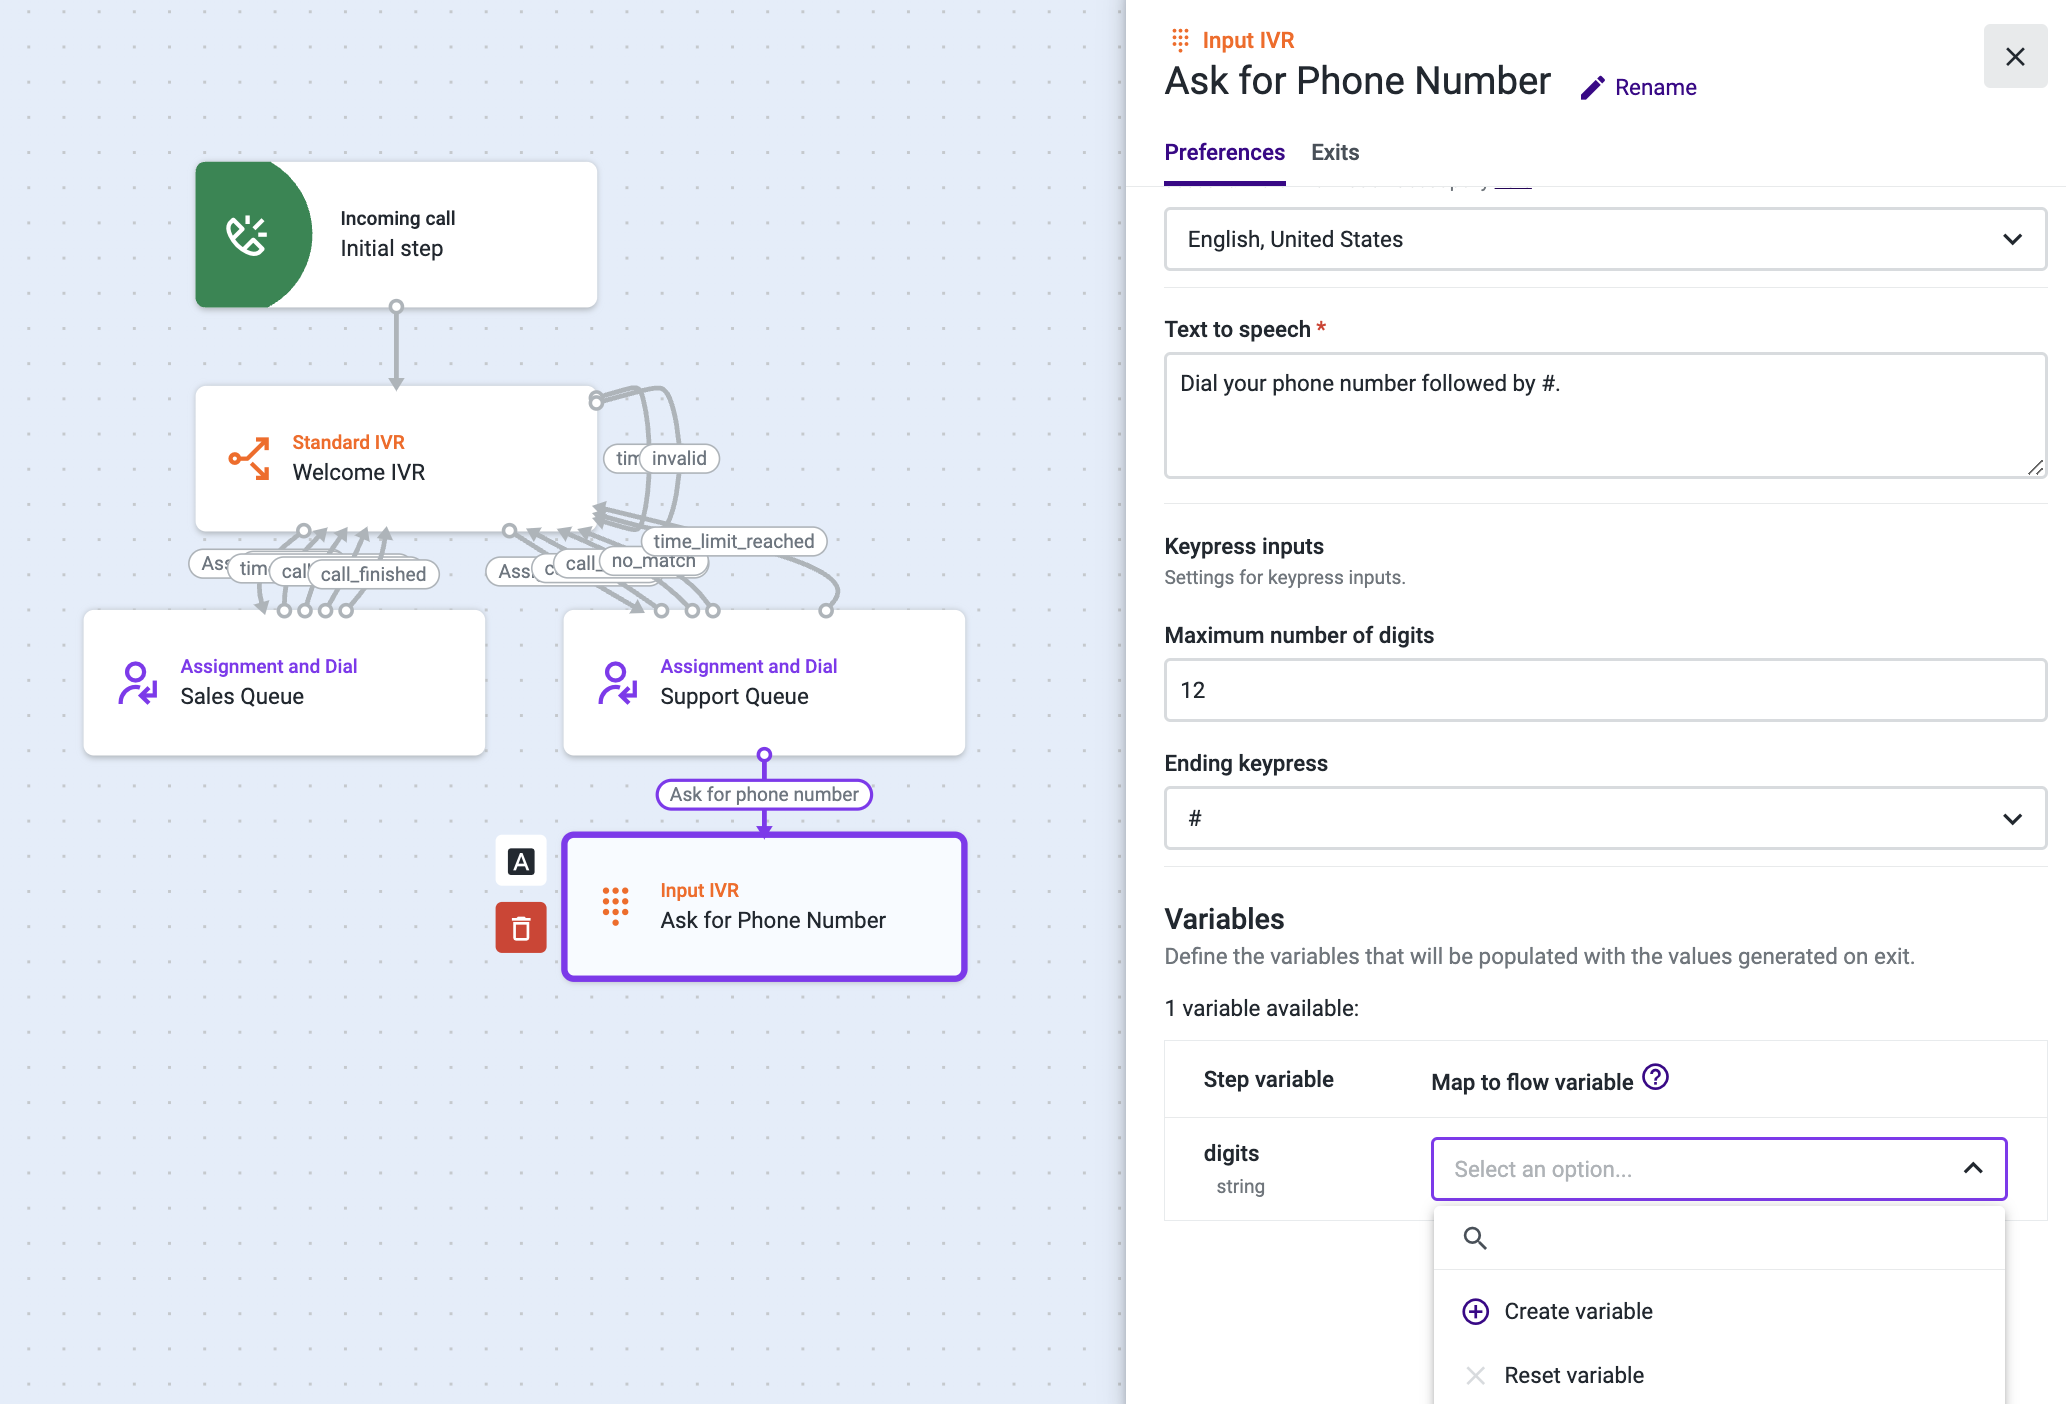
- In the “Variables” section, click on the drop-down and then on Create variable.
- Give a name to the variable. This variable will store the digits that your caller presses, so we’ve named it “phone_number”.
- Select the Exits tab. Under the “Ok” section, add a new step > Request Callback from Queue component.
- In the “Timeout” section, add the number of seconds the system will wait for the caller’s input before it times out, and send the call to the Input IVR again if that happens.
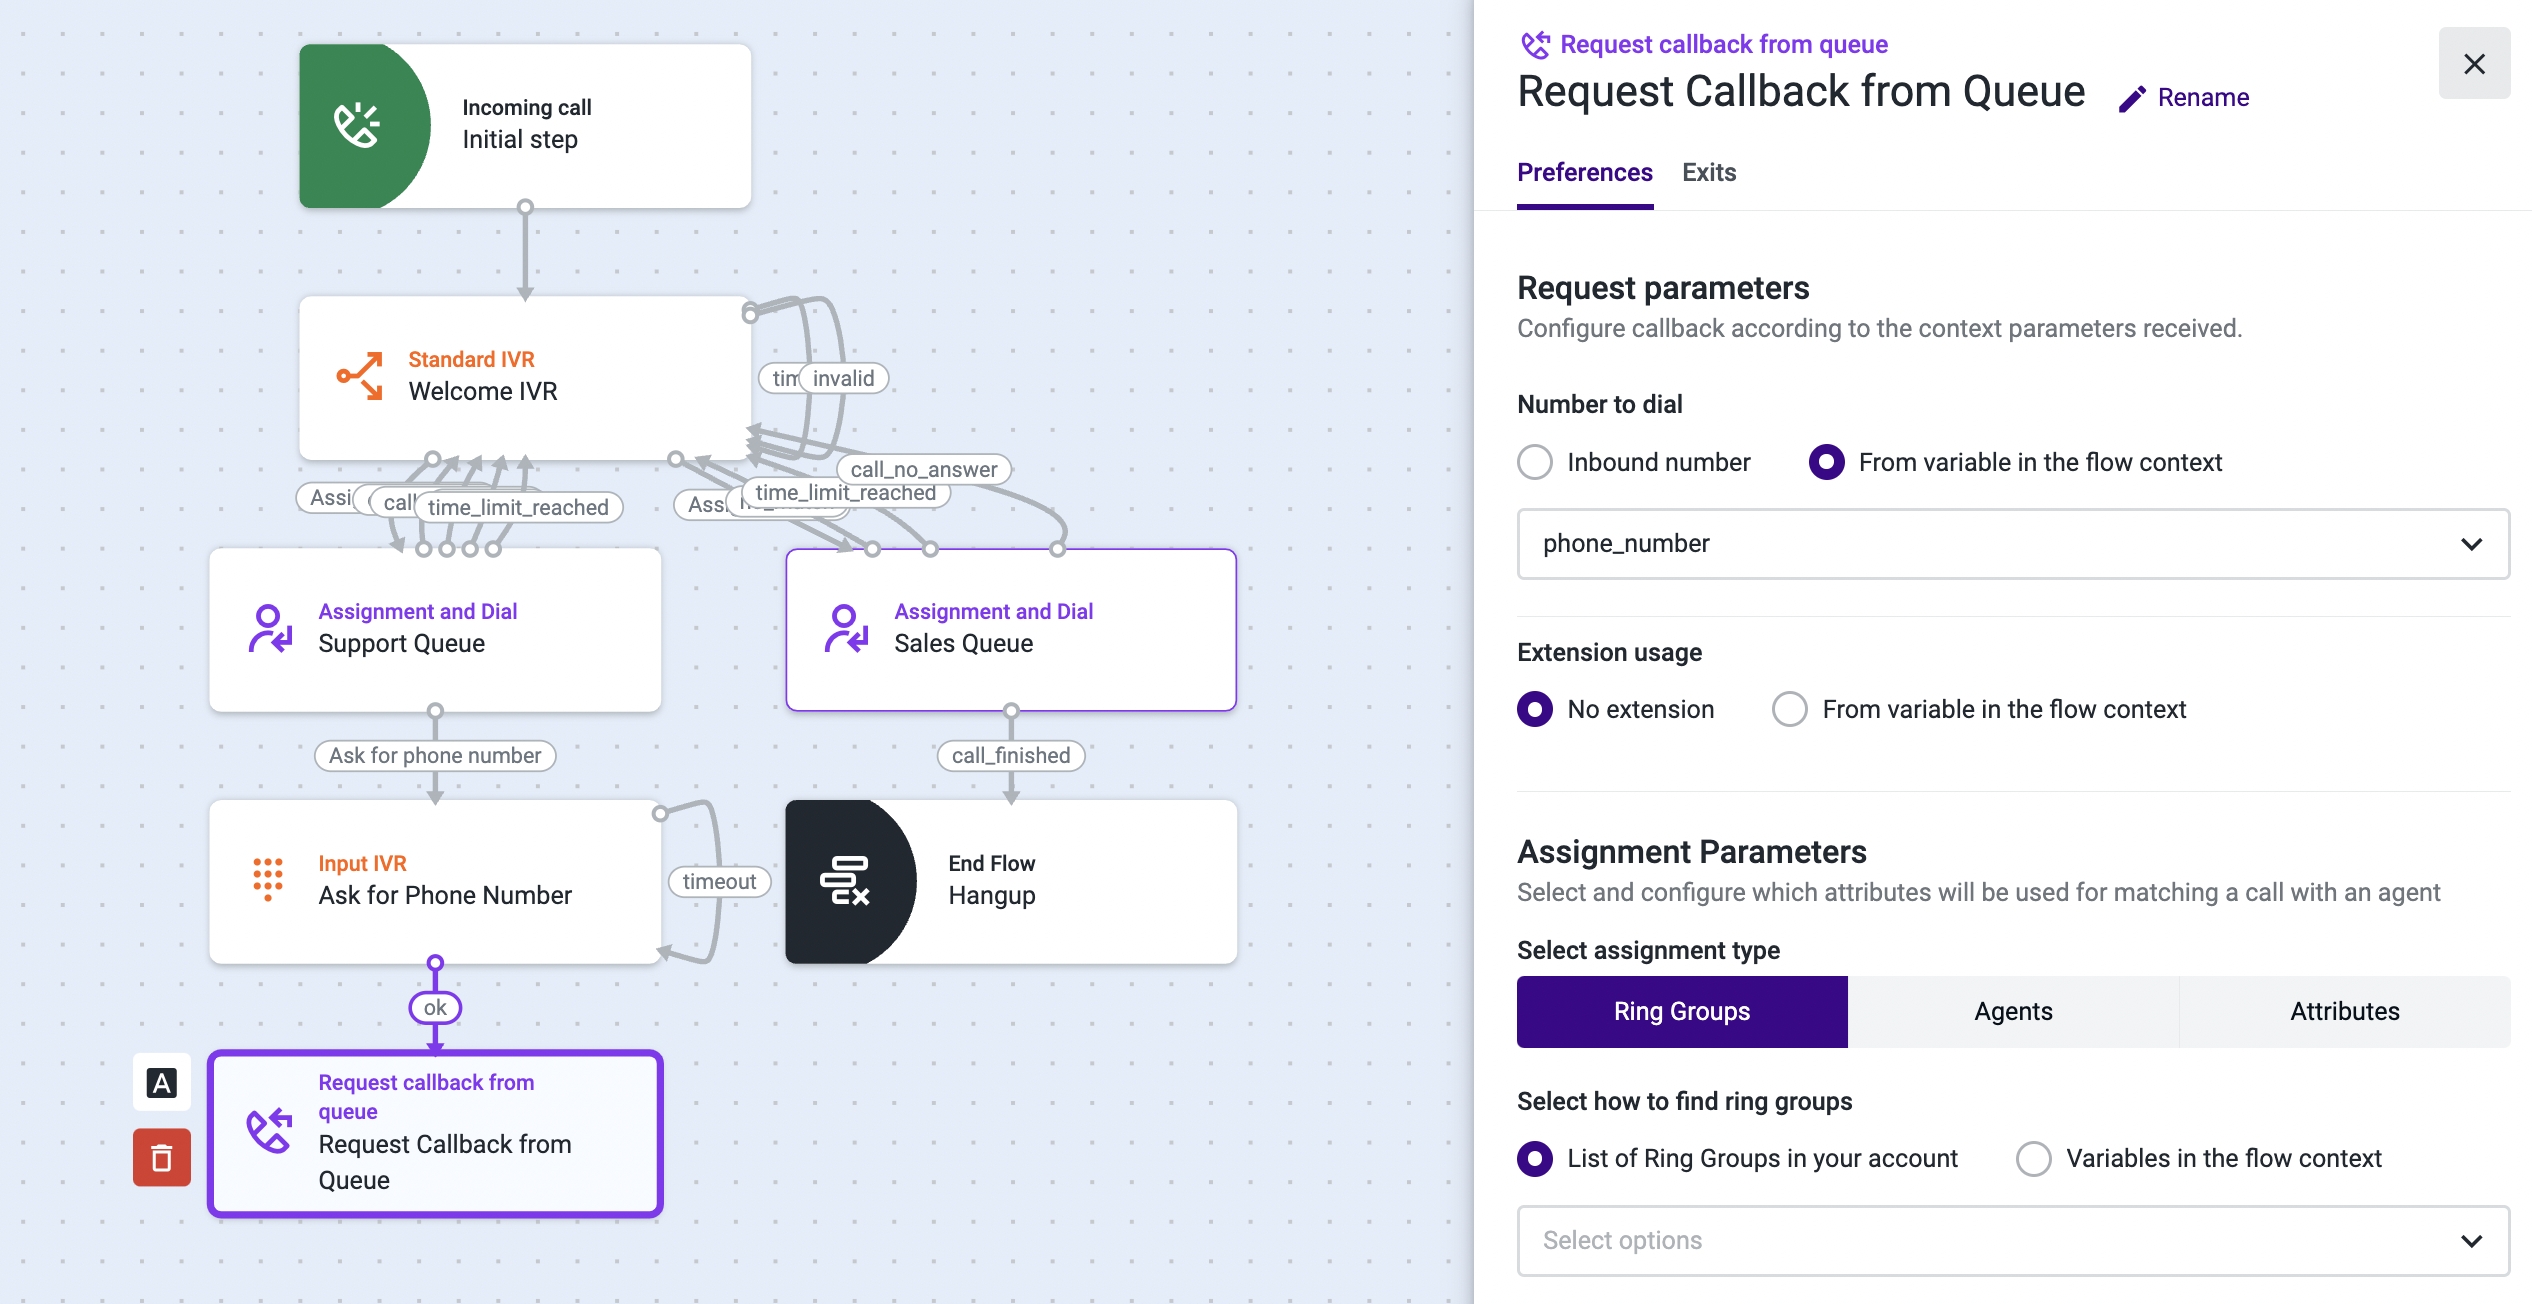
- Open Request Callback from Queue and select the Preferences tab.
- Under “Number to dial”, select "From variable in the flow context".
- Select "phone_number" from the drop-down list.
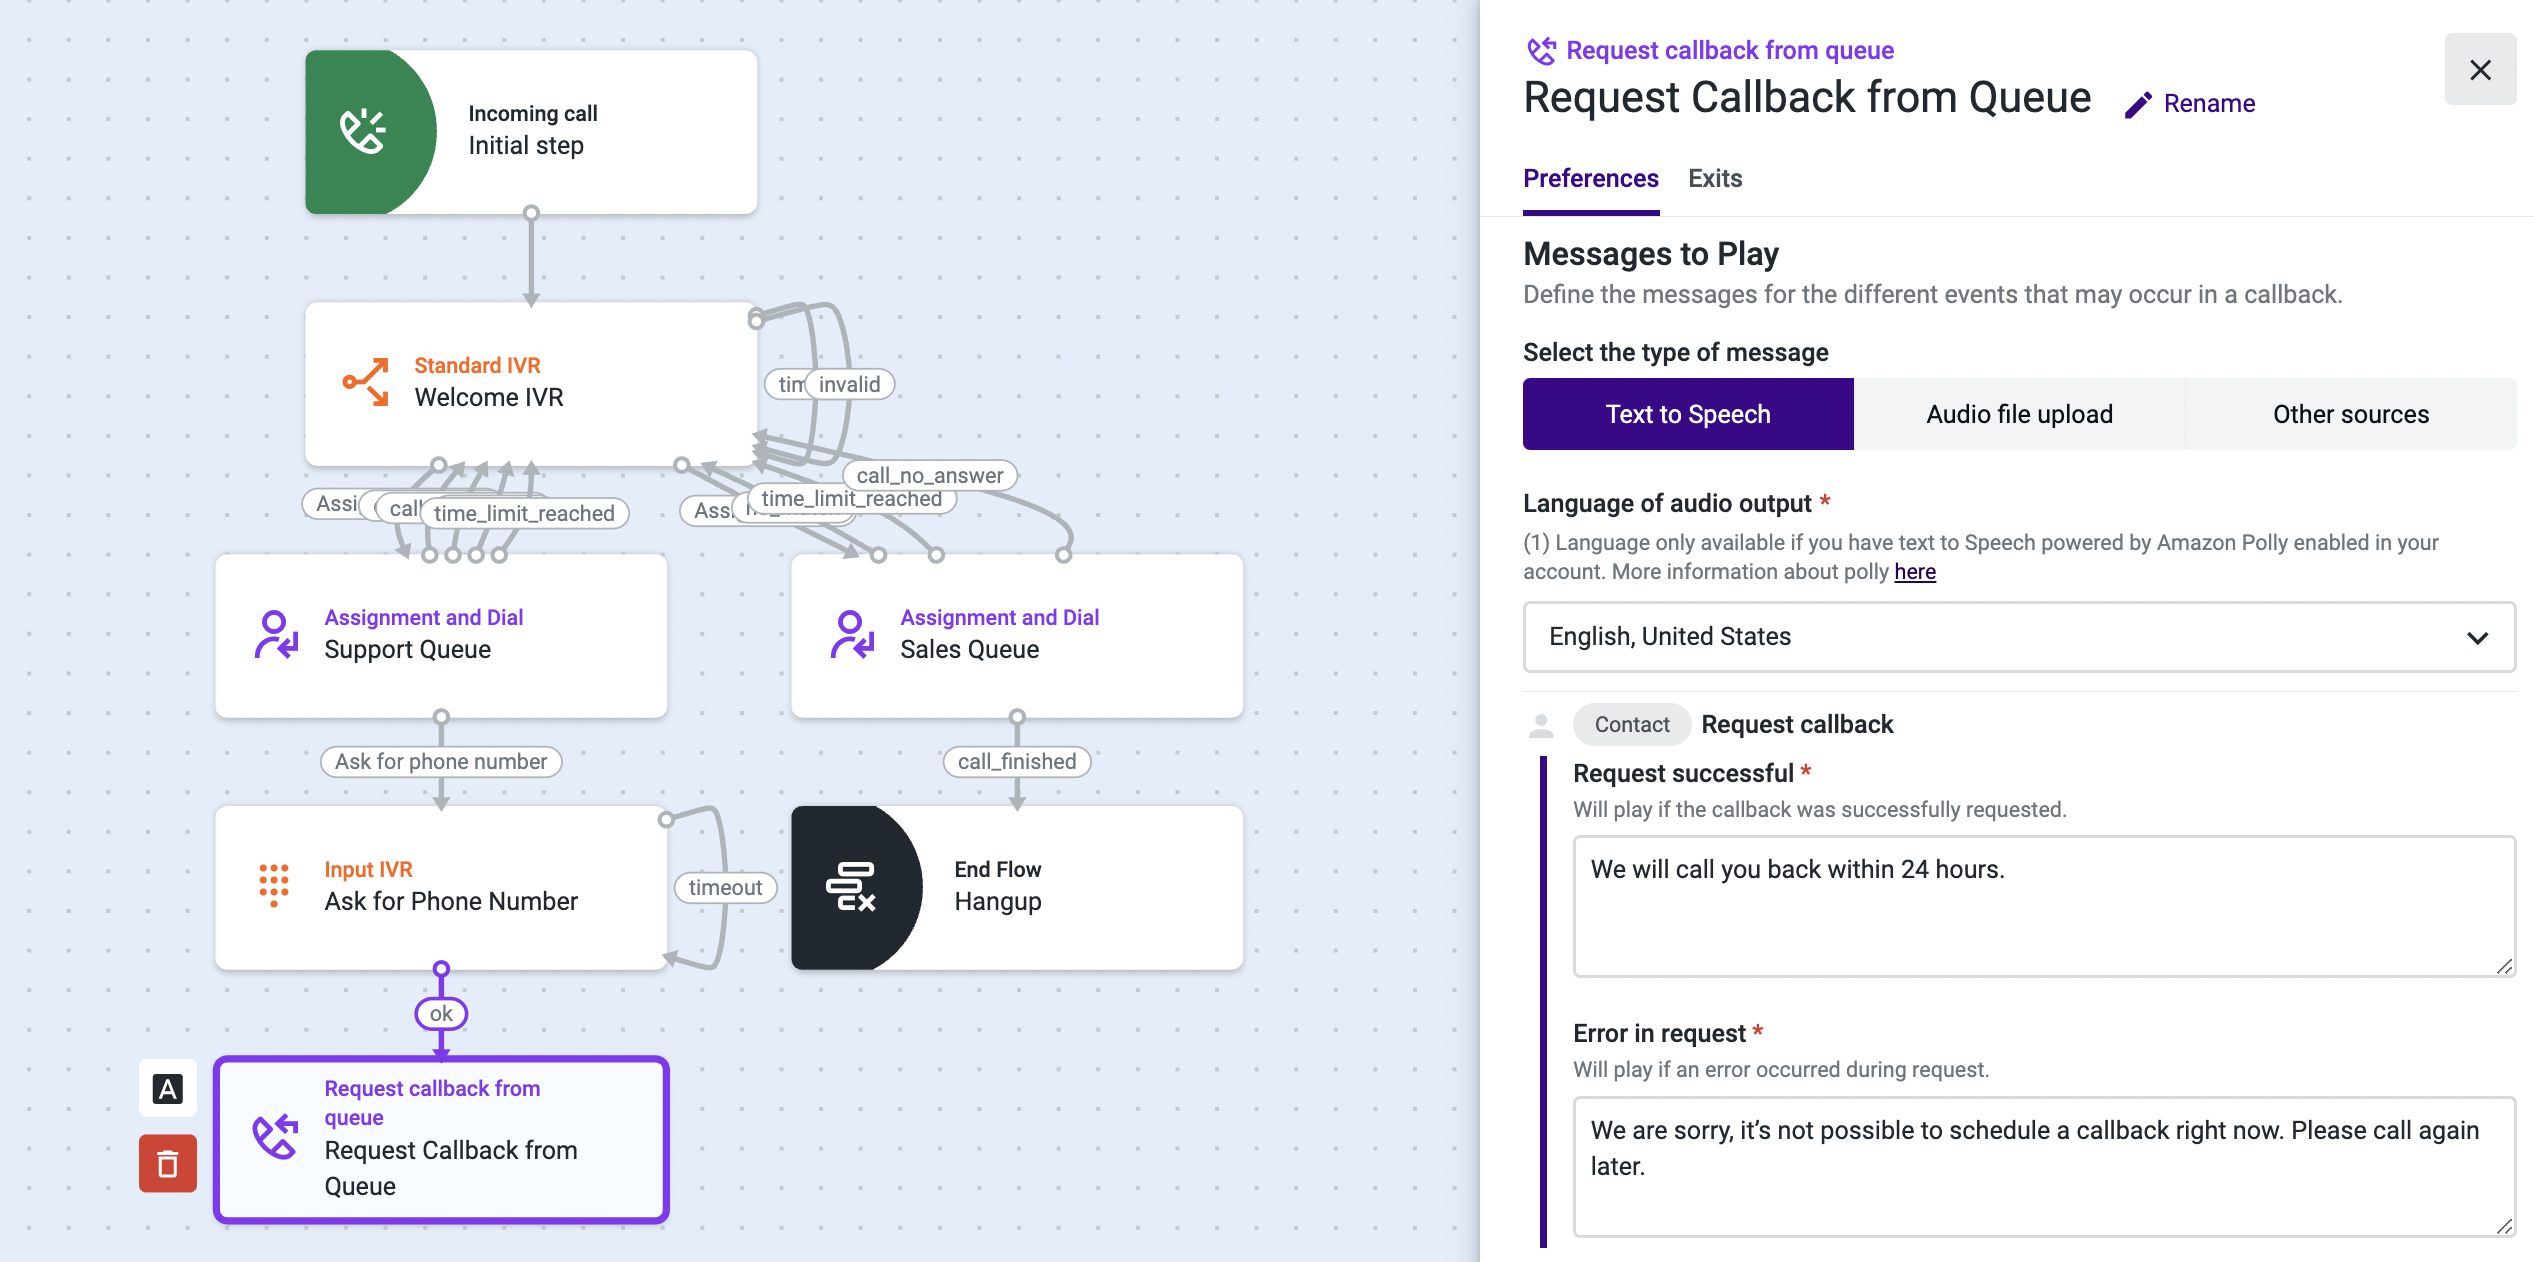
- Scroll down to the “Messages to Play” section.
- Select Text to Speech as the message type and the appropriate language.
- In the “Request successful” field, type or paste the message your callers will hear if their request for a callback is successful. Example: “We will call you back within 24 hours.”
- In the “Error in request” field, type or paste the message your callers will hear if their request for a callback is not successful. Example: “We are sorry, it’s not possible to schedule a callback right now. Please call again later.”
- Select the Exits tab.
- Add the Play Audio component under “Invalid Caller Id”.
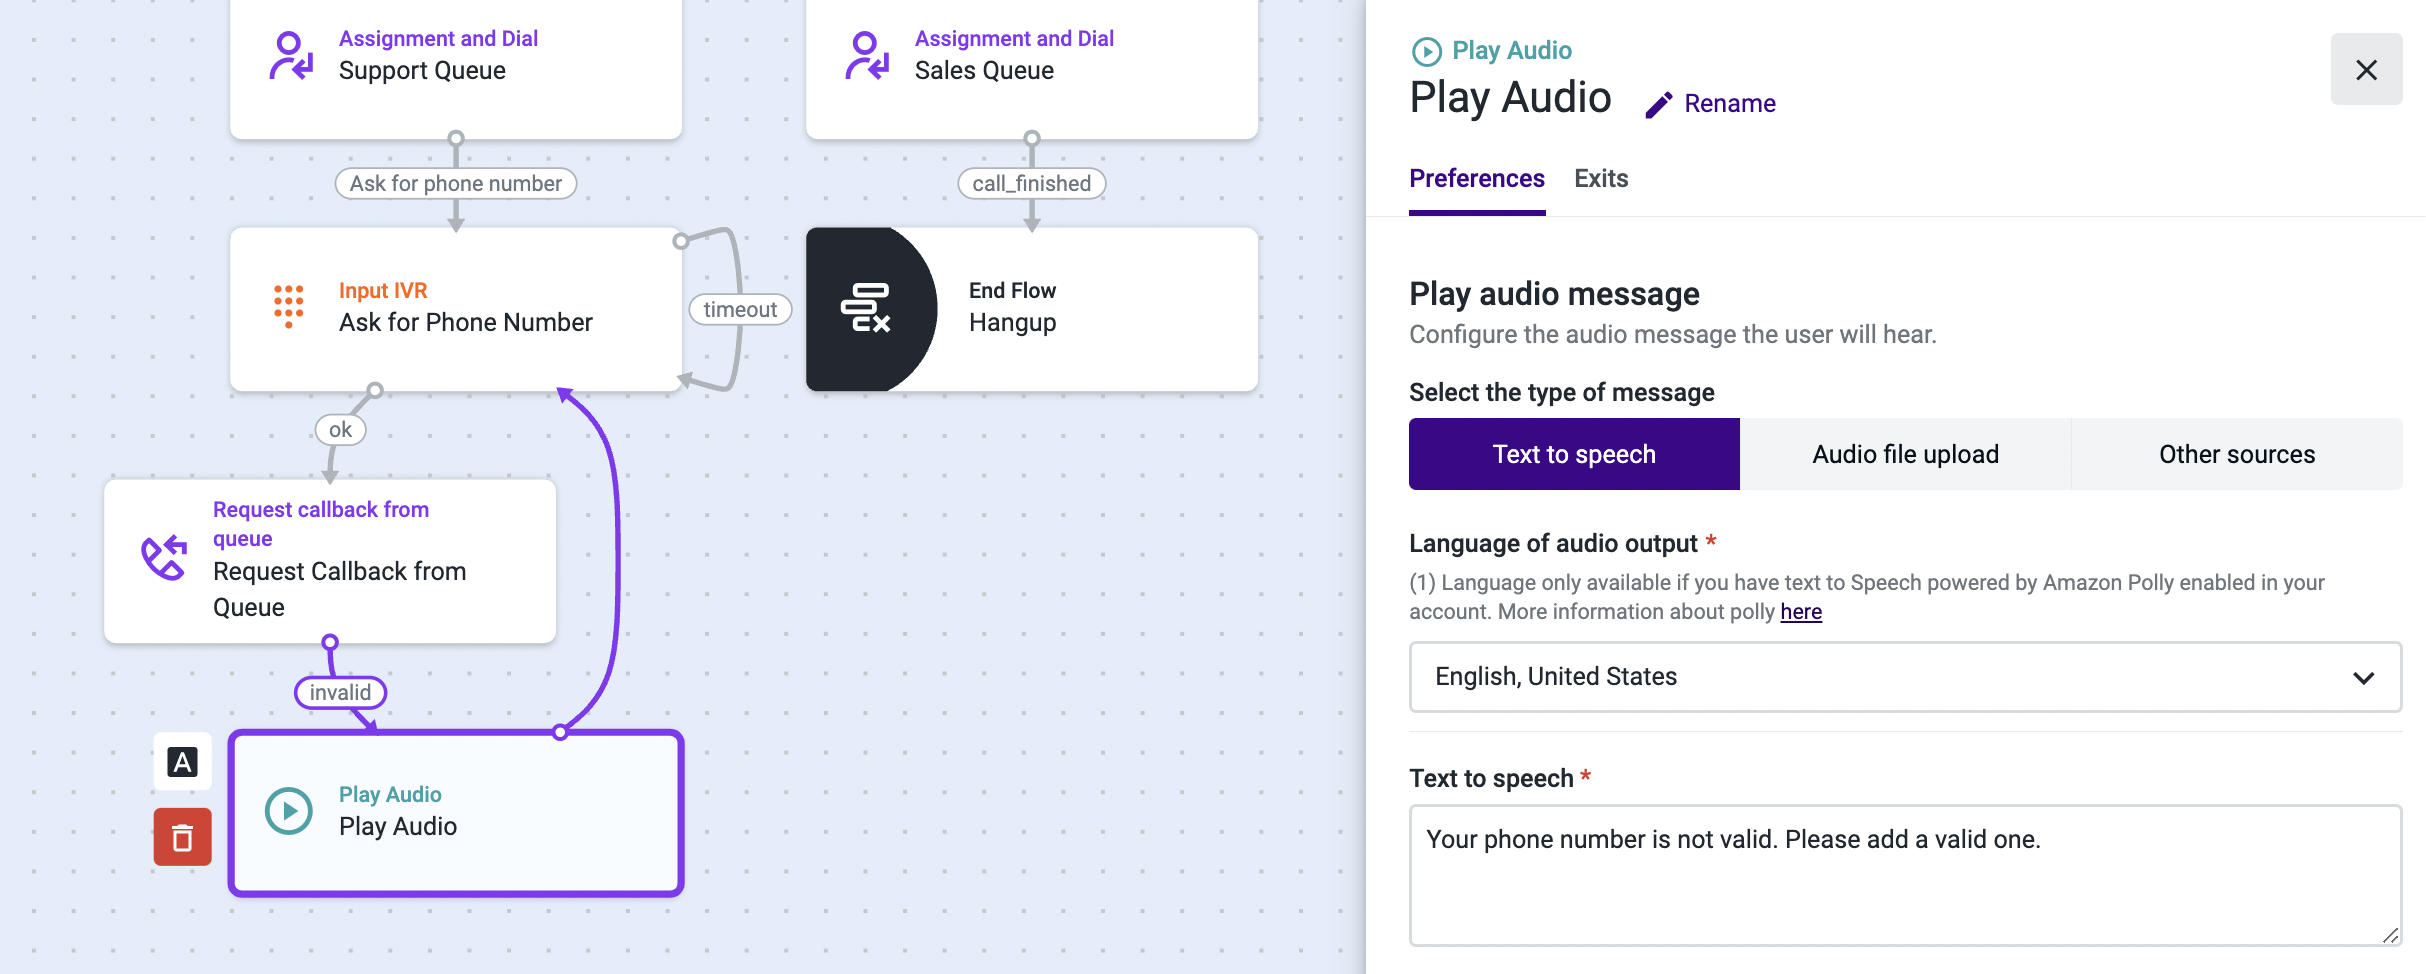
- Open Play audio.
- Select Text to Speech as the message type and type or paste a message that will play if the phone number input by your caller is invalid. Example: “Your phone number is not valid. Please add a valid one.”
- Select the Exits tab and direct the call to an appropriate component. In our example, we will send the callers to the Input IVR again, so that they can add a valid phone number.
- Make sure all your components are configured and save your flow .
From now on, your callers will be able to request a callback to a phone number of their choice. If an invalid number is dialed, they will hear a message, and they will be given another chance to dial a valid phone number.
Updated 3 months ago