Routing with the Voice IVR
With Studio, you can use your callers’ speech to connect them to the right agent without them needing to use the dial pad. You can achieve this simply by adding a Voice IVR component to your flow and associating specific routes (e.g., support, sales, callback, etc.) with the keywords that you expect your callers to say.
Please follow these instructions to configure a Voice IVR component:
- Add the Voice IVR component to your flow.
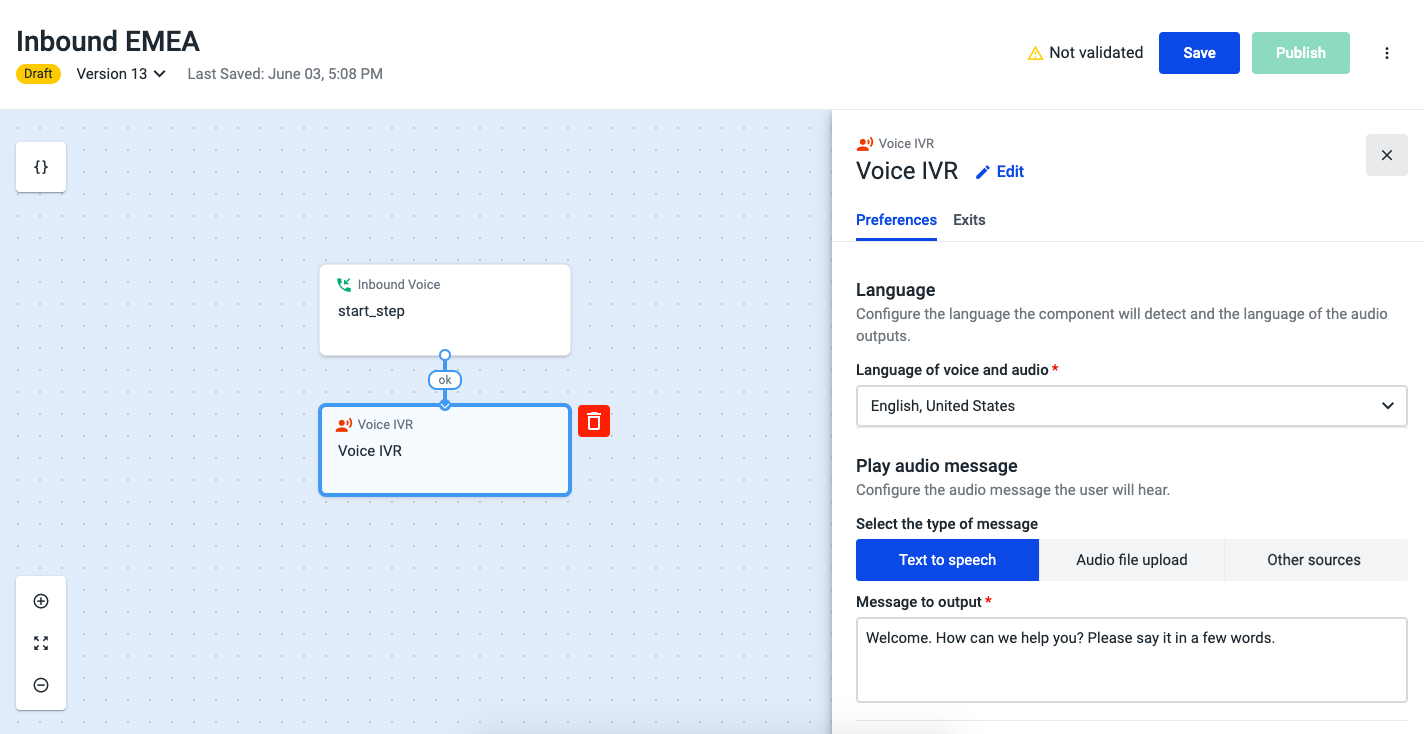
- Open the Voice IVR component, and on the Preferences tab select the language that the system will detect when the caller speaks to the IVR.
- Choose Text to speech as the message type.
- In the “Message to output” text field, type your message in the same language as you chose in step 2. This message will be played as soon as the flow reaches the Voice IVR component.
Example: “Welcome. How can we help you? Please say it in a few words.”

- In the “Speech recognition” section, insert the number of seconds without speech that the system will wait for before taking one of the three possible Exits: Voice Command, No Match or Timeout.
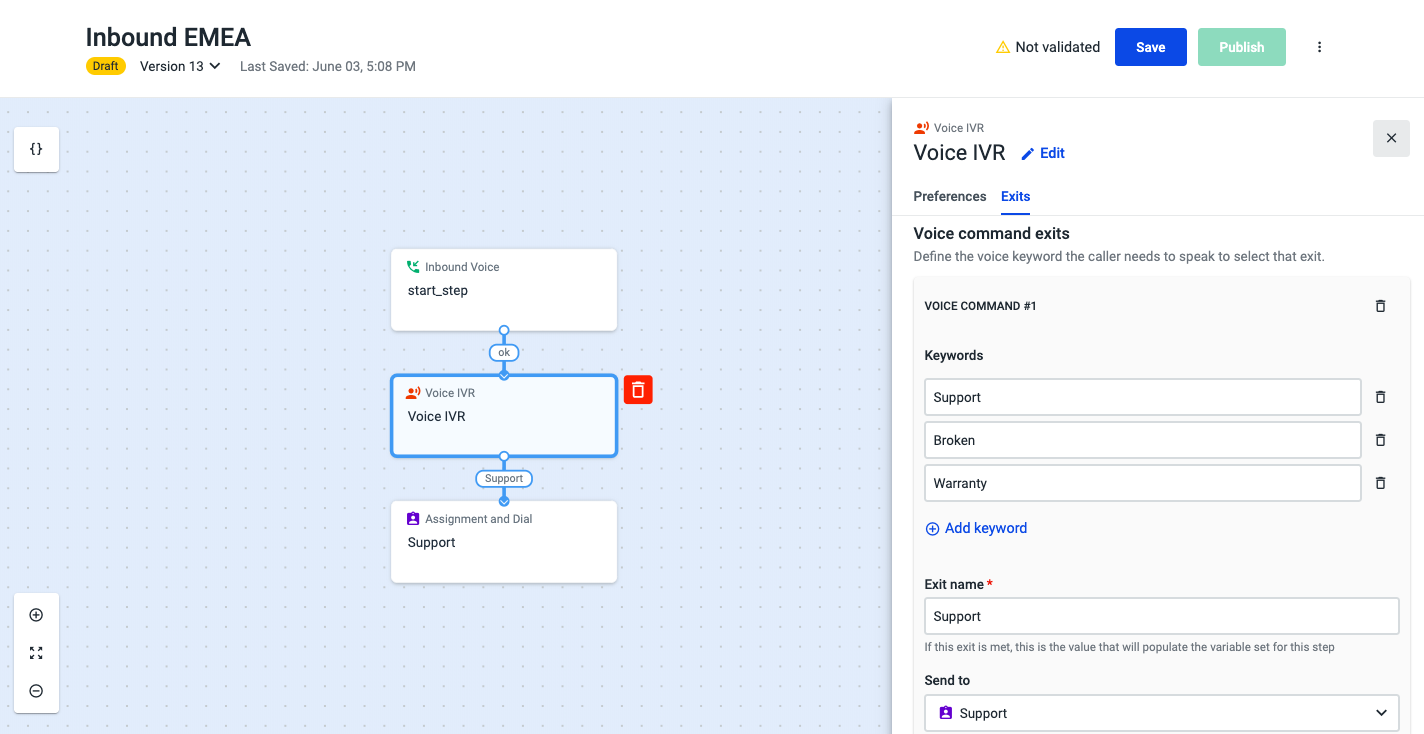
- Select the Exits tab and in the “Voice command exits”, add the keywords you expect your caller to use in order for a specific Exit to be taken. In our example, we wanted to direct them to the support line, so we used the following keywords: Support; Broken; Warranty.*
* Please visit thispage to learn more about “Voice command exits”.
- Name the Exit and select the Assignment and dial (A&D) component.

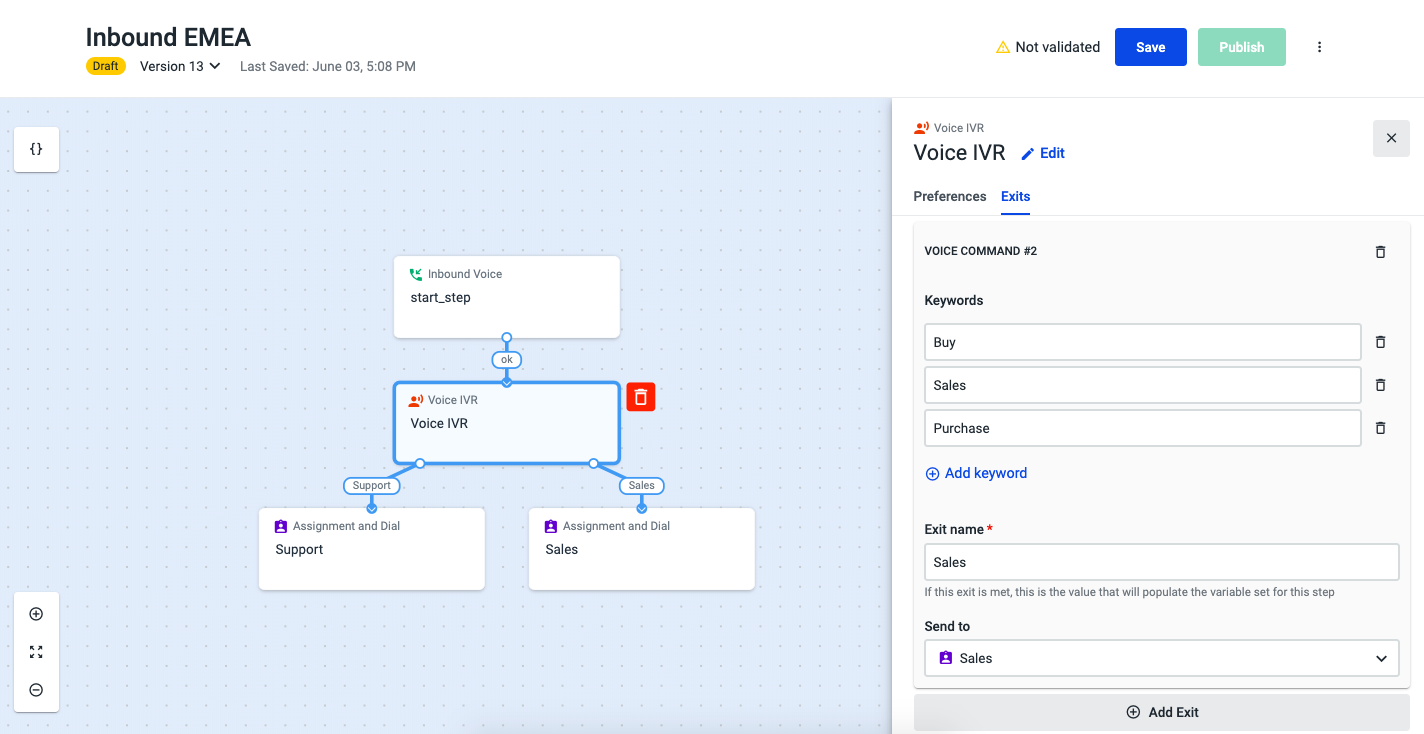
- Click on Add Exit.
- Add the keywords for the sales line. We used the following: "Buy; Sales; Purchase".*
- Name the Exit and select the Assignment and dial (A&D) component.

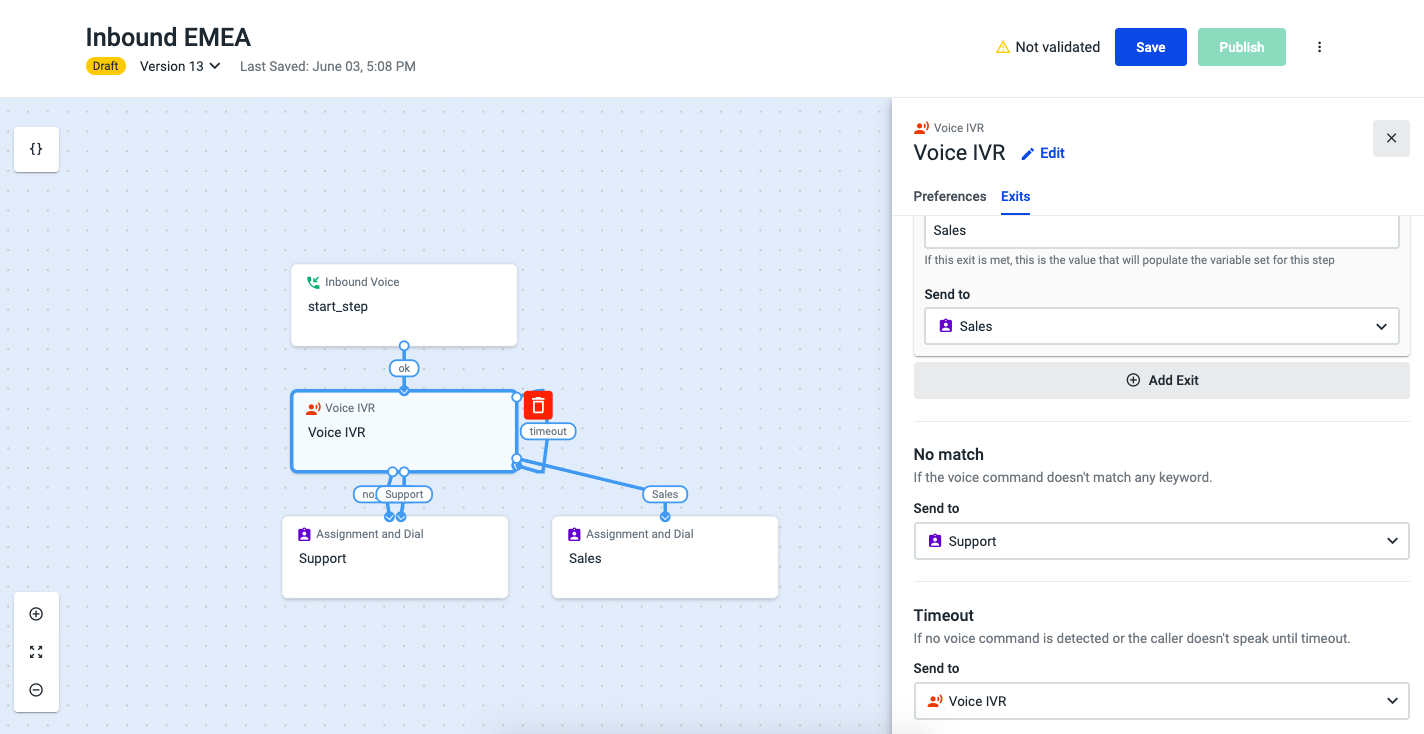
From now on, if your caller says any of the keywords you have added, the corresponding Exit will be taken. However, if no keyword is detected, the “No match” Exit will be followed. To configure it:
- Scroll down to the “No match” section and add the appropriate component. In our example, we have routed the call to the support line (A&D component).
- In the Timeout section, create a loop by selecting the Voice IVR component. This Exit will be taken if the system does not detect any speech.

- Complete the configuration of both A&D components and hit Save when you’re done.
Updated 3 months ago