Importing and Exporting Flows
In Studio, you can create a flow by importing a JSON file and exporting published, draft, and archived flows.
NoteWhen importing a flow, please be aware that you should check the resources (agents, audio files, among others), to ensure that they match the ones existing in the account. Non-existing or non-matching resources can result in unexpected behavior during the interaction.
Exporting a Flow
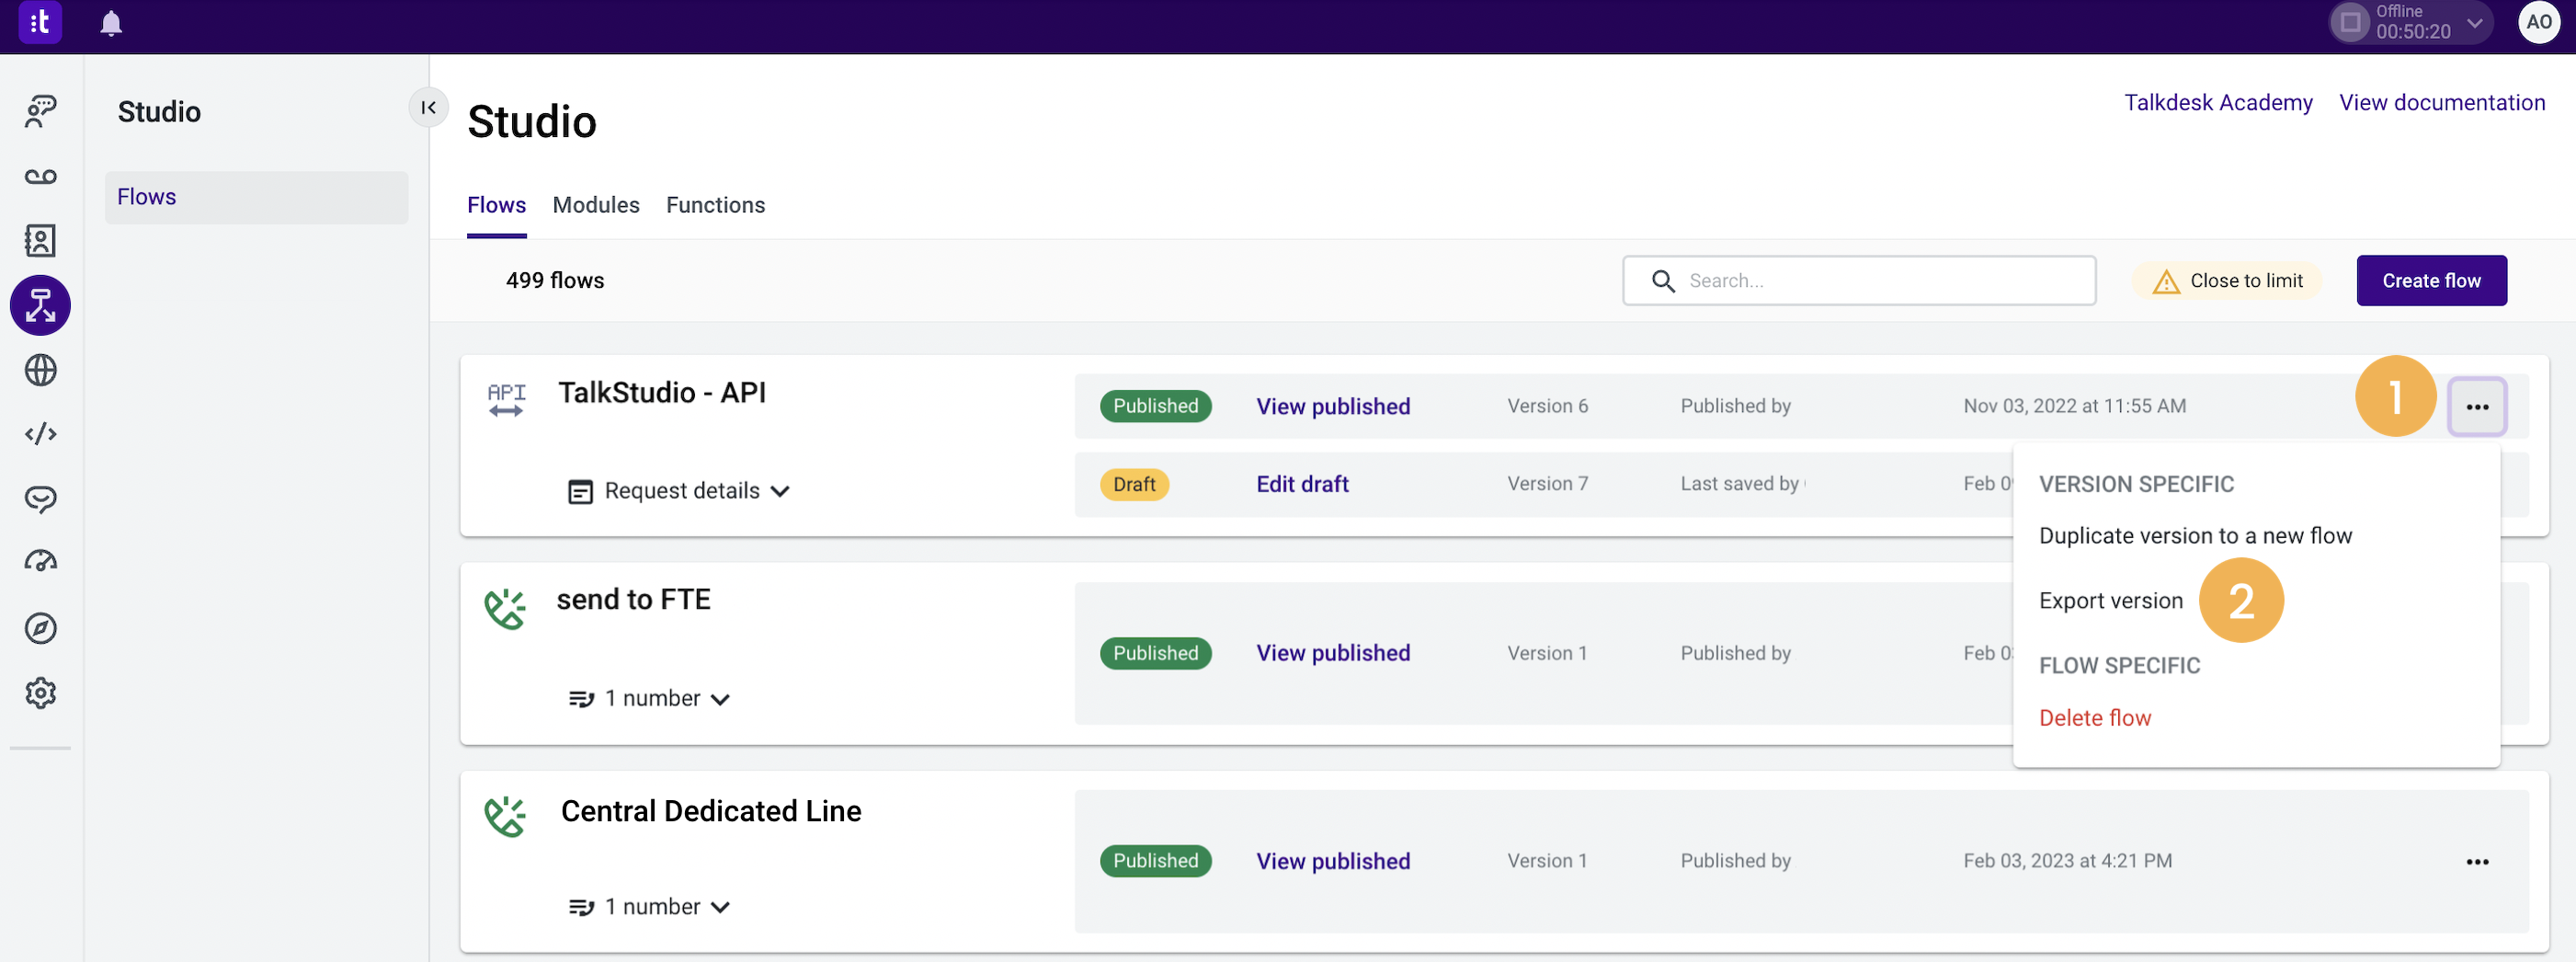
- On the Flow Manager page, click on the “more options” icon [⋯] [1] of the flow you wish to export.
- Select the option Export version[2].
- After doing this, a JSON file will be generated and displayed at the bottom of your screen. This JSON file includes general information about the flow and a section for each step configuration.
- Keep the file, so you can later import the flow, if necessary.
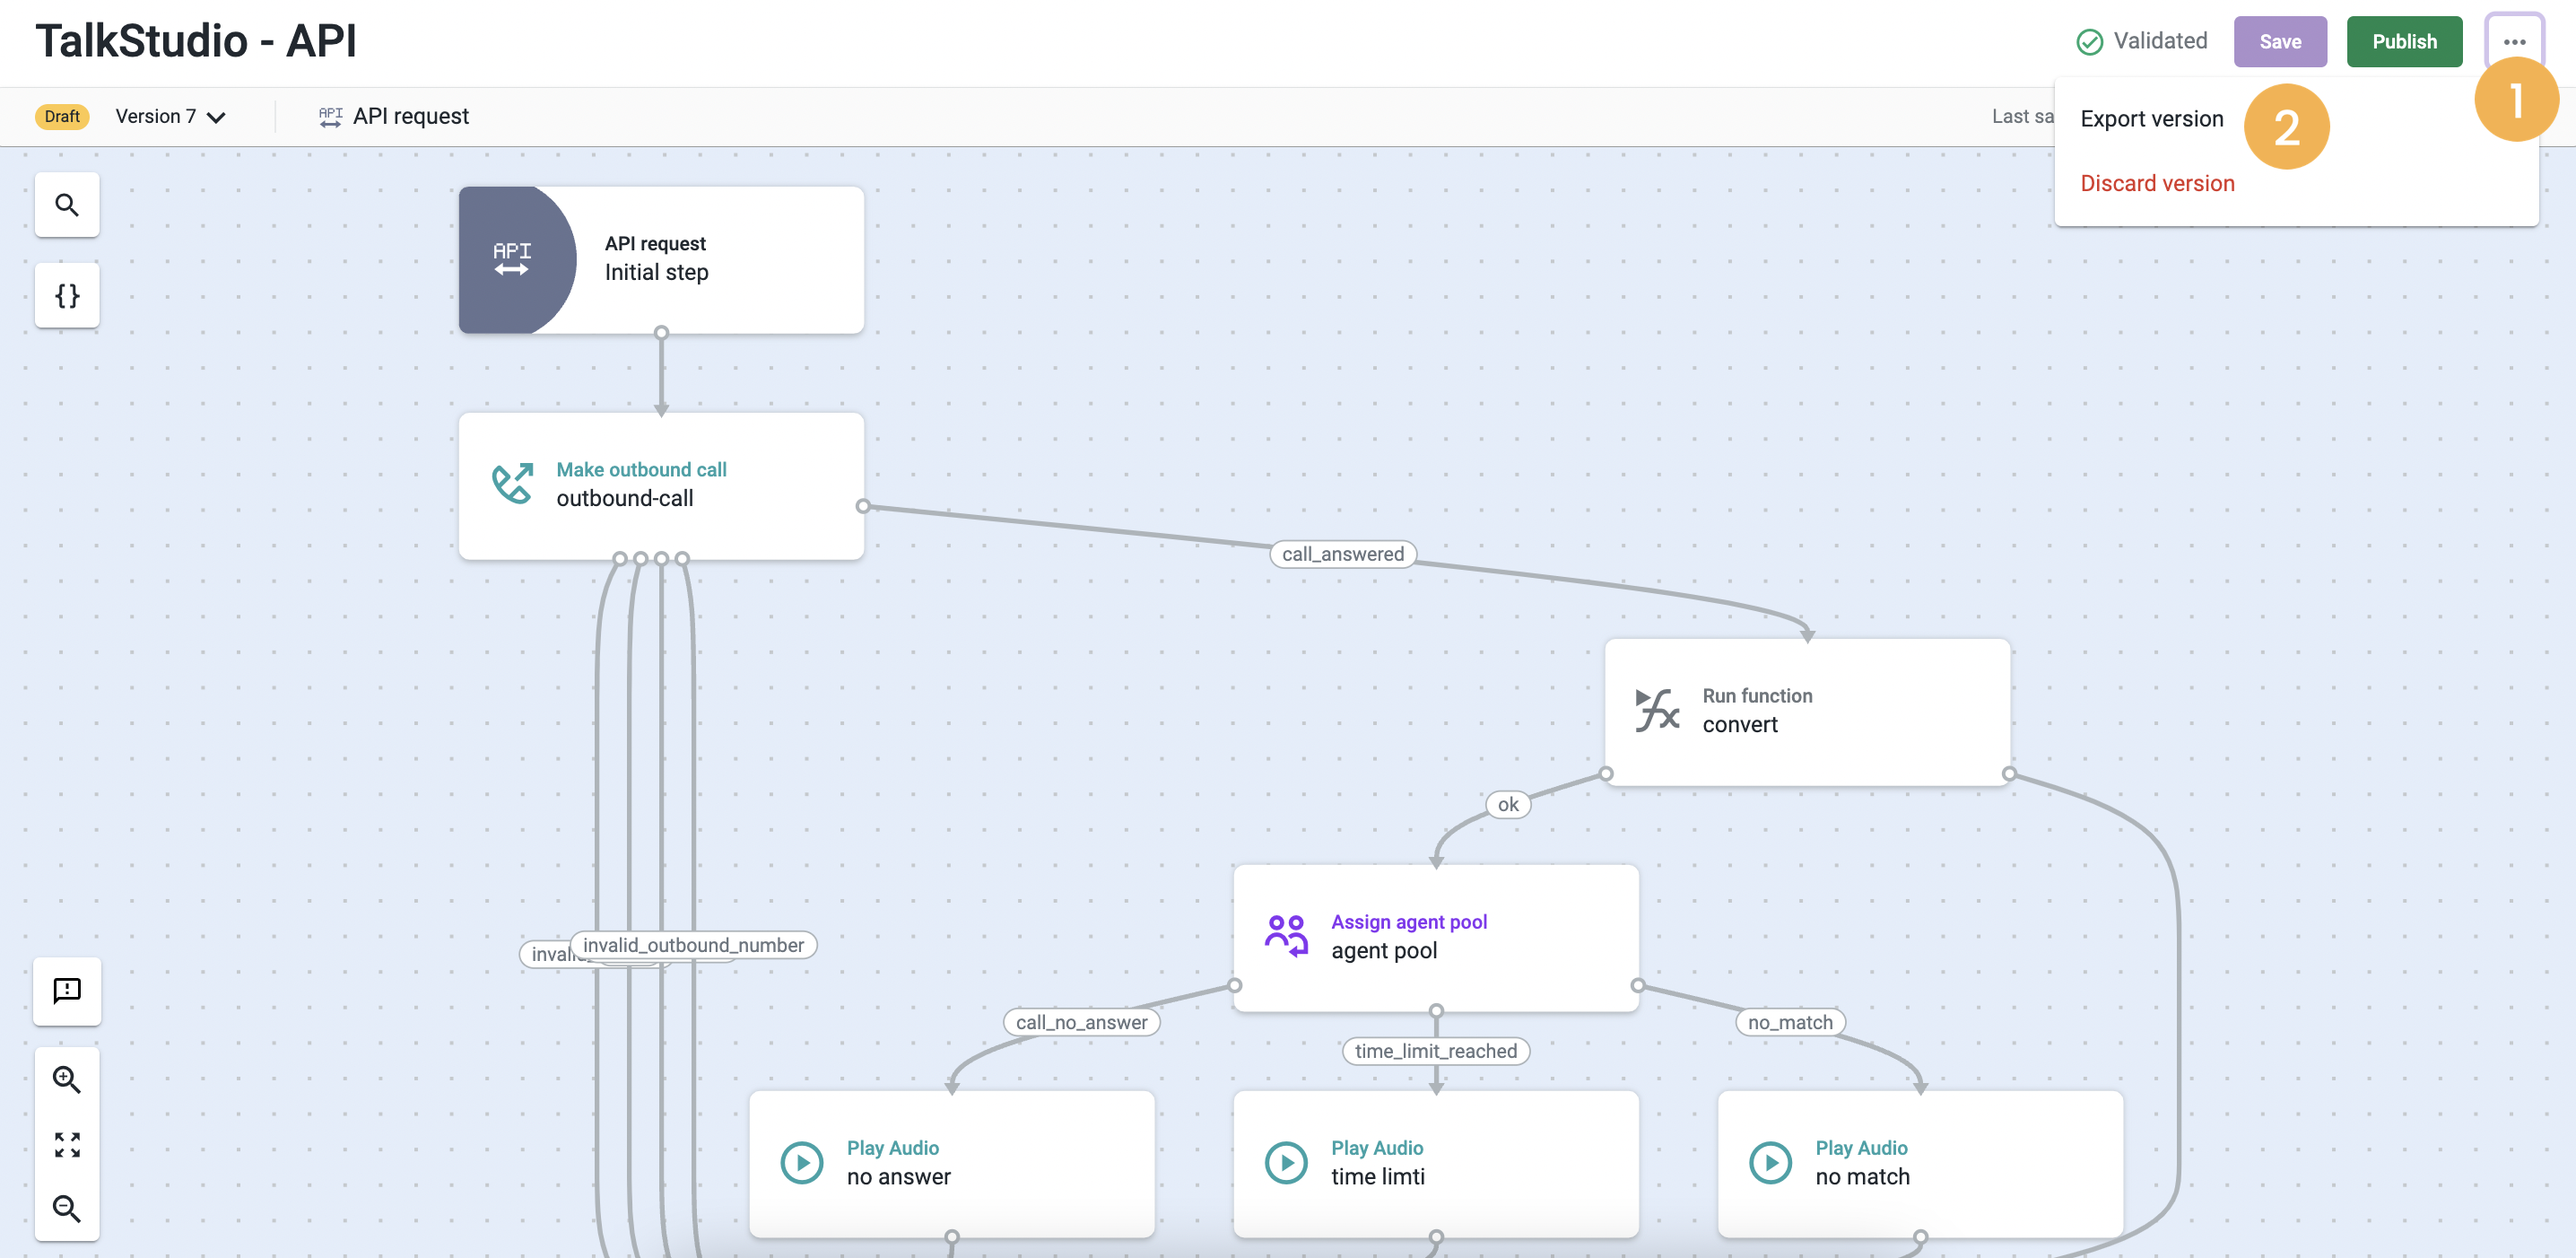
- Alternatively, you can also export a flow from within the Flow Editor page:
- Click on the “more options” icon [⋯] [1] followed by Export version[2], if you wish to export a draft or an archived version.
- If you are trying to export an already published flow, click directly on the Export version button.
NoteIf a draft version of the flow is already validated and saved, and any changes are made before clicking on the Export version button, a window will be displayed to confirm whether you wish to export the last saved version of the draft or its current version, containing the changes.
Importing a Flow
If you wish to import a flow, follow these steps:
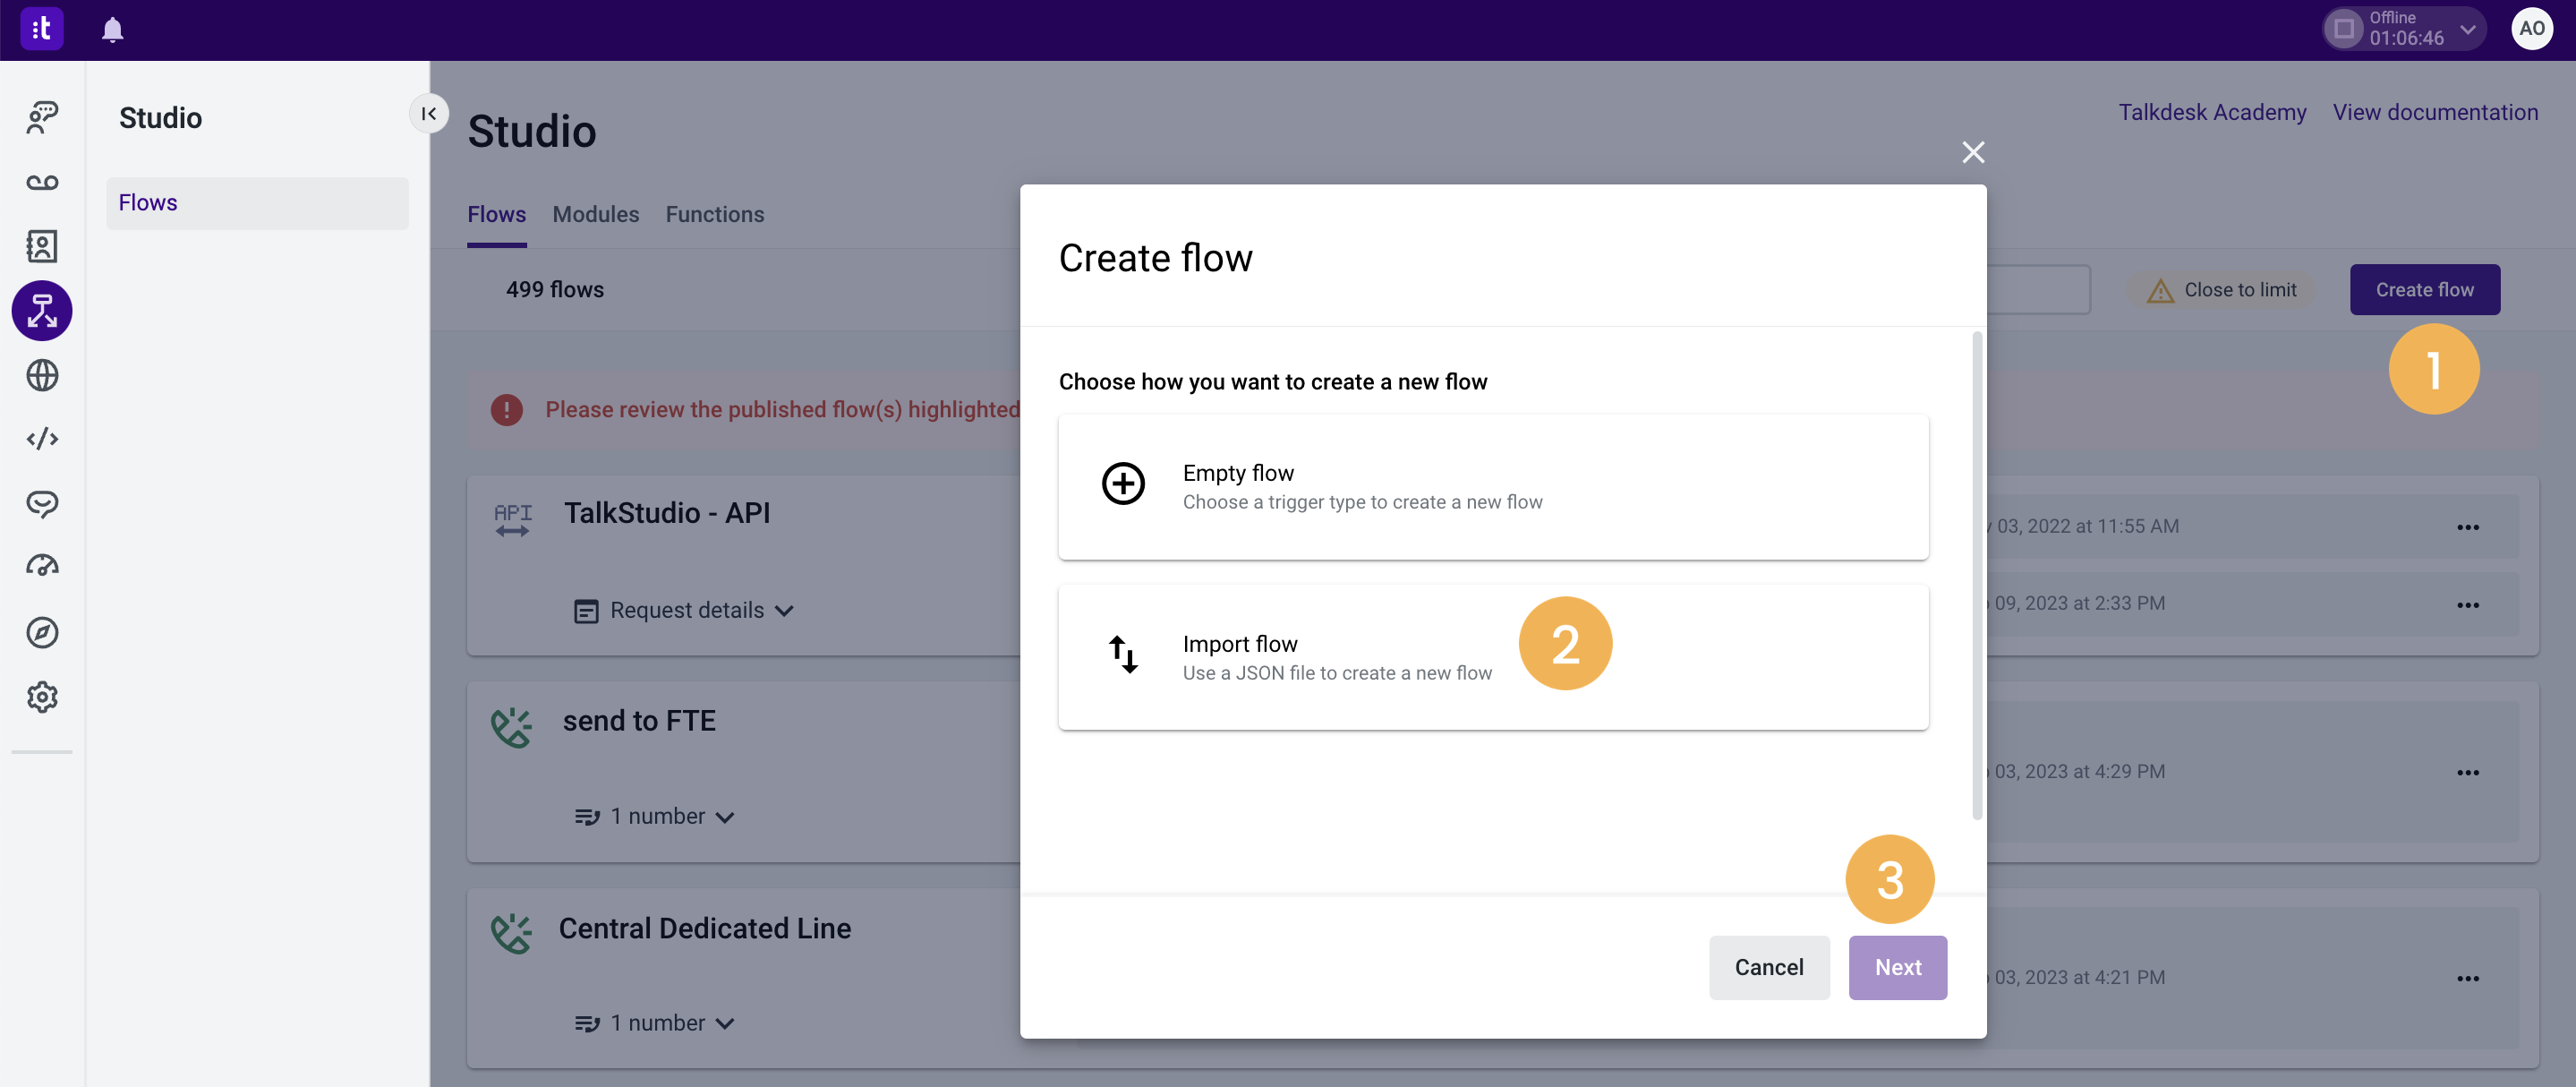
- Select the Create flow option [1] on the Flow Manager page.
- On the next screen, click Import flow[2], followed by Next[3].
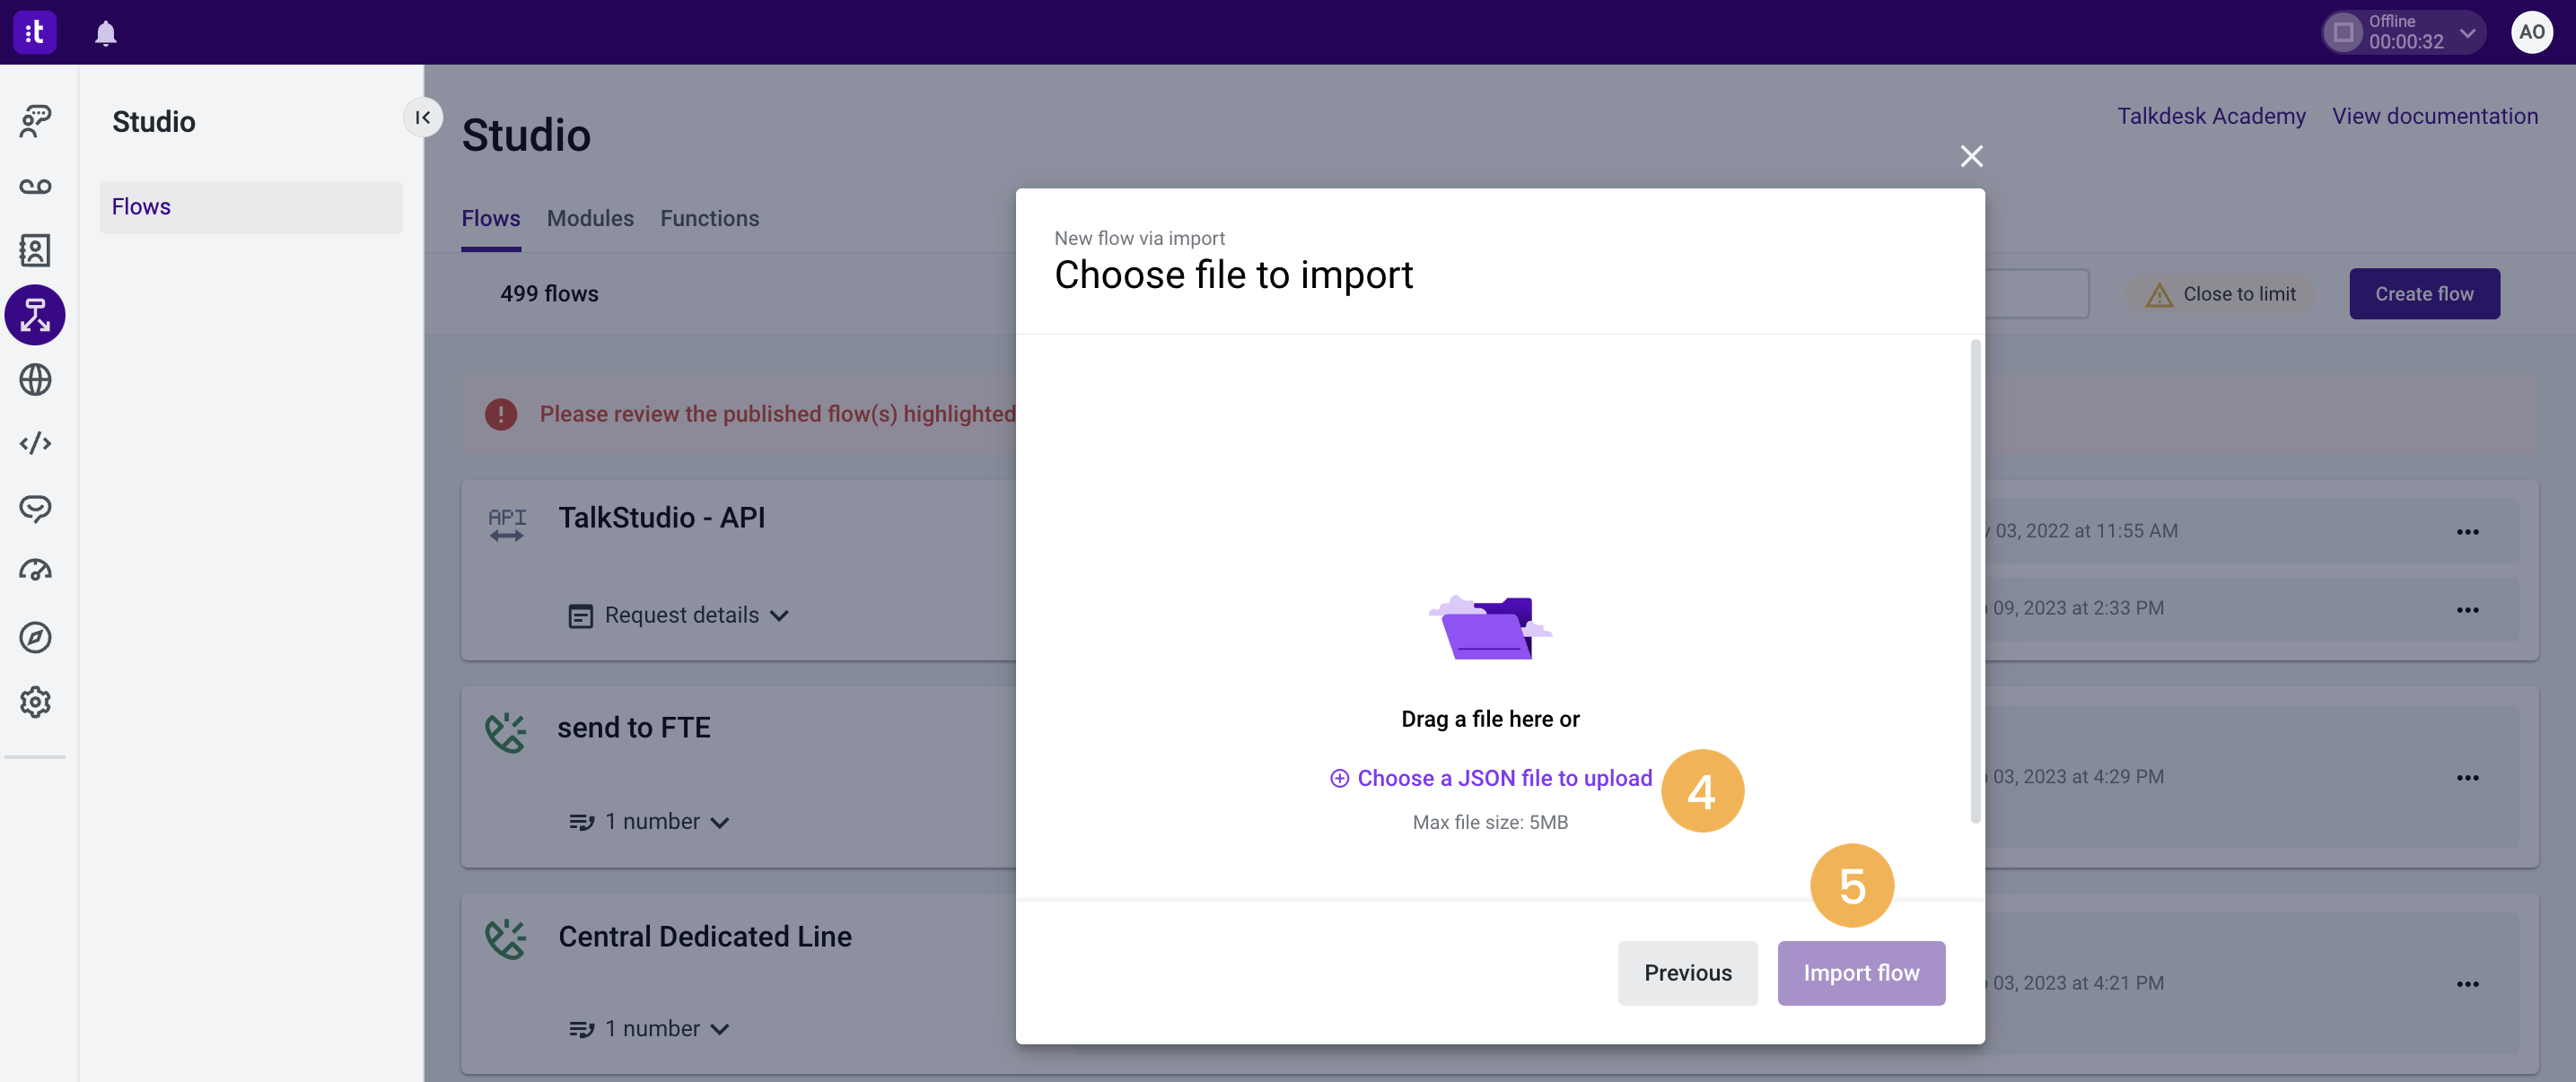
- Select the JSON file to upload [4]. Please be aware that the file size needs to be under 5 MB.
- Click Import flow[5] to finalize the process.
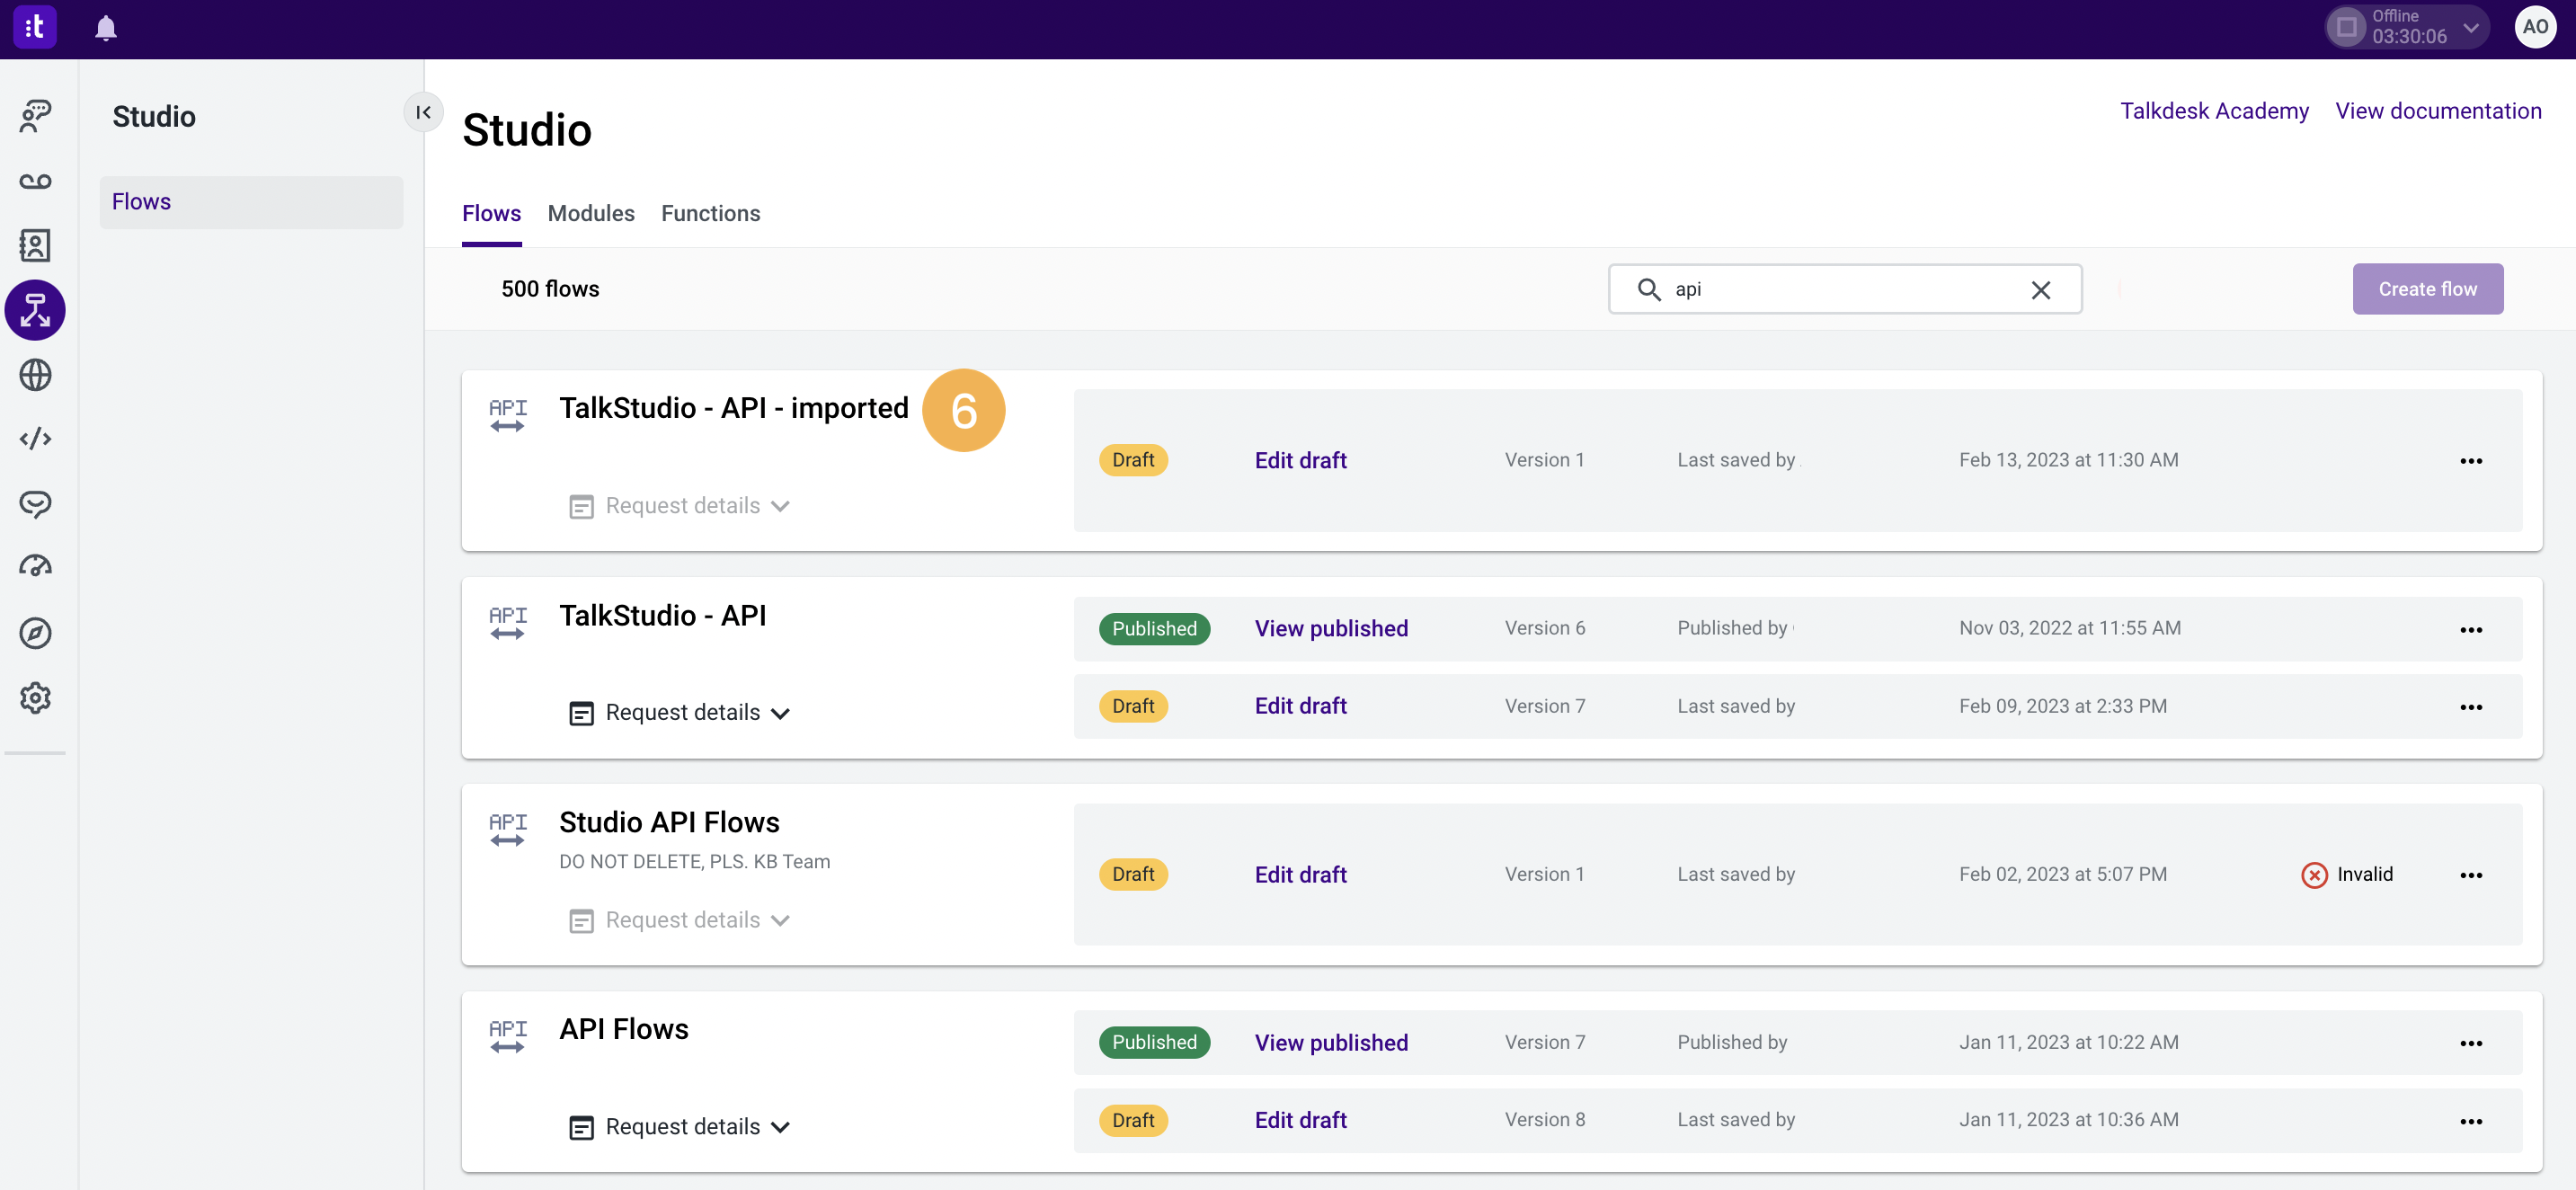
- When the importing process is finished, the flow will be displayed on the screen and the Flow Manager page. An “imported” label [6] will be attached to the name of the flow so that you can easily identify its origin.
Updated 3 months ago