Creating an Incoming Message Studio Flow for Chat Channels
A studio flow can be triggered by an incoming message from any channel.
Through the incoming message flow, the inbound conversation can be routed to a specific agent or ring groups based on the criteria of the conversation.
Follow the steps below to assign a chat conversation by the type of inquiry topics.
Configuring an Incoming Message Flow
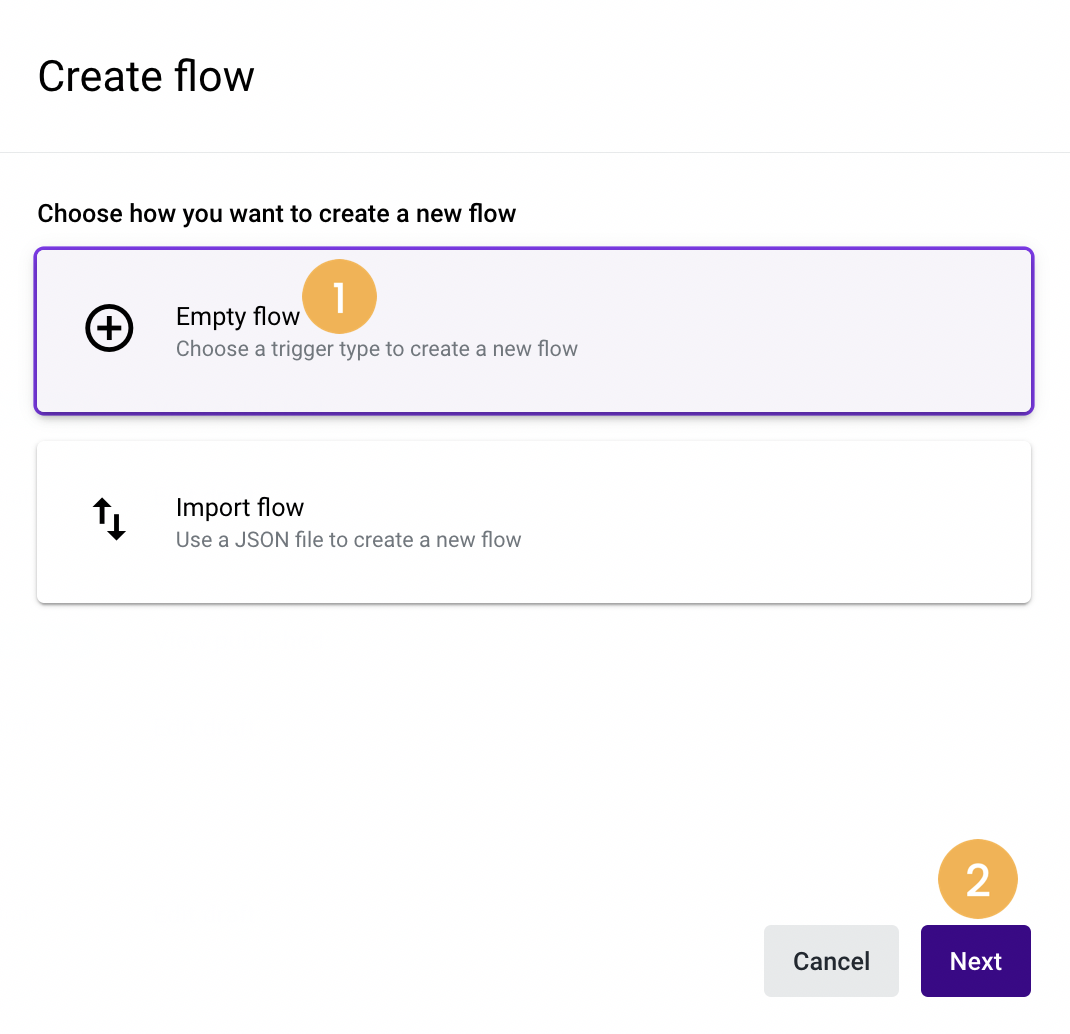
- Click “Create flow” on the Flow Manager page, and on the new window that is displayed.
- Select Empty flow[1], followed by Next[2].
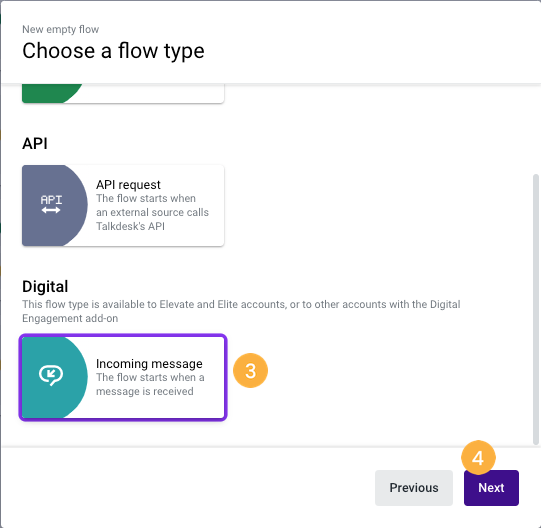
- Choose Incoming message[3] and then Next[4].
- On the next screen, enter a name (as shown in the example below) and, if necessary, a description of the flow.
- The contact person can input the value of predefined fields in the chat widget's initial screen.
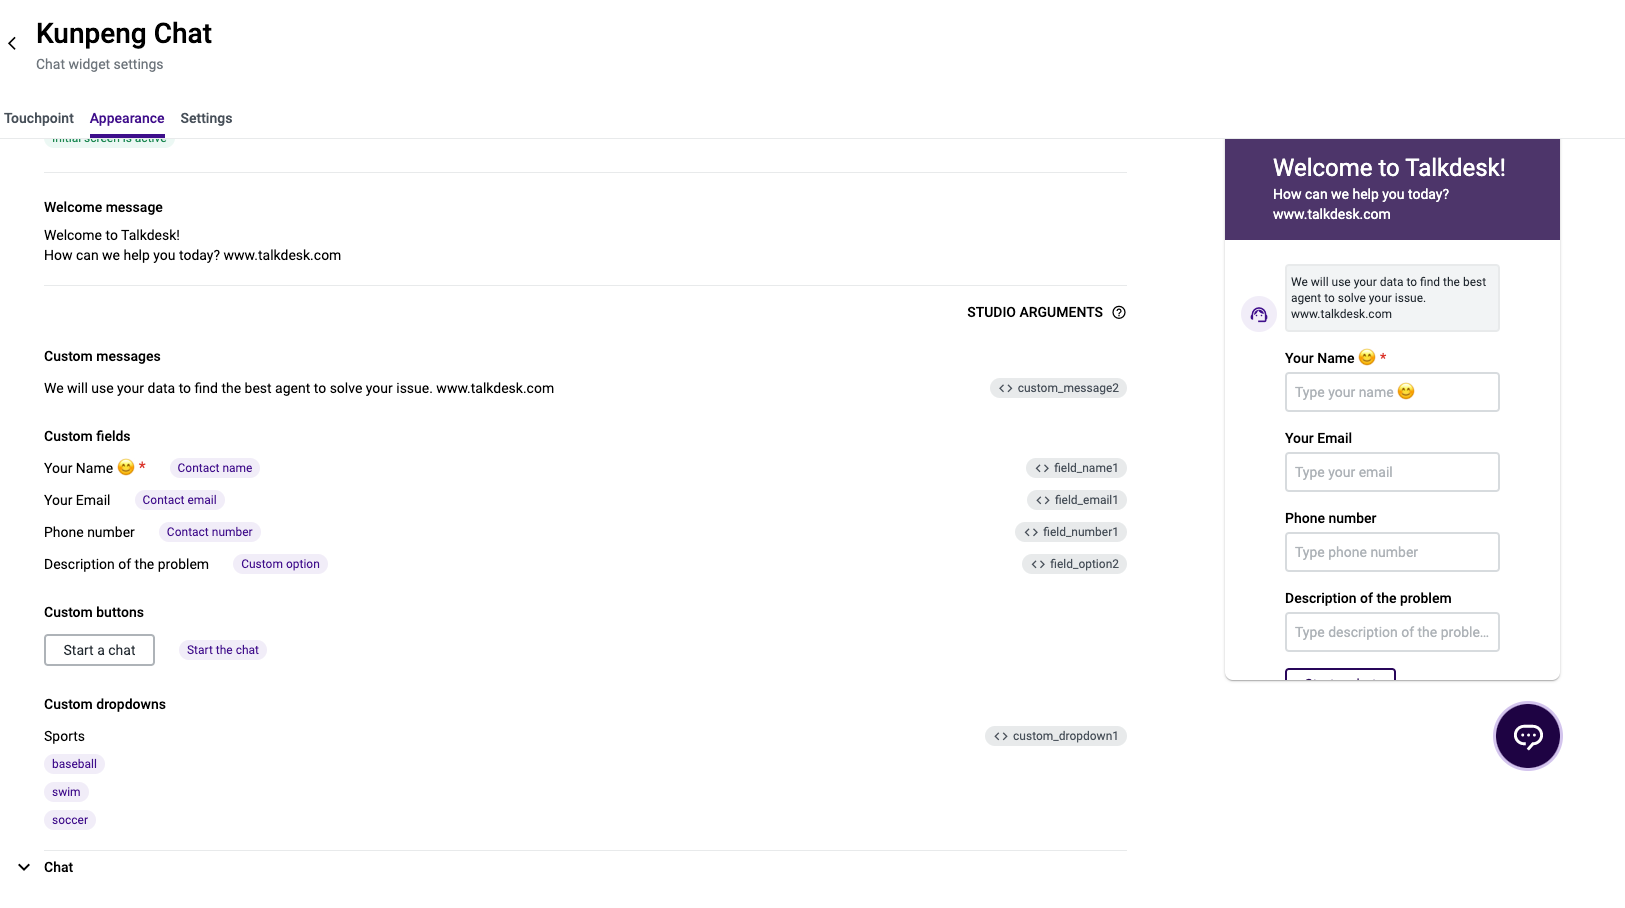
- To import the value into the flow, the admin needs to enter the argument name [1] into the initial step arguments. Then create flow variables [2] and map them to the argument names.
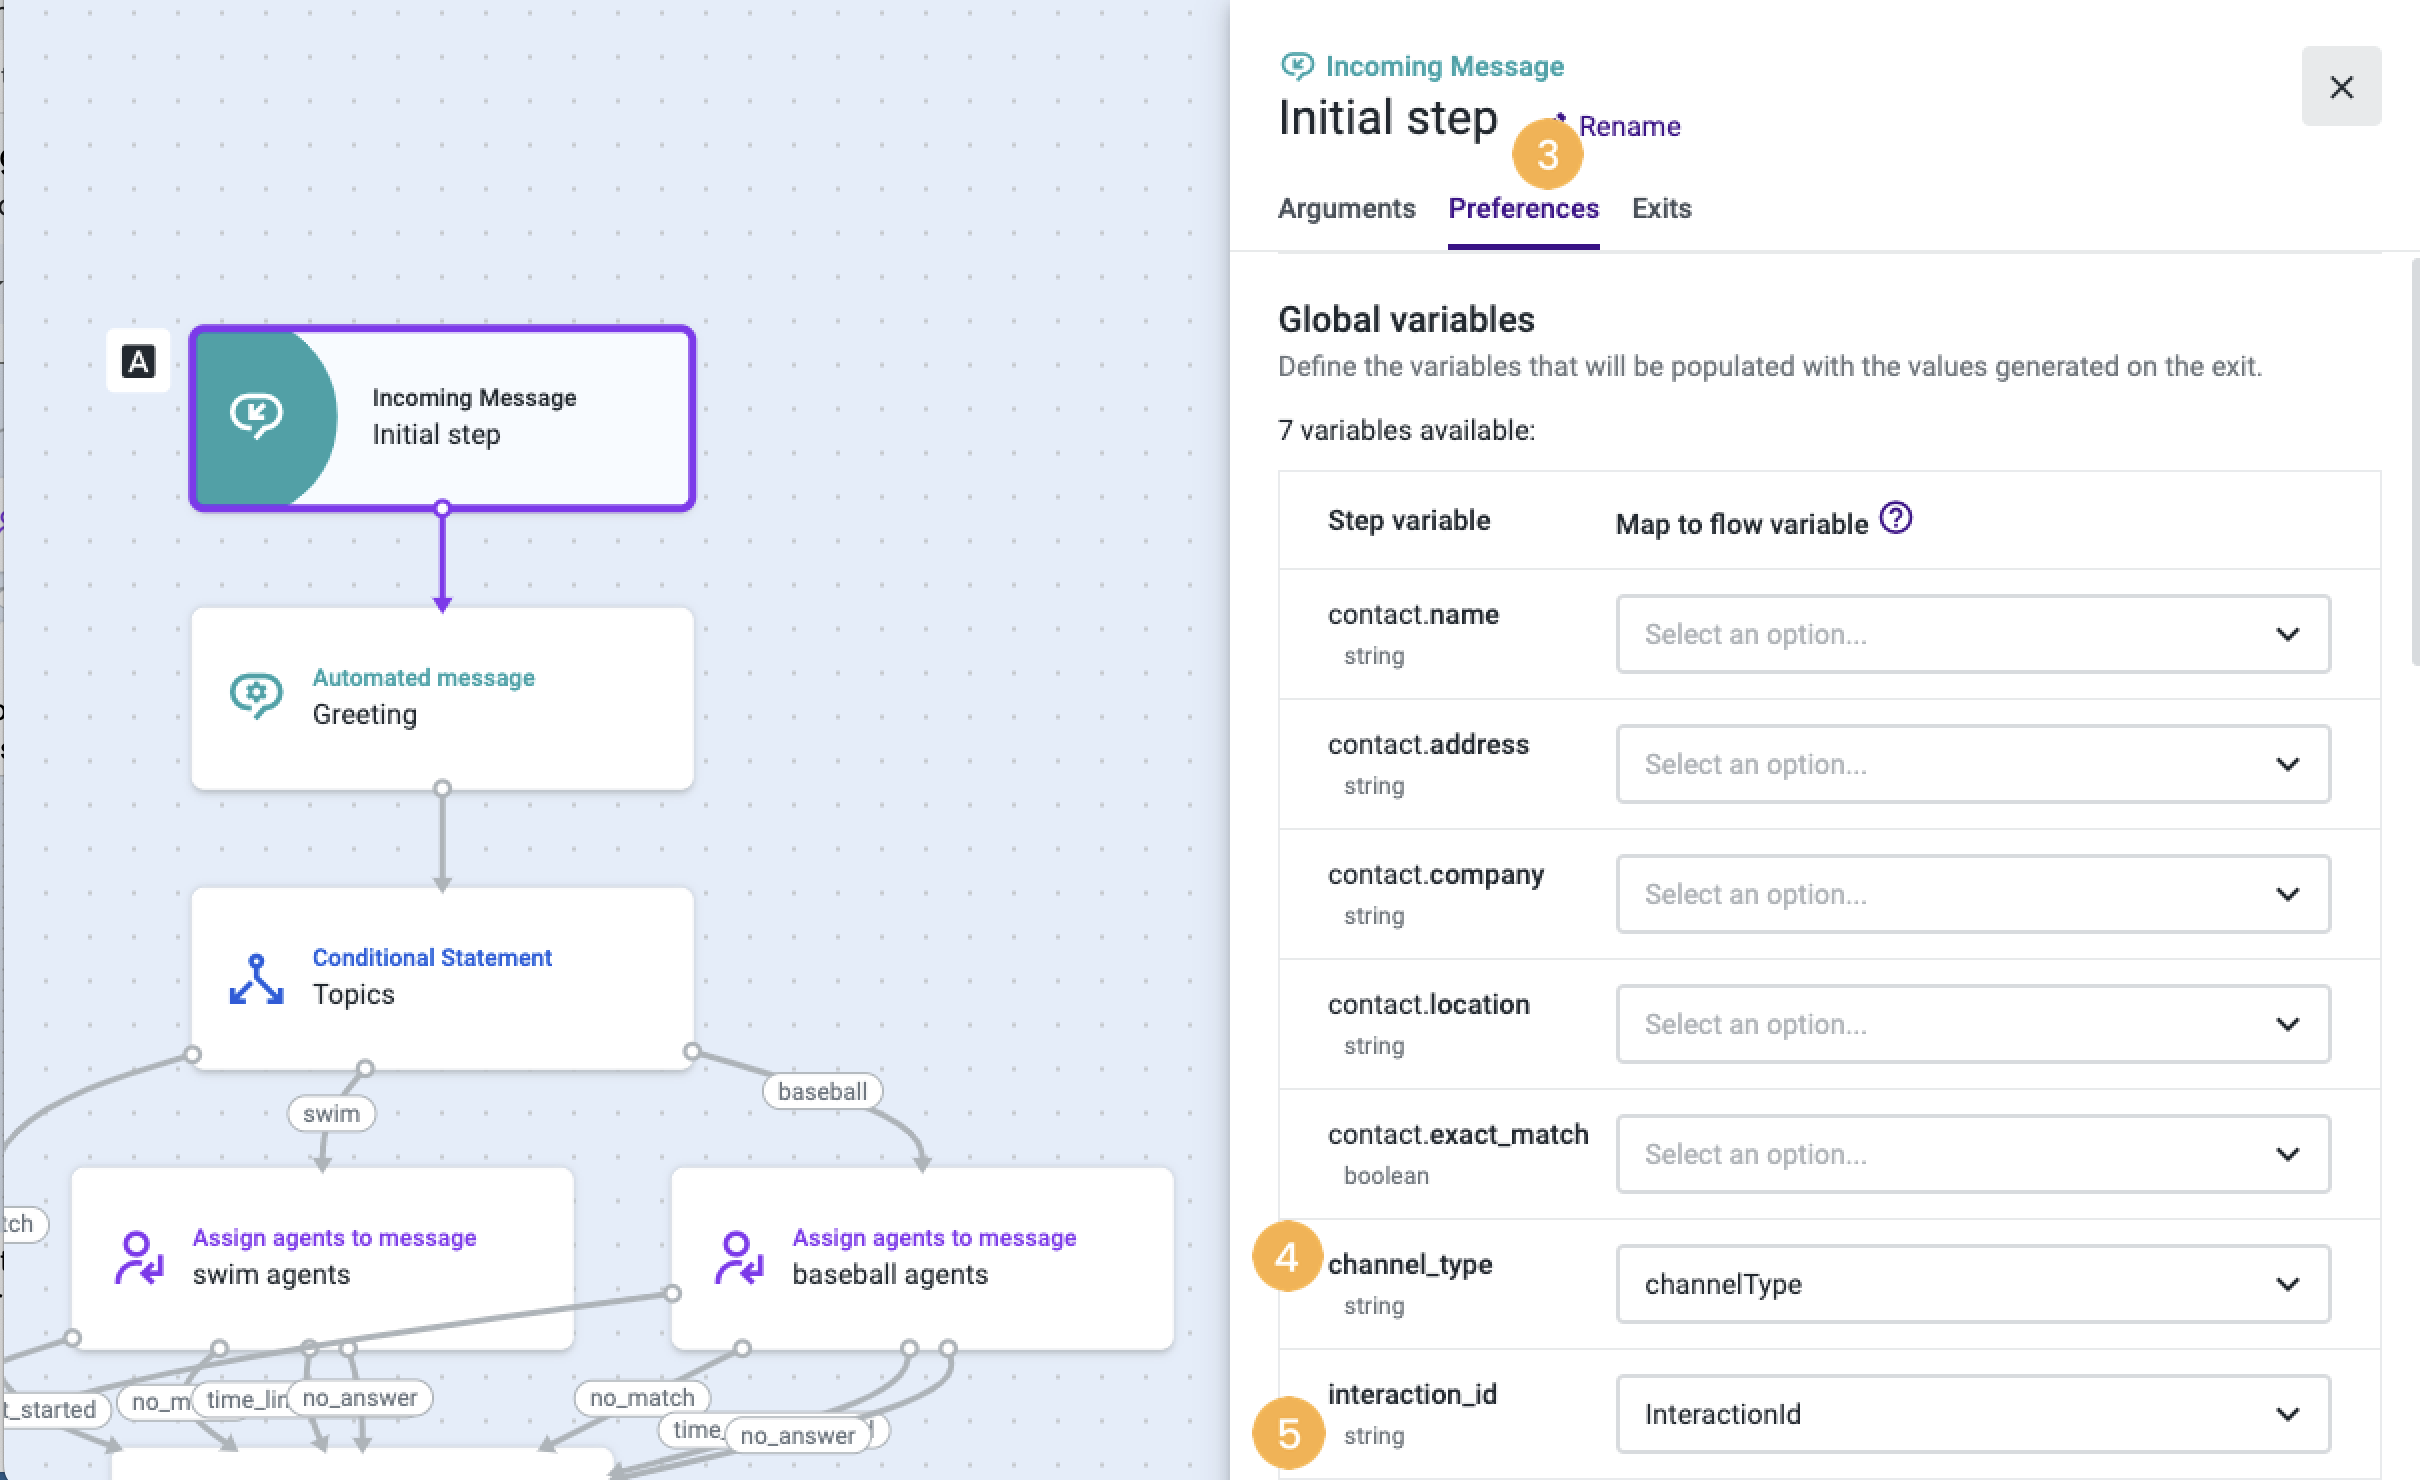
- In the Preferences tab [3], add the “channel_type” [4] or “interaction_id” [5], if necessary.
- Go to the Exits tab [6] to add an automated message component. This component will send a message to the contact person informing the message is being handled.
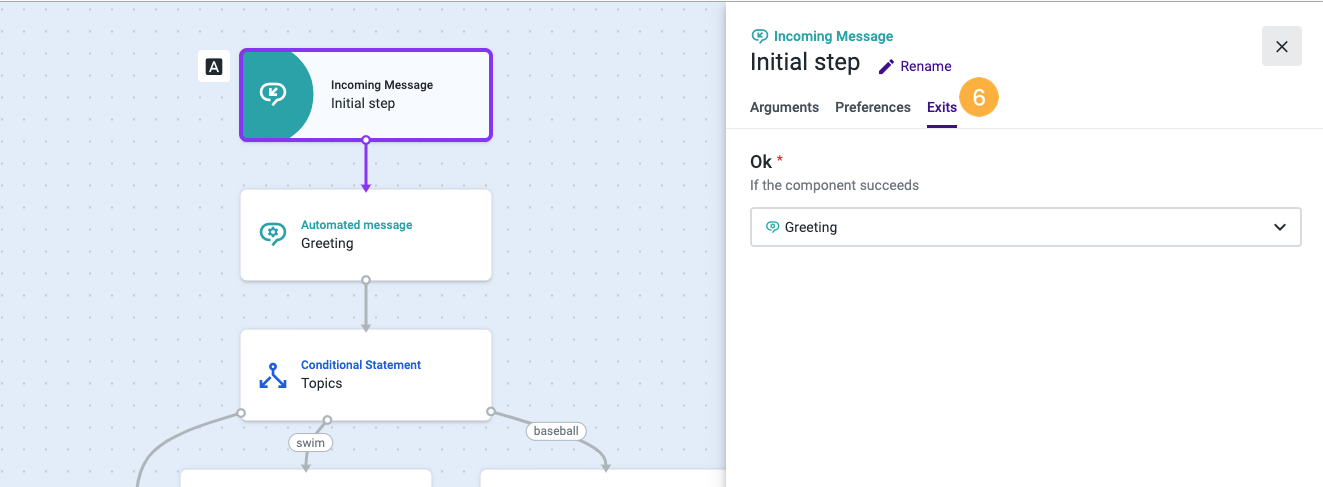
- In the “Automated message” component’s Preference tab [7], use the “Message” text box to enter the content of the automated message you want to send to the contact person.

- In the Exits tab [8], add a “Conditional statement” component to decide how the conversation will be assigned based on the topics the contact person selected in the initial screen.
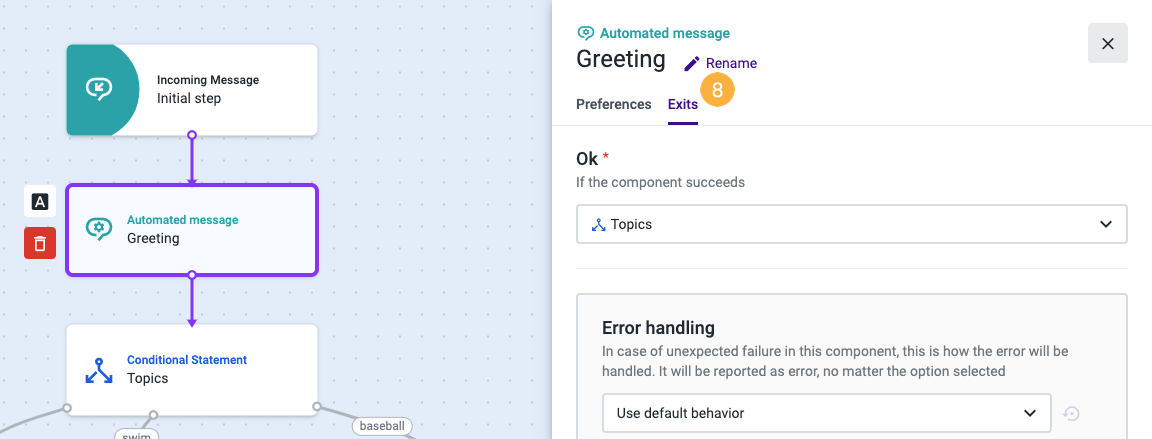
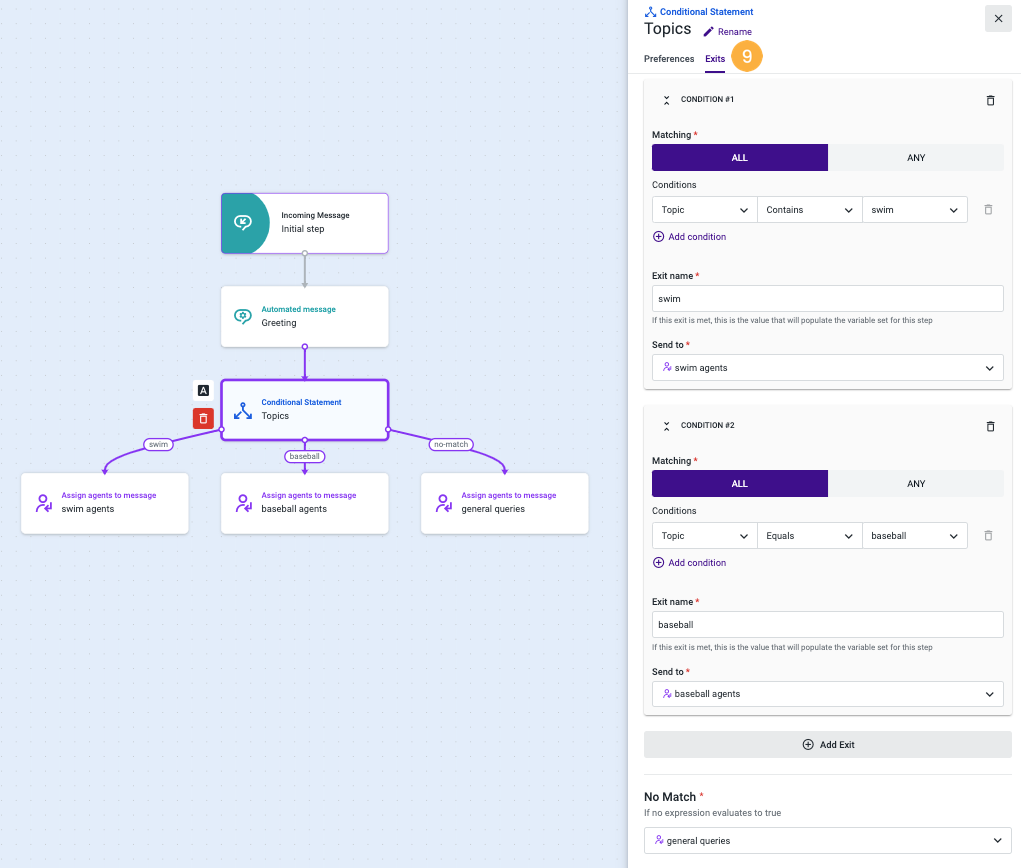
- In the Exits tab [9] of the “Conditional statement” component, set the conditions regarding the topics.
- As shown in the example below, if the topic contains “swim”, assign it to the “swim agents” (“Assign agents to message” component). If the topic contains “baseball”, assign it to “baseball agents”. Otherwise, assign it as “general queries”.
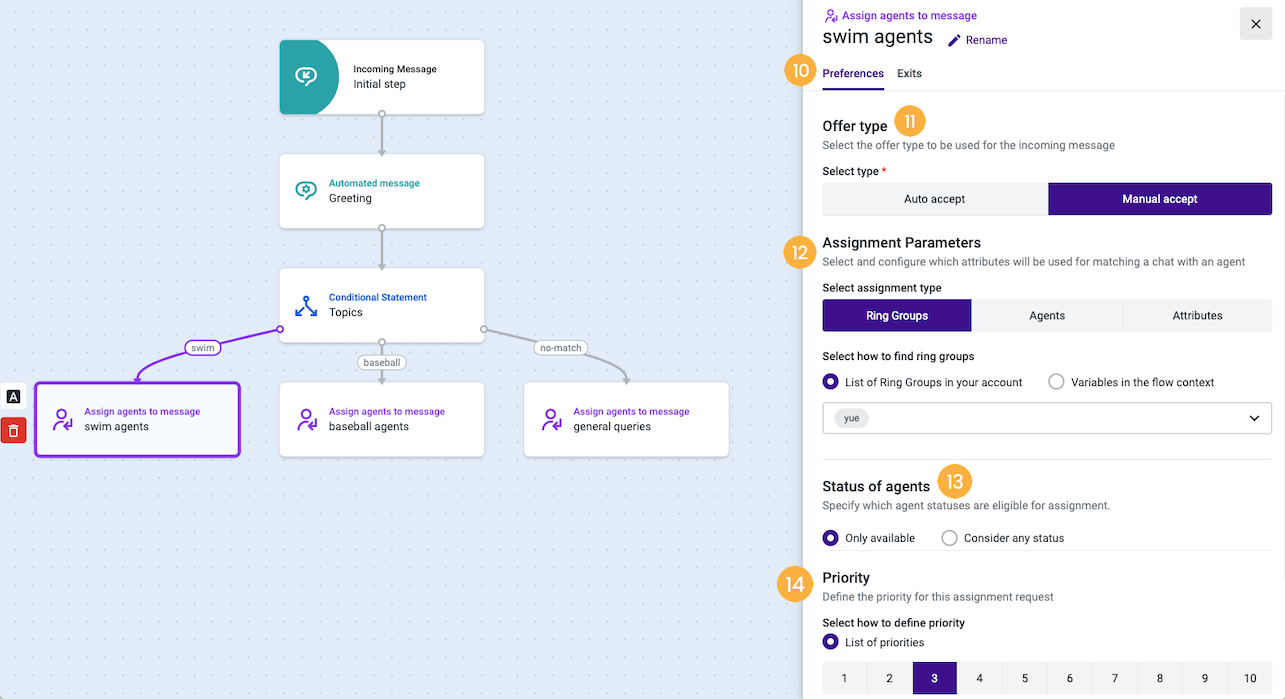
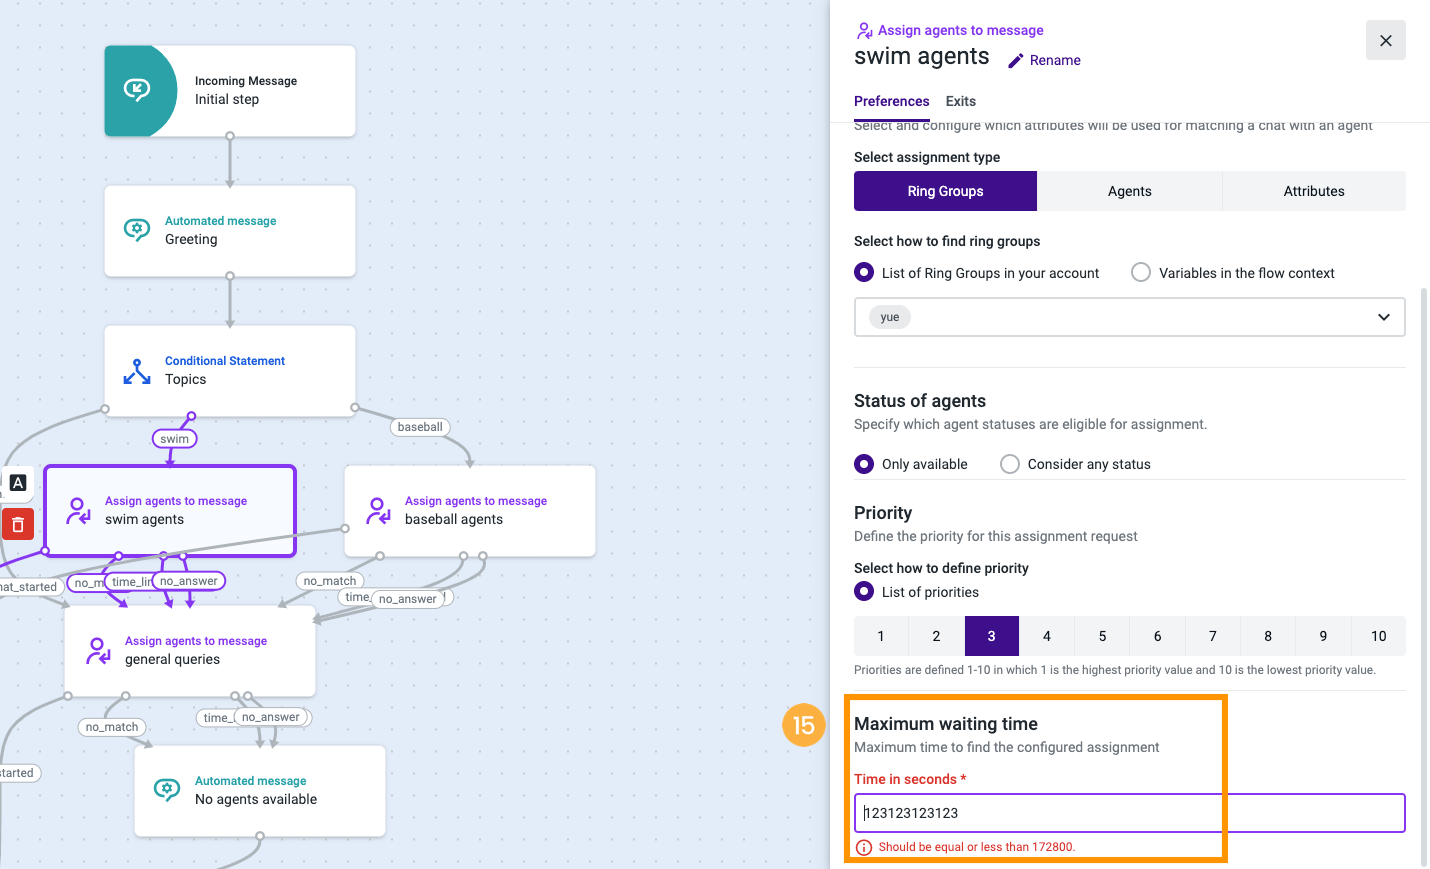
- In the “swim agents” Preferences tab [10] of the “Assign agents to message” component, select the “Offer type”, “Assignment Parameters”, “Status of agents”, “Priority” and the “Maximum waiting time”:
- “Offer type” [11]: When Auto accept is selected, the conversation goes to the agent’s “Assigned to you” tab immediately when the assigned agent is available. When Manual accept is selected, when the conversation is assigned to an agent, the agent will have an offer page showing in the Conversations app. The agent could choose to either accept or reject.
- “Assignment Parameters” [12]: There are three assignment types: Ring Groups, Agents, and Attributes. Admins can select to either assign to ring groups, to agents, or to assign based on the attributes.
- “Status of agents" [13]: Only available or consider any status. If consider any status is selected, all matching agents that are not offline will be the assigning candidates.
- “Priority” [14]: Admins can define the priority level for the assigned conversation. The range is from 1 to 10.
- “Maximum waiting time” [15]: Admins can set the assignment maximum waiting time. Once the maximum waiting time is reached, the assignment will stop and go to the “Maximum waiting time reached” exit.
In the “Exits” tab [16], when there is no match found [17], or the maximum waiting time has been reached [18], or there were no answers [19], it will indicate that at the moment no available “swim agents” can pick up the conversation. Therefore, the “general queries” component was used for these exits (“No match found”, “Maximum waiting time reached” and “No answer”) to assign the second round, to find other available agents to pick up the conversation.
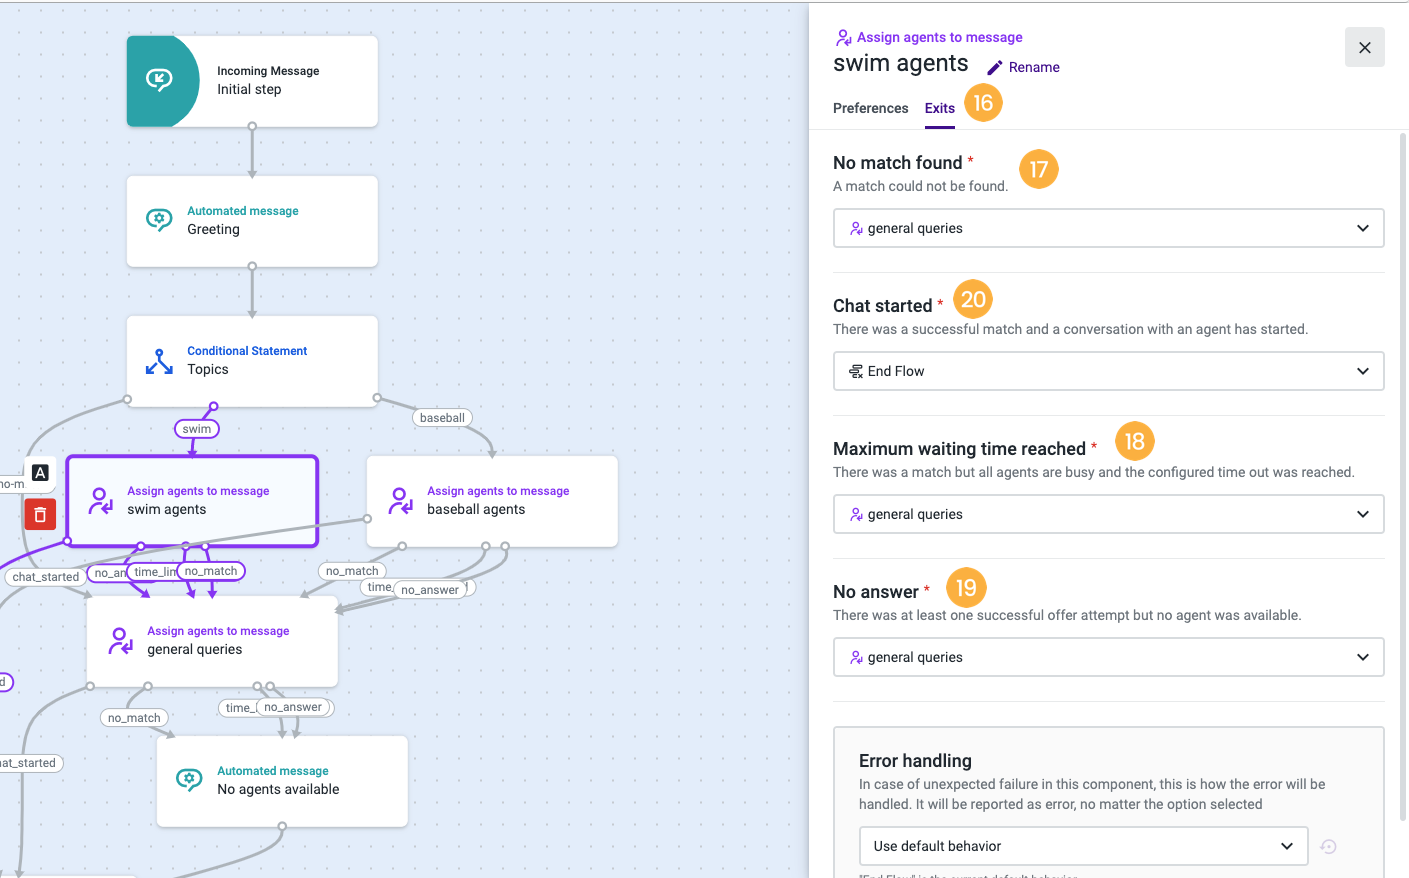
For the “Chat started” exit [20], we added the “End flow” component.
Repeat the process for the “baseball agents” and for the “general queries” (“Assign agents to message”) component.
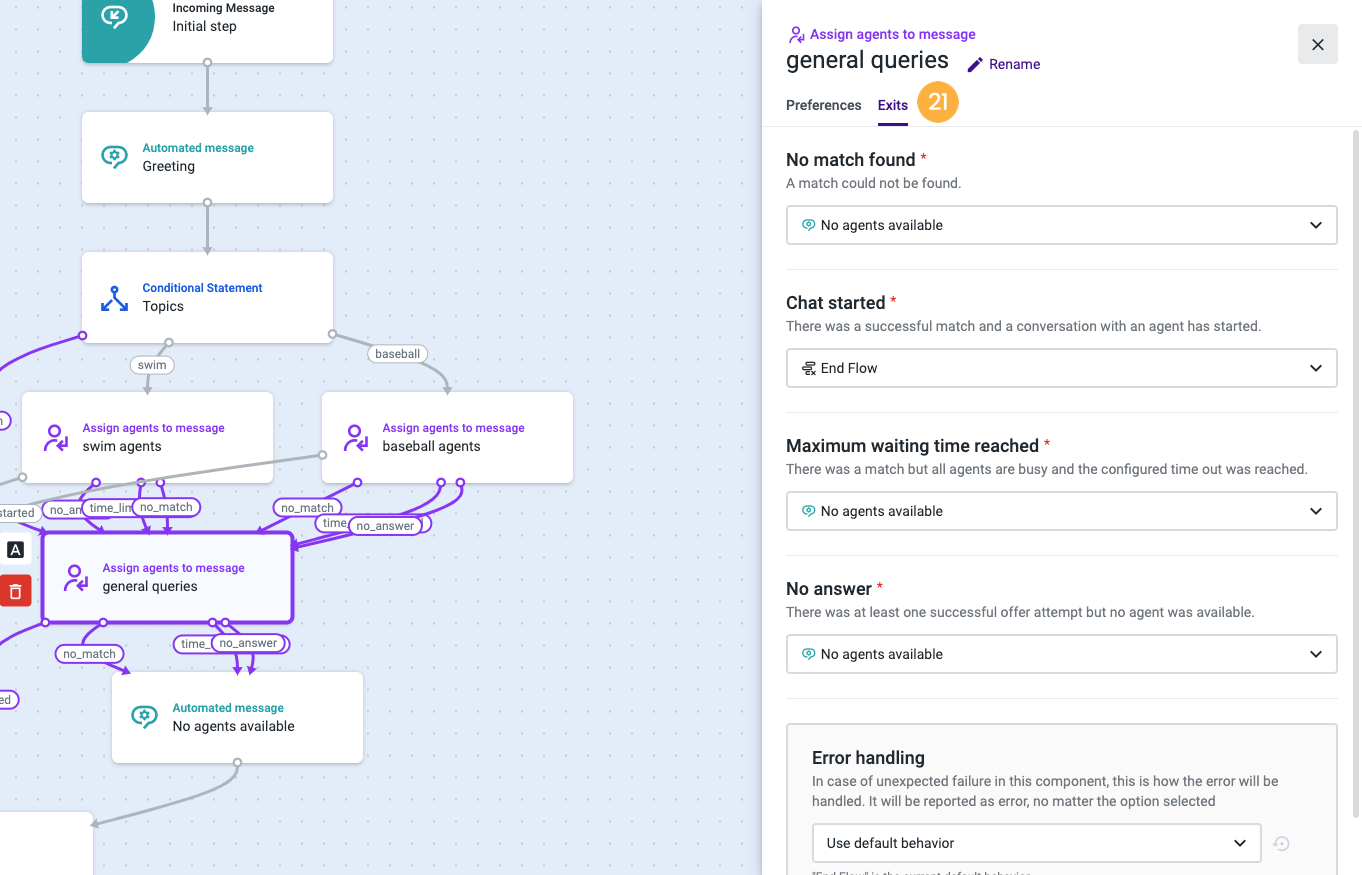
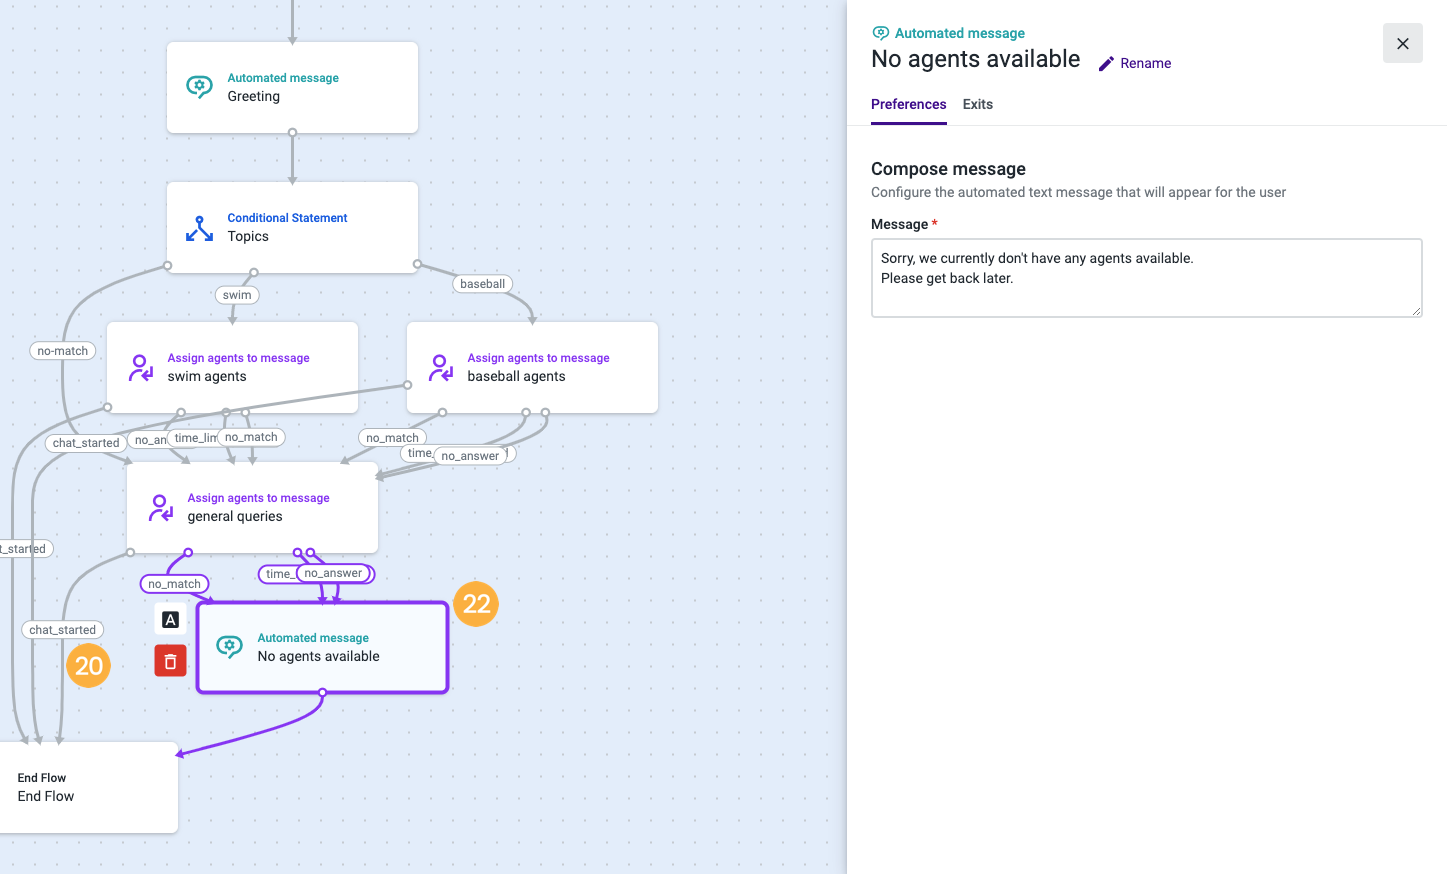
In the Exits tab [21] of the “general queries” component, when the second round assignment failed, an “Automated message” component [22] was added to warn the contact person that no agents are currently available.
Updated 3 months ago