Prompts
“Prompts” is a centralized assistant platform that provides the ability to manage audio prompts independently of the Studio flows so that you can replace, rename and delete existing audio file prompts without having to change multiple voice components in a Studio flow.
This application is installed by default for all Talkdesk accounts that use Talkdesk Studio™.
In this document, you will find information on:
Accessing Prompts
“Prompts” can be accessed within the Talkdesk Studio™ app.

- Click on the Studio app [1].
- Select the Prompts tab [2].
Managing Prompts
On the “Prompts” page, you can:

- See the total number of created prompts [1].
- Search prompts by their names [2].
- Choose how many prompts you can see per page [3].
- Apply one or several “Filters” to narrow down your search results [4].

- To do so, on the side panel, choose the filter(s) you wish to use and select Apply Filters[5].
On the “Prompts” list, you will see the following data:

- “Name” [1] of each prompt created.
- “Description” [2] added while creating a prompt (optional field).
- “Last modified date” [3]: Here, you can see when and who last modified the prompt.
- “Usage” [4]: In case the prompt is being used in any Studio flow, you can select Used in X place(s)[5] to see where. If it is not being used, it appears as “Not in use”.
If you click on the Used in X place(s) option, the “Prompt usage” side panel opens. There, you can see the following data:
Flows

- Prompt name [8].
- Search by the flow name [9].
- The number of flows where it is being used [10].
- The flow name in which it is being used [11].
- The corresponding flow status (“Published” or “Draft”) [12].
- Depending on the flow status, you can click View or Edit to be redirected to the flow [13] in which it is being used.
Queues
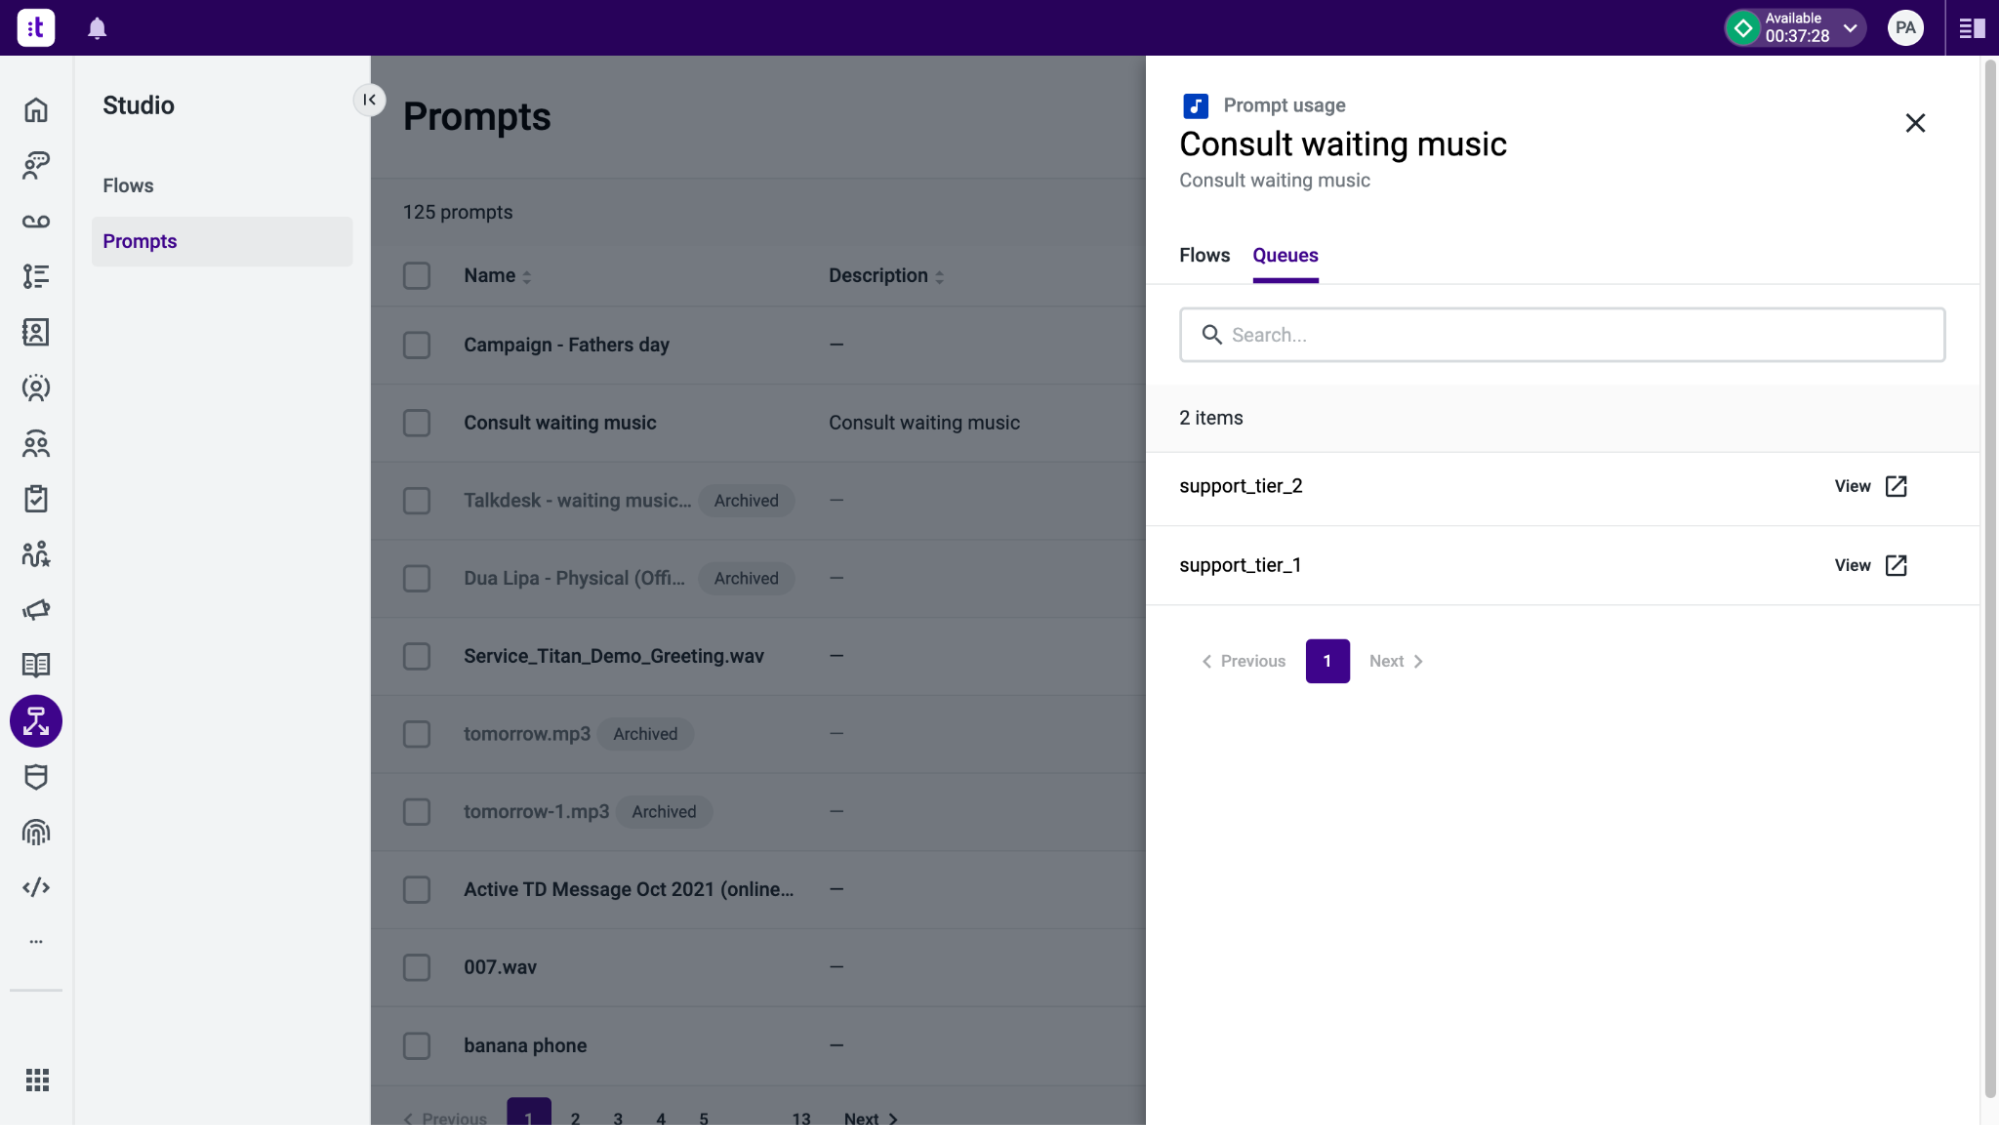
Similar to what happens with “Flows”, in the “Queues” tab of the “Prompt usage” panel, it is possible to search by the queue name where the prompt is being used, the number of queues, and the name of the queues in which it is being used. The admin can also click View to be redirected to the selected queue’s details.

- Play option [14]: Here, you can play the existing audio file. This way, you are able to easily identify which audio file it is.
- Edit option [15]: You can change the name and description here, as well as replace the file and download it. To know more about editing prompts, please check this section below.
- More Options (“...”) button [16]: Select to download and/or delete the prompt. The Delete prompt option is only available if it is “Not in use”. To know more about deleting prompts, please check this section below.

- Alternatively, you can also download the prompt in bulk by clicking the checkbox(es) next to each prompt “Name” [17]. Then, click Download selected[18].
Creating Prompts
You can create new prompts by uploading audio files that can be referenced in a Studio flow through a “Play audio” widget in components such as “Play Audio”, “Assignment and Dial”, “Input IVR”, and “Standard IVR”, among others.
Additionally, prompts can also be used in Queues, under the ”Waiting music to play” transfer preference.
NoteTo ensure optimal performance and results, it is recommended to convert large audio files to an 8kHz WAV format with a single audio channel (mono), encoded using the u-Law encoding. This will allow the files to be used without the need for instant conversion by telephony systems.
To learn how to create a new “Prompt”, please follow the steps below:

- Select Create prompt[1].

- You can either drag and drop the file or choose the audio file from your device by clicking Choose an audio file to upload[2].
NoteThe audio file must be in MP3 or WAV format, and can only have a maximum size of 10 MB.

- Insert a “Name”, and optionally, a “Description”. If you wish to replace the previously selected audio file, select Change file[3].
- Click Create prompt[4].

Once the prompt is created, it is available to be used when setting up the audio component (e.g. “Play audio”, “Input IVR”, among other components) in Studio Preferences tab > Audio file upload > Search the prompt created in the “Audio file” field.
Prompts are also able to be used to customize the waiting music to be played on consult transfers to a queue, in Queues Preferences tab > Waiting music to play > Use prompts > Search the prompt created in the “Prompt” field.
Editing Prompts
You can edit the name and description on an existing prompt. To do so, please follow these steps:

- Select the pencil icon [1].

- On the side panel, you can change the file “Name” or “Description”. Here, you can also replace the file by clicking the Replace file option [2]. If you wish to download it, select the 3 dots icon.
NoteWhen you replace the file on the prompt, all Studio components and queues using that prompt will play the new audio on runtime.
- Once you’re finished, click Save[3].
Deleting Prompts

You can delete a prompt that is no longer in use (prompts identified as “Not in use” in the “Usage” column). To do this, select the More Options (“...”) button [1] followed by Delete prompt[2].

In case you wish to remove multiple prompts that are not being used, click the checkbox(es) next to each prompt’s “Name” [3]. Then, click Delete selected[4].
NoteYou can only delete prompts that are no longer in use.
Updated 8 months ago