Prioritizing VIP Calls in Salesforce
If you use Salesforce and some of your customers are categorized as VIP in that CRM, Studio enables you to prioritize their calls through the use of Variables. This way, your agents can handle your most important customers first.
Please follow these instructions to prioritize calls according to the VIP status of a customer in Salesforce:
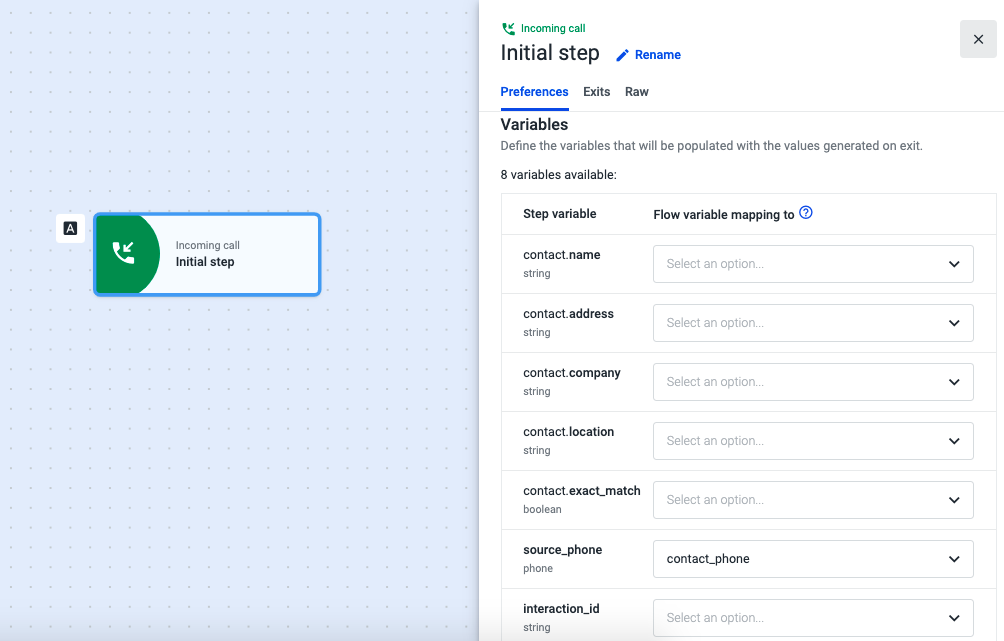
- Open the Incoming Call component and select the Preferences tab.
- Click on the drop-down next to "source_phone" and then on Create variable.
- Give a name to the variable. It will store the phone number that called your contact center and that will be used to check on Salesforce if the owner of the phone number is a VIP or not. We’ve named it “contact_phone”.
- Select the Exits tab and add the Salesforce data dip component.
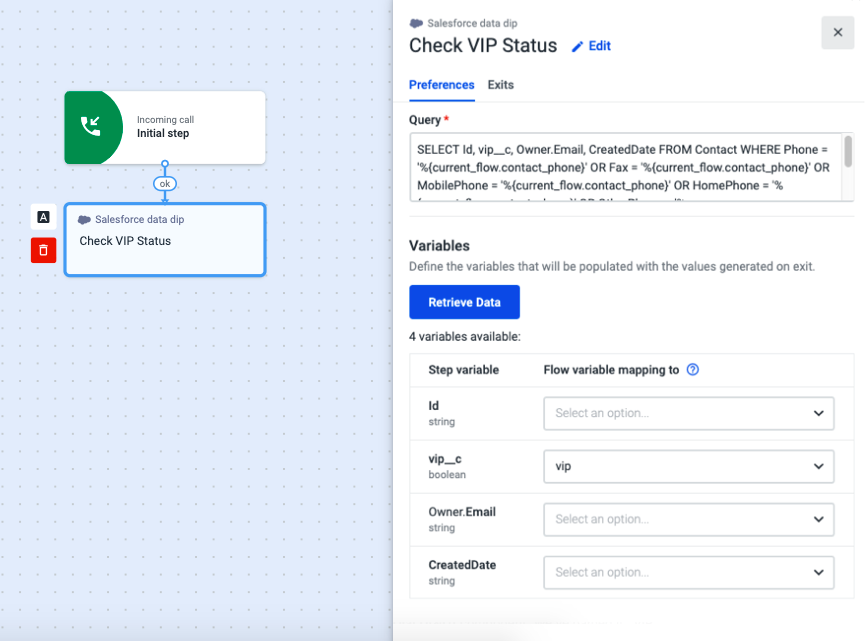
- Open the Salesforce data dip component and paste the following query:
SELECT Id, vip__c, Owner.Email, CreatedDate FROM Contact WHERE Phone = '%{current_flow.contact_phone}' OR Fax = '%{current_flow.contact_phone}' OR MobilePhone = '%{current_flow.contact_phone}' OR HomePhone = '%{current_flow.contact_phone}' OR OtherPhone = '%{current_flow.contact_phone}' OR AssistantPhone = '%{current_flow.contact_phone}' ORDER BY CreatedDate DESC LIMIT 1
NoteIf you have given a different name to your variable (step 3), replace all “contact_phone” instances with the name of your variable.
- Click on Retrieve Data.
- Click on the vip__c drop-down and add a new variable with the name “VIP”. This variable will store data if there is a match between the VIP status and the phone number.
- Open the Exits tab and add the same Conditional statement component to all three Exits.
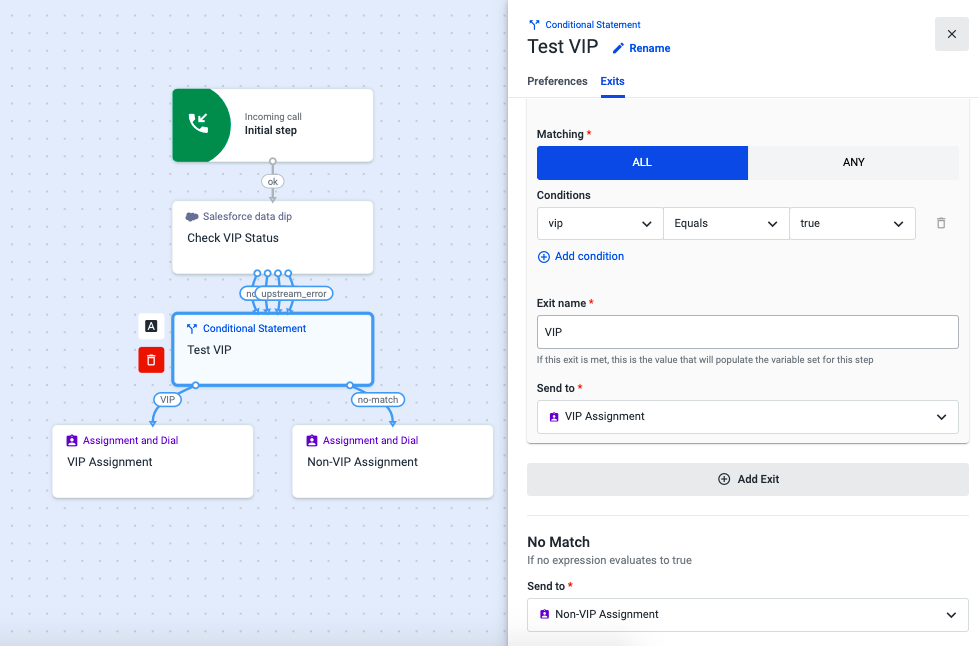
- Open the Conditional statement component, and select the Exits tab.
- In the first exit, use one of the buttons All or Any and the drop-downs to create the condition below. Either one of these buttons can be selected, since we're only creating one condition.
vip Equals true- Name the Exit “VIP” and, under “Send to”, add an Assignment and dial (A&D) component. We’ve named it “VIP Assignment” because VIP customers will be sent there.
- Under “No Match”, add a new A&D component. Non-VIP customers will be directed there, so we’ve named it “Non-VIP Assignment”.
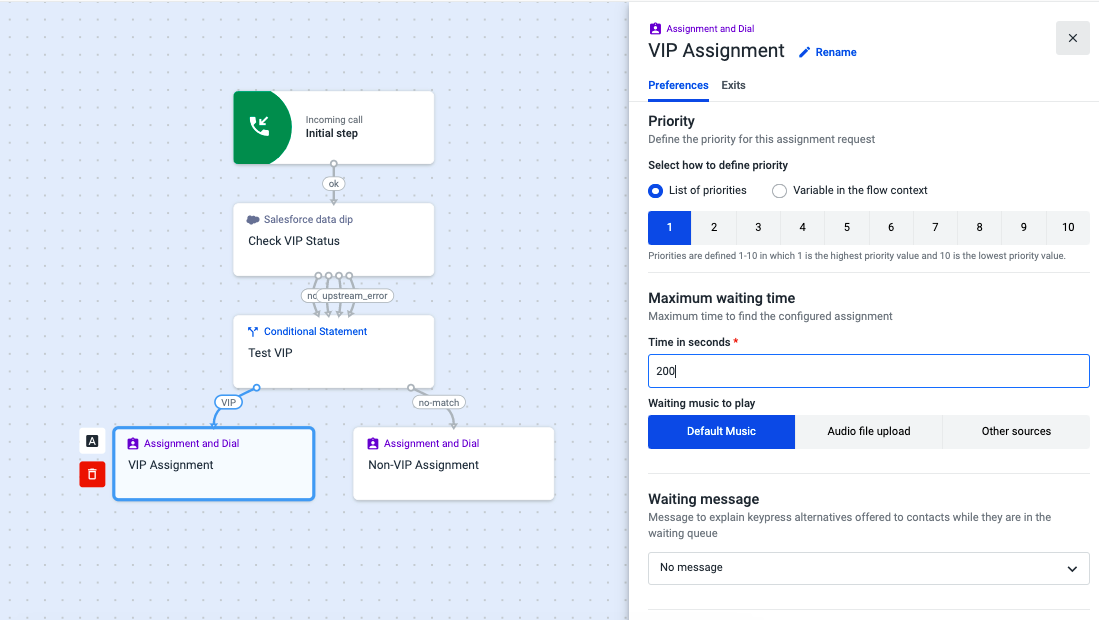
- Open "VIP Assignment" (A&D component) and select the Preferences tab.
- Scroll down to the “Priority” section, and choose “List of Priorities”.
- Since this is an A&D for VIP customers, select 1 for top priority.
- Fill out all the remaining fields in both tabs.
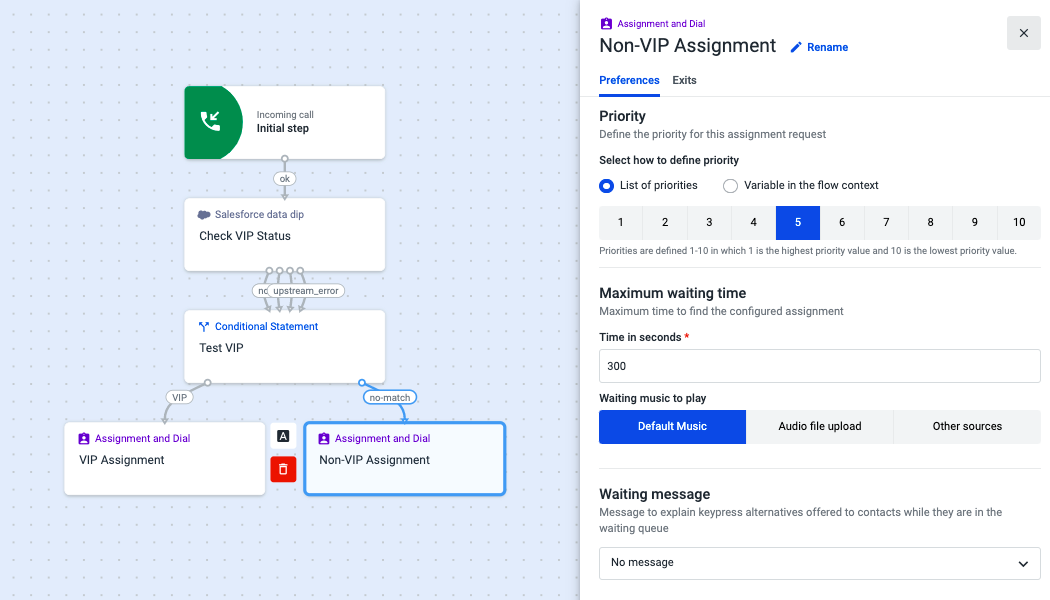
- Open the “Non-VIP Assignment”, scroll down to the “Priority” section, and choose “List of Priorities”.
- In the “Priority” section, select any number except 1 so that this A&D does not have the same priority as the A&D for VIP customers.
- Fill out all the remaining fields in both tabs and remember to save your flow when you are finished.
From now on, if calls coming through the two A&D components you configured, end up in the same queue (directed to the same agents or ring groups ), the “VIP Assignment” calls will be handled first.
Updated 3 months ago