Setting up IVR Menu Options
Please follow the instructions below to learn how to set up the Exits of a Standard IVR component.
Custom Exits
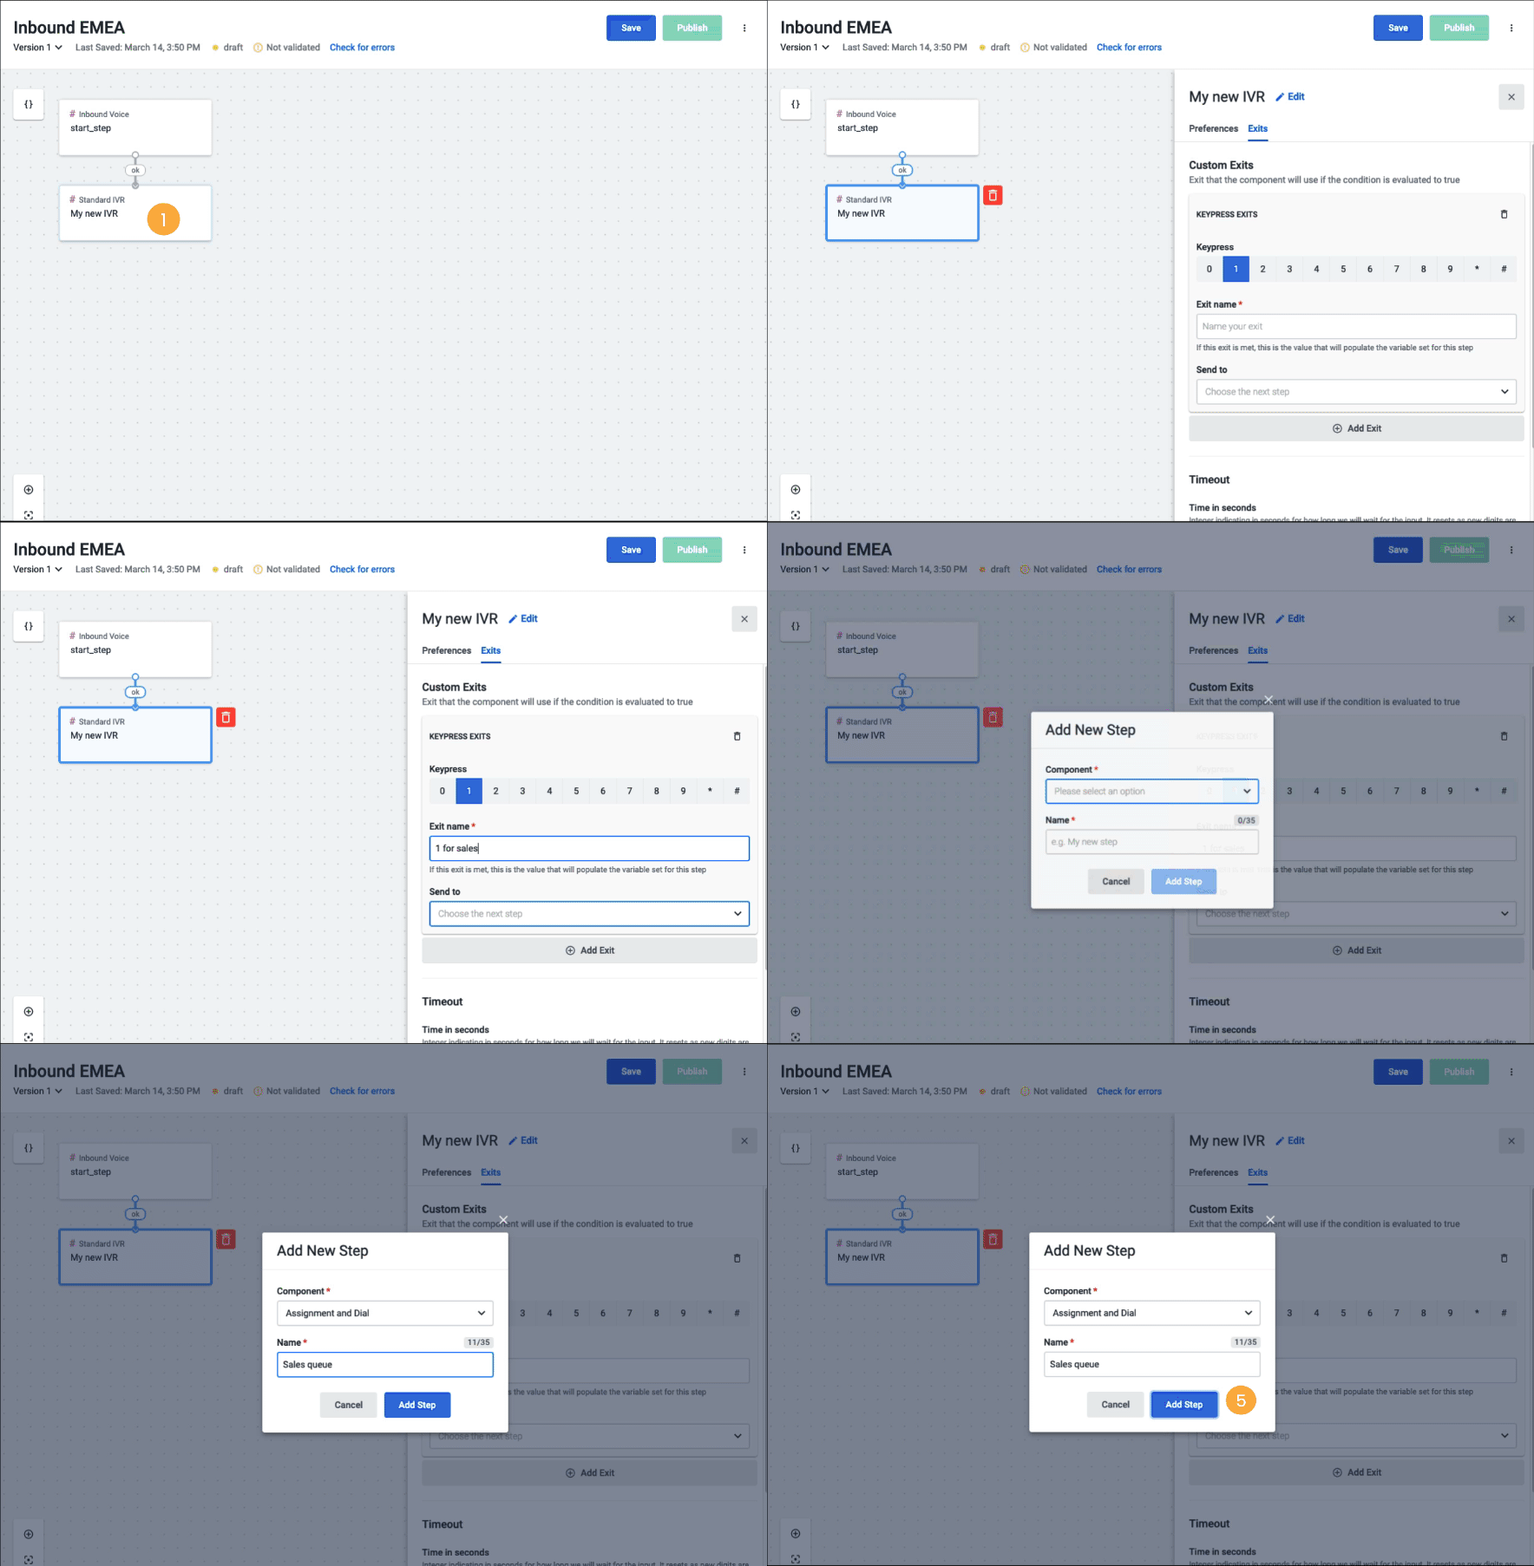
- Click the My new IVR component [1] and select the Exits tab [2].
- In Keypress exits[3], select "1". IVR option 1 is going to send the call to our sales team, so we’ll name our Exit, "1 for sales".
- Hit Send to[4] and select Add new step.
- On the Component drop-down menu, select Assignment and dial, so we can select where calls will be routed when customers press 1.
- Type in a name for this step. We’ve called ours: "Sales queue".
- Click on Add Step[5].

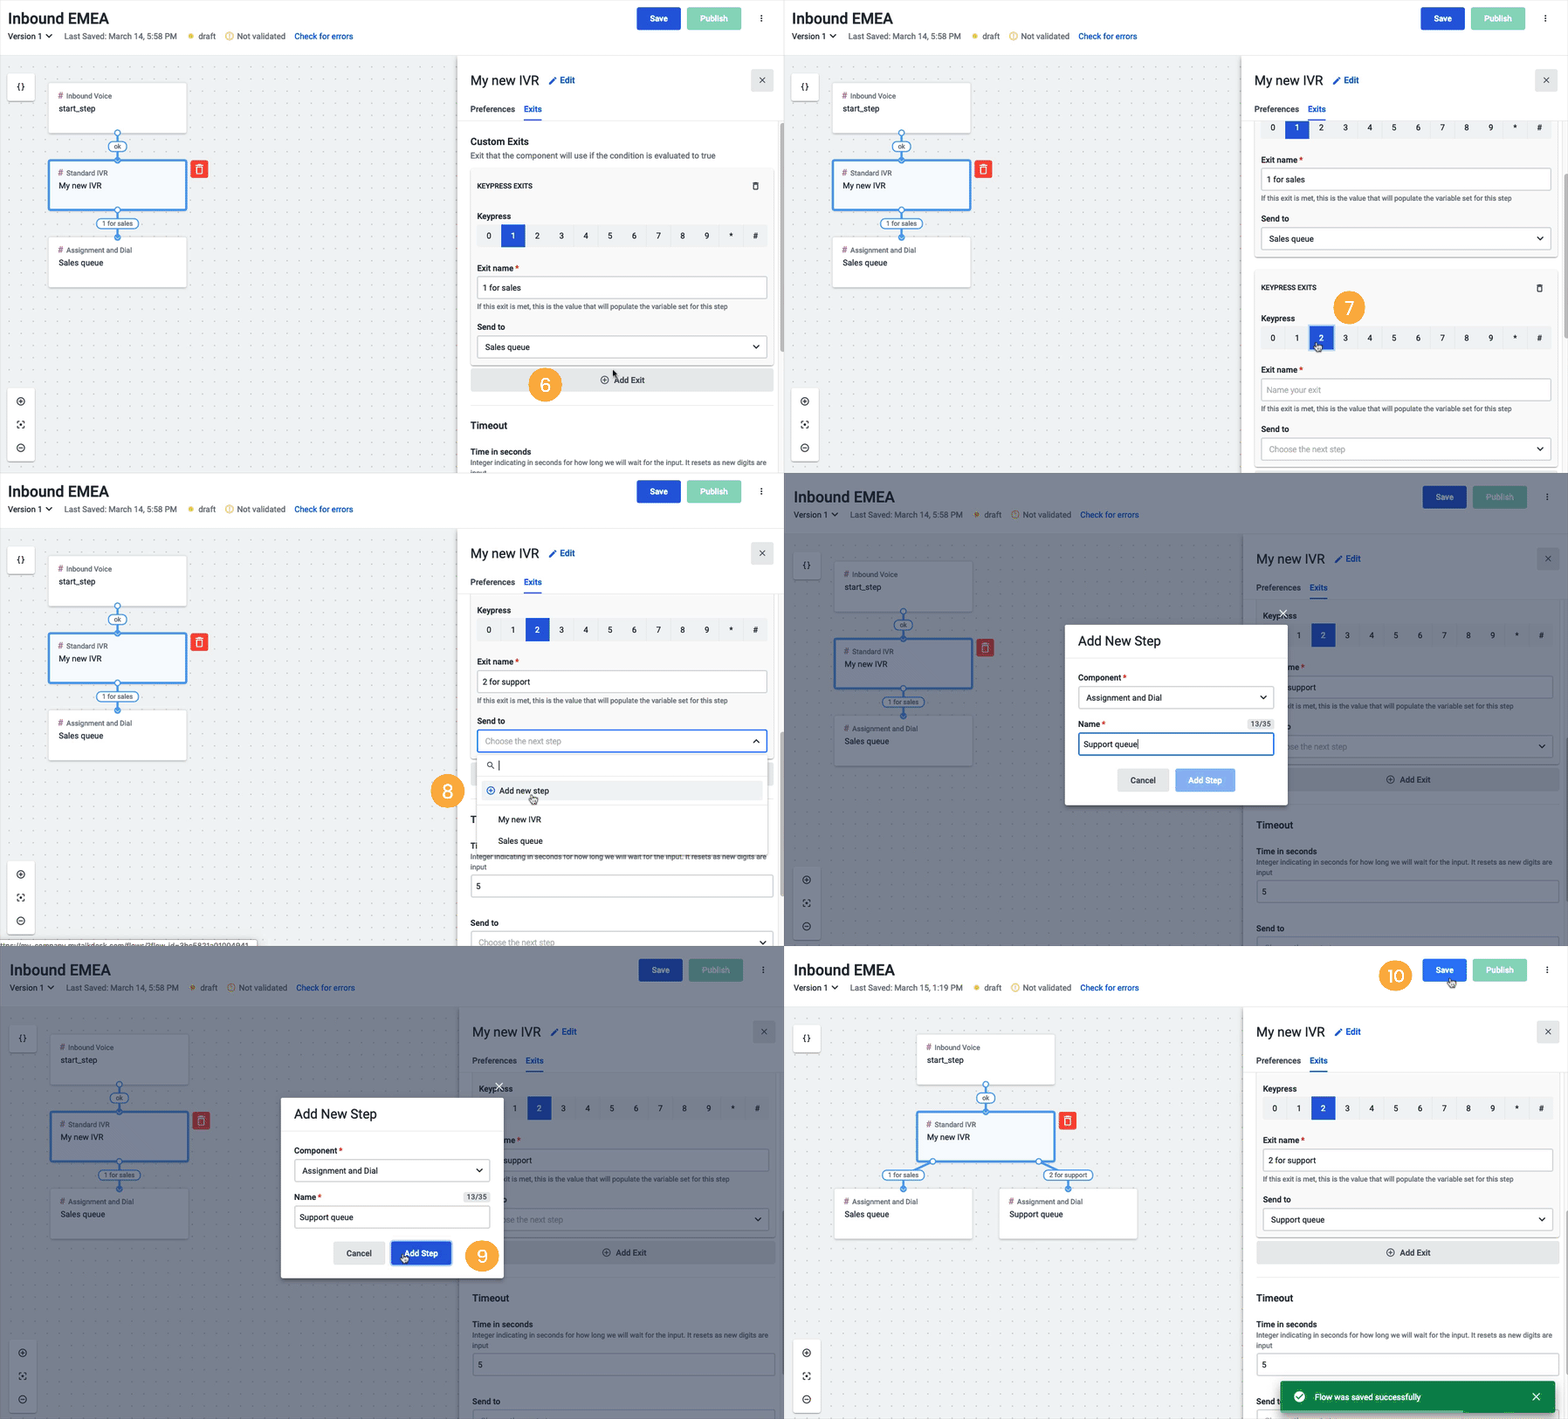
- Hit Add Exit[6] to add our second IVR Keypress option.
- In Keypress exits[7], select "2" to send the call to our support team and type in a name for this Exit (e.g. "2 for support").
- Click on the Send to drop-down and select Add new step[8].
- On the "Component" drop-down menu, select Assignment and dial again so we can define where option 2 should route our callers. We’ve named this step, "Support queue".
- Hit Add Step[9] and Save[10] your changes.
NoteYou may notice that some errors appear each time you save the flow. This is normal and will continue until all steps are complete and the flow is ready to be published.

Timeout
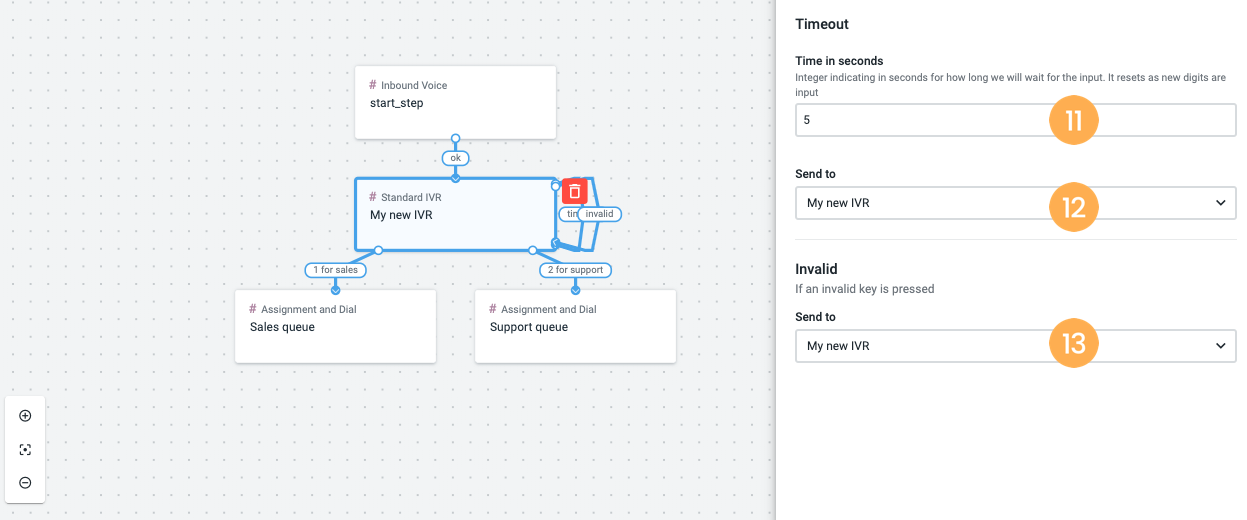
- In the Timeout section, under "Time in seconds", add the number of seconds the system will wait for the caller to select an option [11] before redirecting the call to another component (or the same if applicable) [12].
- Select where to send the call if the caller presses an invalid key [13].

Updated 3 months ago