Routing a Call leveraging Salesforce Unified Routing with T4SCV
If you have the Talkdesk for Service Cloud Voice product, you can leverage Salesforce Unified Routing to route a Talkdesk voice call by triggering a flow in Salesforce.
Please follow these instructions to learn how:
- Add the Trigger Salesforce Unified Routing component to your flow. This component should be added immediately before the Assignment & Dial component.
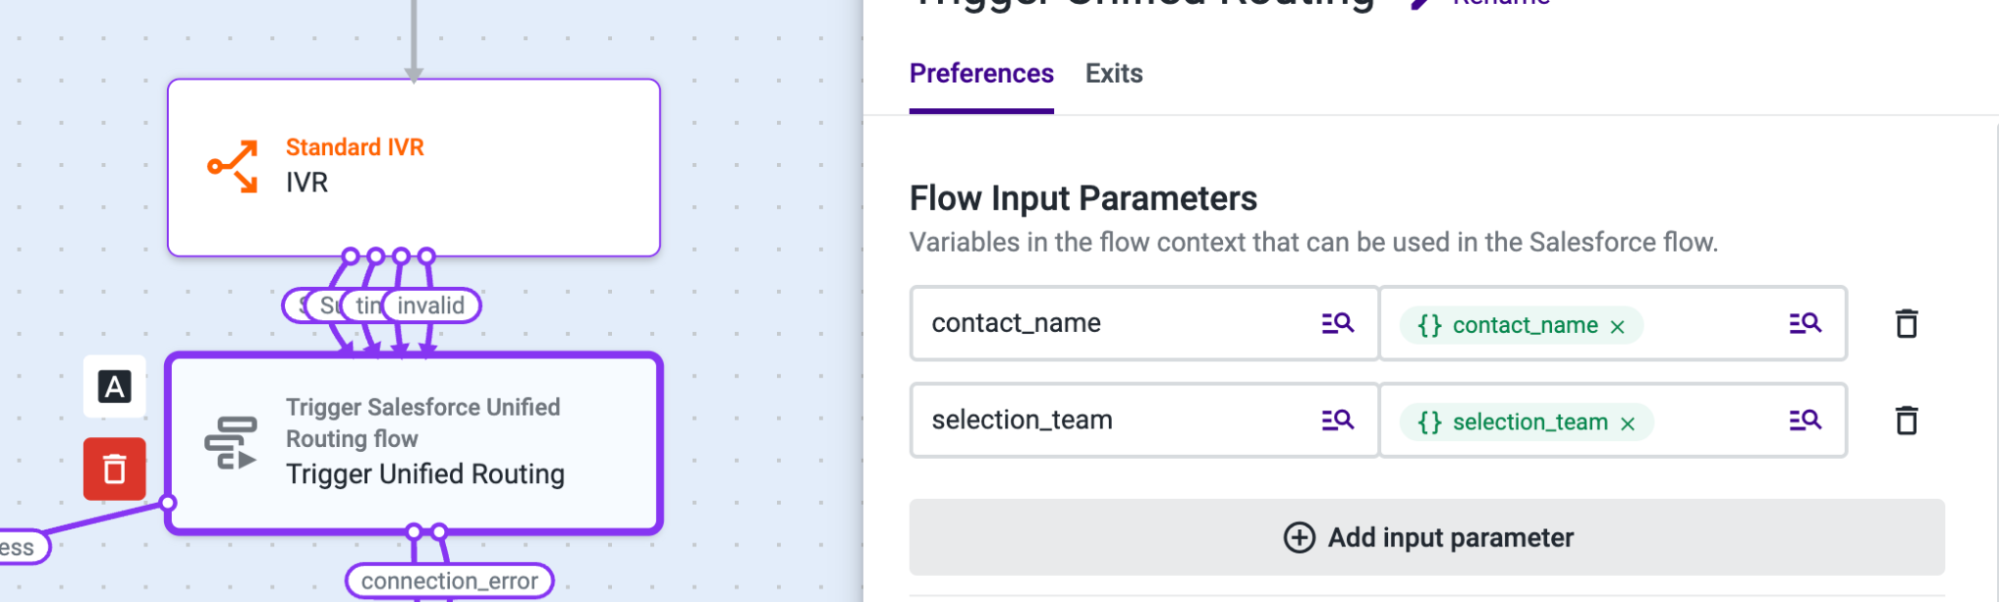
- Open the Trigger Salesforce Unified Routing component, and select the Preferences tab.
- In the Flow Input Parameters section, add the context variables you want to send to Salesforce. You can skip this step if you don’t have any value you want to send to Salesforce.
- Under Parameter Name, add the salesforce variable name, previously configured on the Salesforce Omni-Channel Flow.
- Under Value, add the context variable from the studio flow. In this case, we are sending the Contact Name and an IVR selection variable. To learn more about variables check this article.

Variables Section:
- Click on the Agent dropdown and add a new variable with the name “agent_email”. This variable will store the agent email provided by Salesforce, to whom we should connect the call audio stream.
- Click on the Queue dropdown and add a new variable with the name “fallback_queue”. This variable will store the fallback queue name provided by Salesforce.
Exits Tab
-
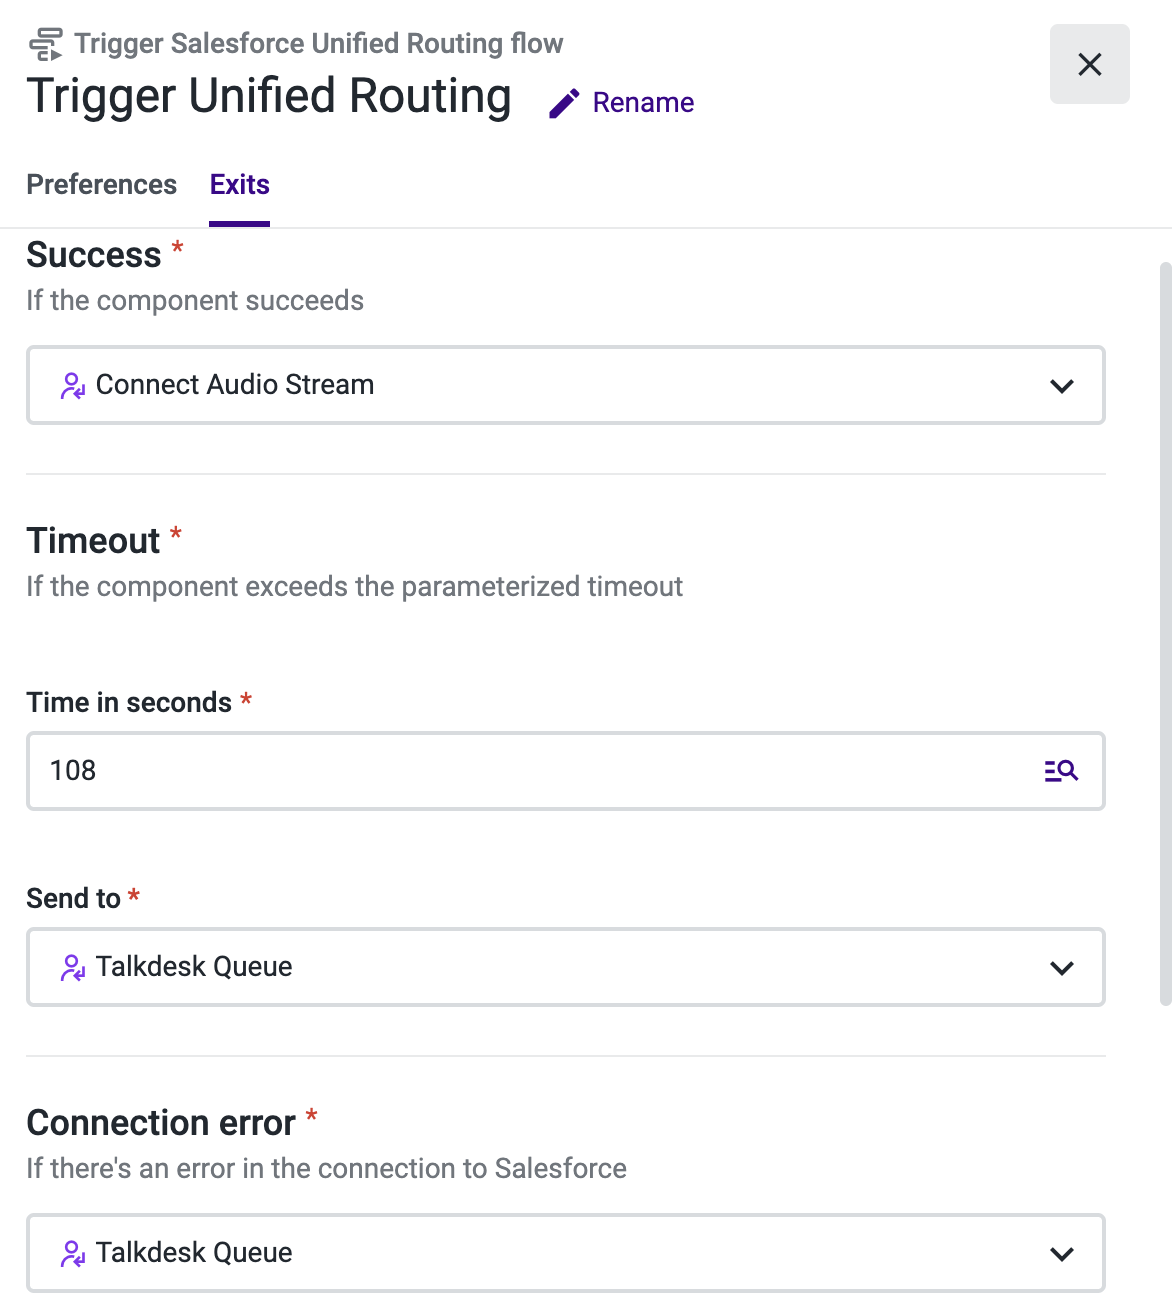
Select the Exits tab.
-
Add an Assignment and Dial component under the “Success” section and name it “Connect Audio Stream”.
-
Under “Timeout” select 10800 seconds, this is the maximum time allowed.
-
Under “Timeout” and “Connection error”, add another Assignment and Dial component and name it “Talkdesk Queue”. This is an optional step that will allow the call to be routed through Talkdesk in the event of an error getting the information from Salesforce.
-
Open the “Connect Audio Stream” Assignment and Dial component.
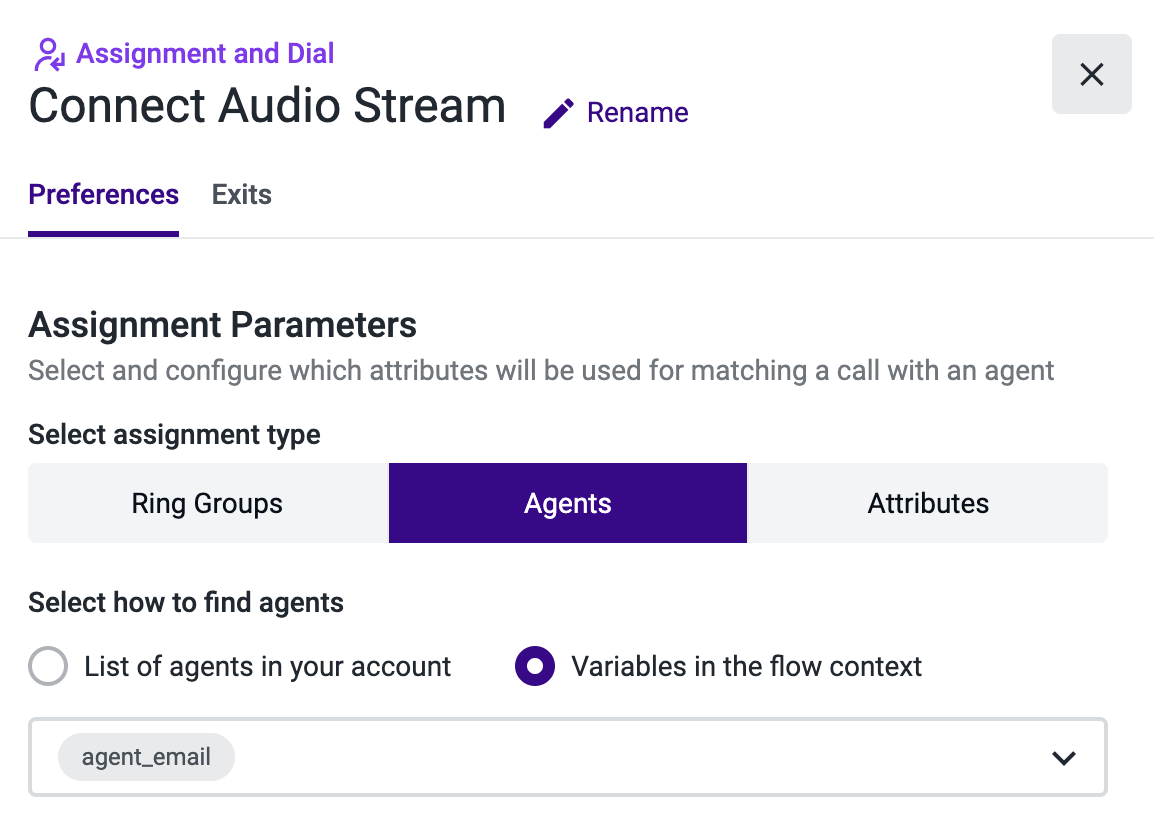
- Select Agents as the assignment type.
- Under “Select how to find agents”, choose Variables in the flow context and select "agent_email" from the list.
The remaining configuration of the component is irrelevant, since we will only use it to connect the audio stream to the agent who accepted the call in Salesforce. However, mandatory fields must still be filled.
-
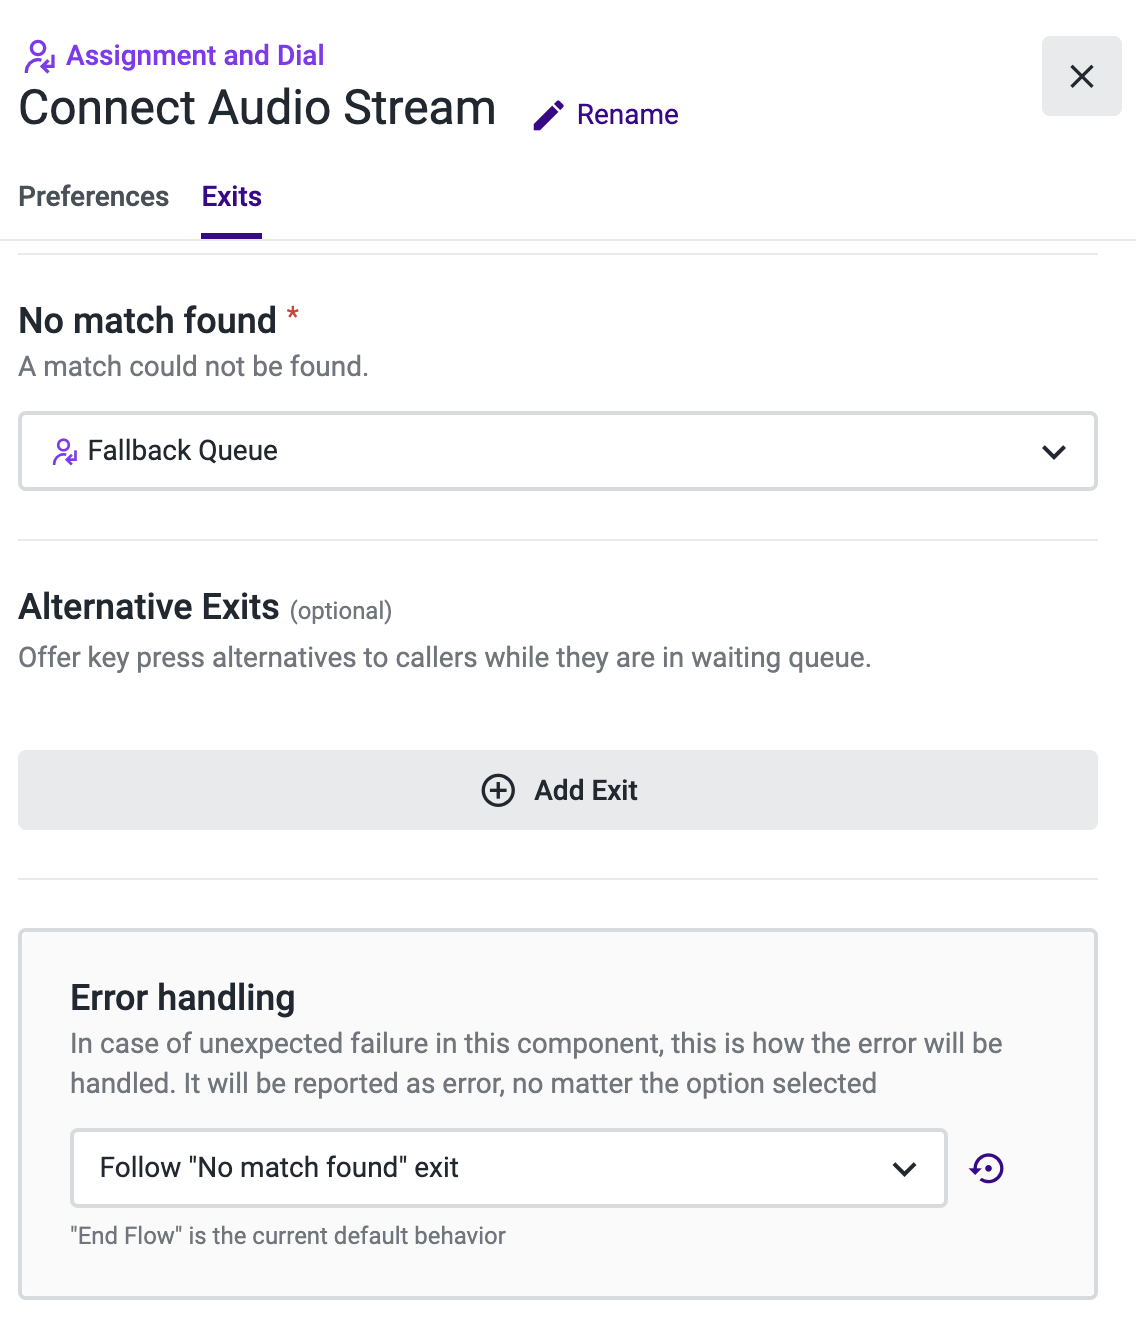
Select the Exits tab.
-
Under “Error handling” you can send the call to another “Assignment and Dial” component for the Fallback queue shared by Salesforce.
-
Open the new “Fallback queue” component.

-
Select Ring Groups as the assignment type.
-
Under “Select how to find agents”, choose Variables in the flow context and select "fallback_queue" from the list.
-
Complete the remaining configuration of this component.
-
Add any remaining components that make sense to your business case.
-
Save and publish your flow.

OutcomeFrom now on, when this flow runs it triggers a Salesforce flow based on the destination number and receives the agent who accepted the call and a fallback queue name from Salesforce to proceed with the audio stream establishment.
Updated 6 months ago